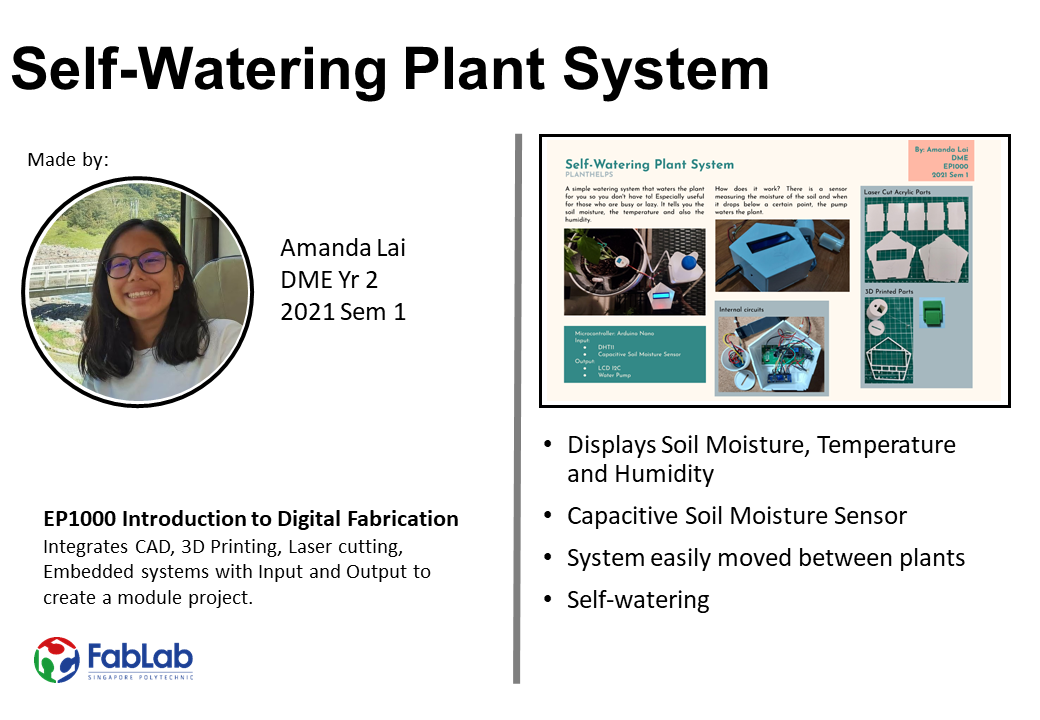
For my Final Project for this module, I decided to make a self-watering plant system. I came up with this idea after seeing a youtube video where a guy made a similar irrigation system using Arduino UNO. The videos I saw can be found here, they helped me understand the basic concept of how to create such a system.
Ideation
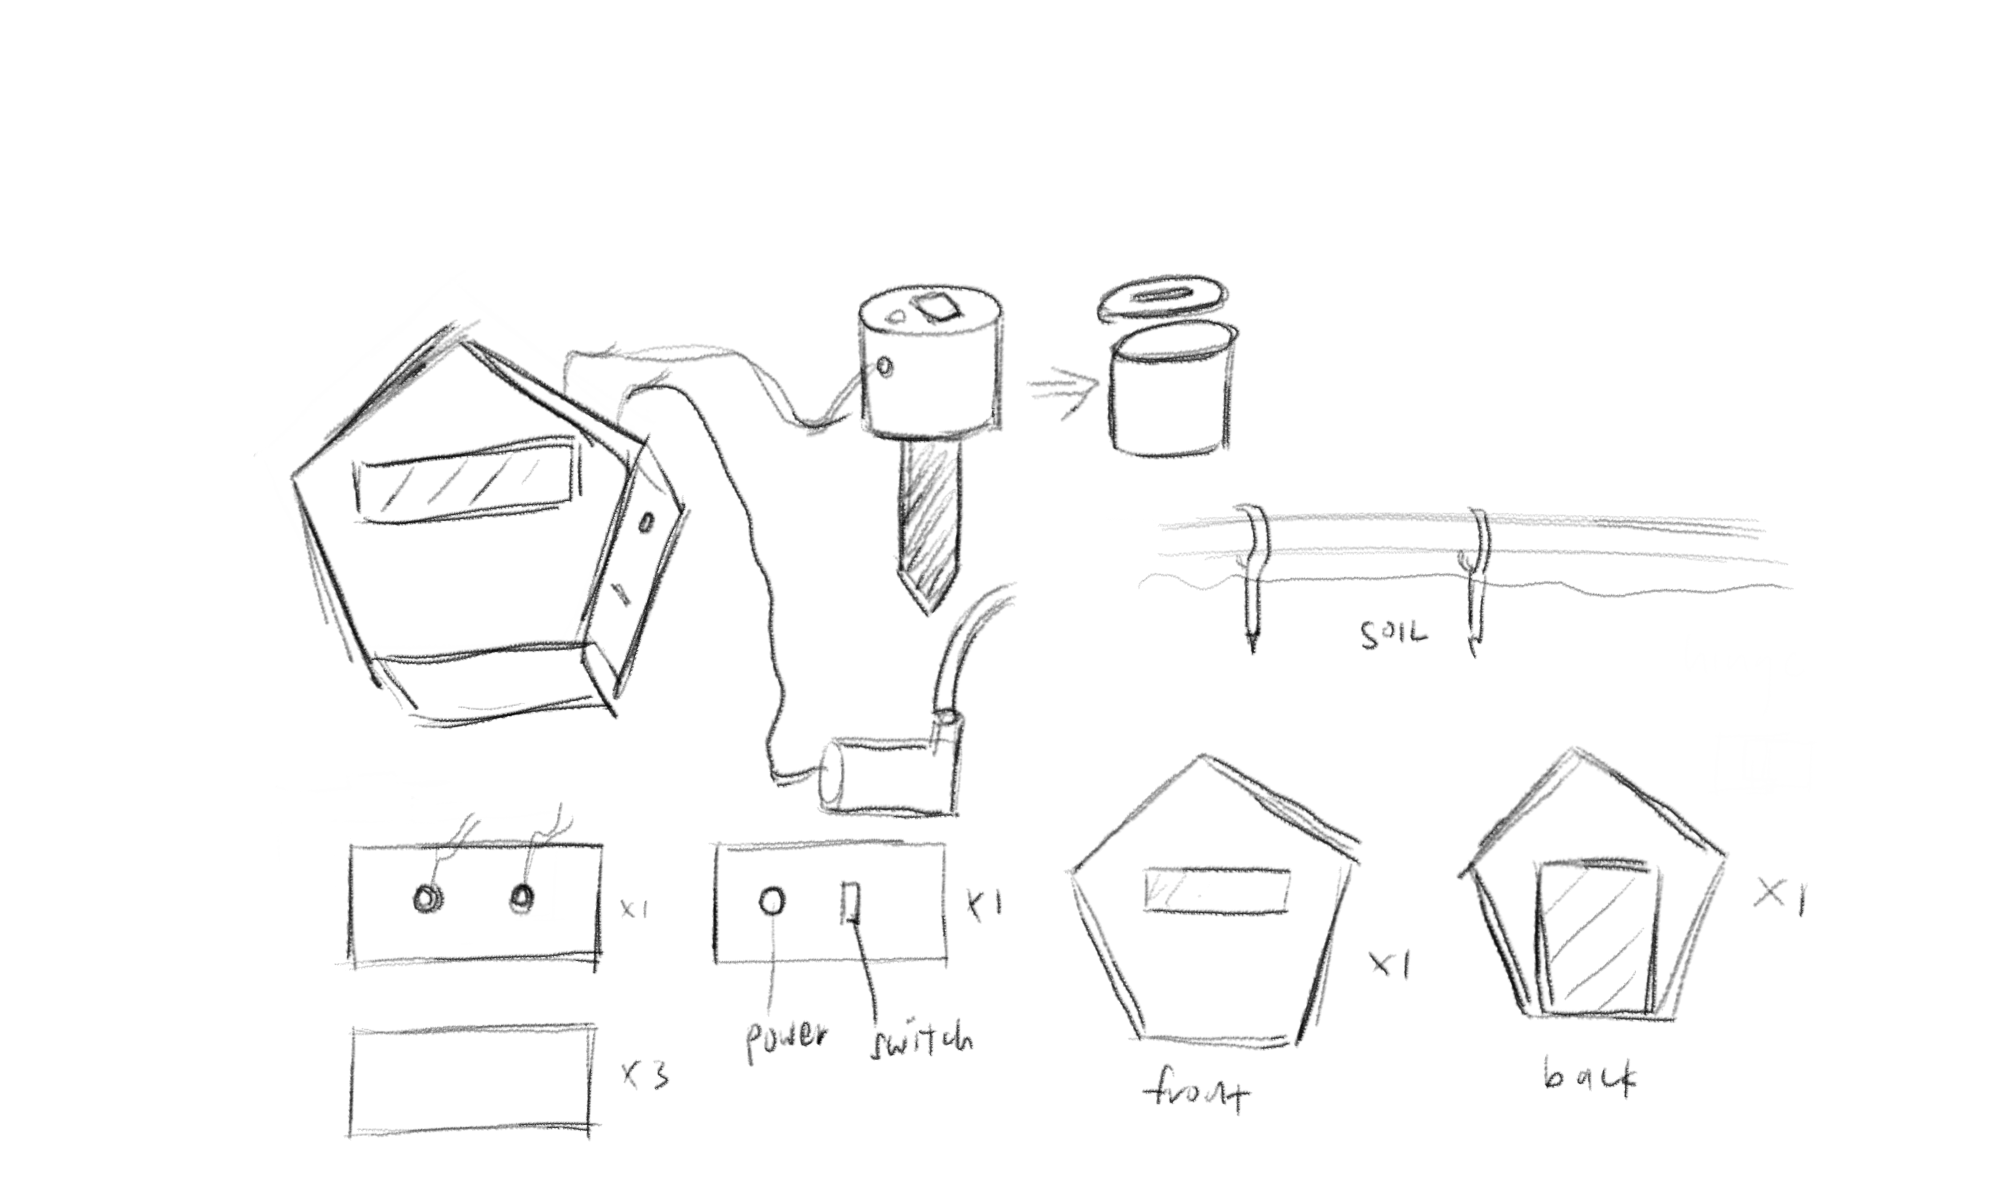
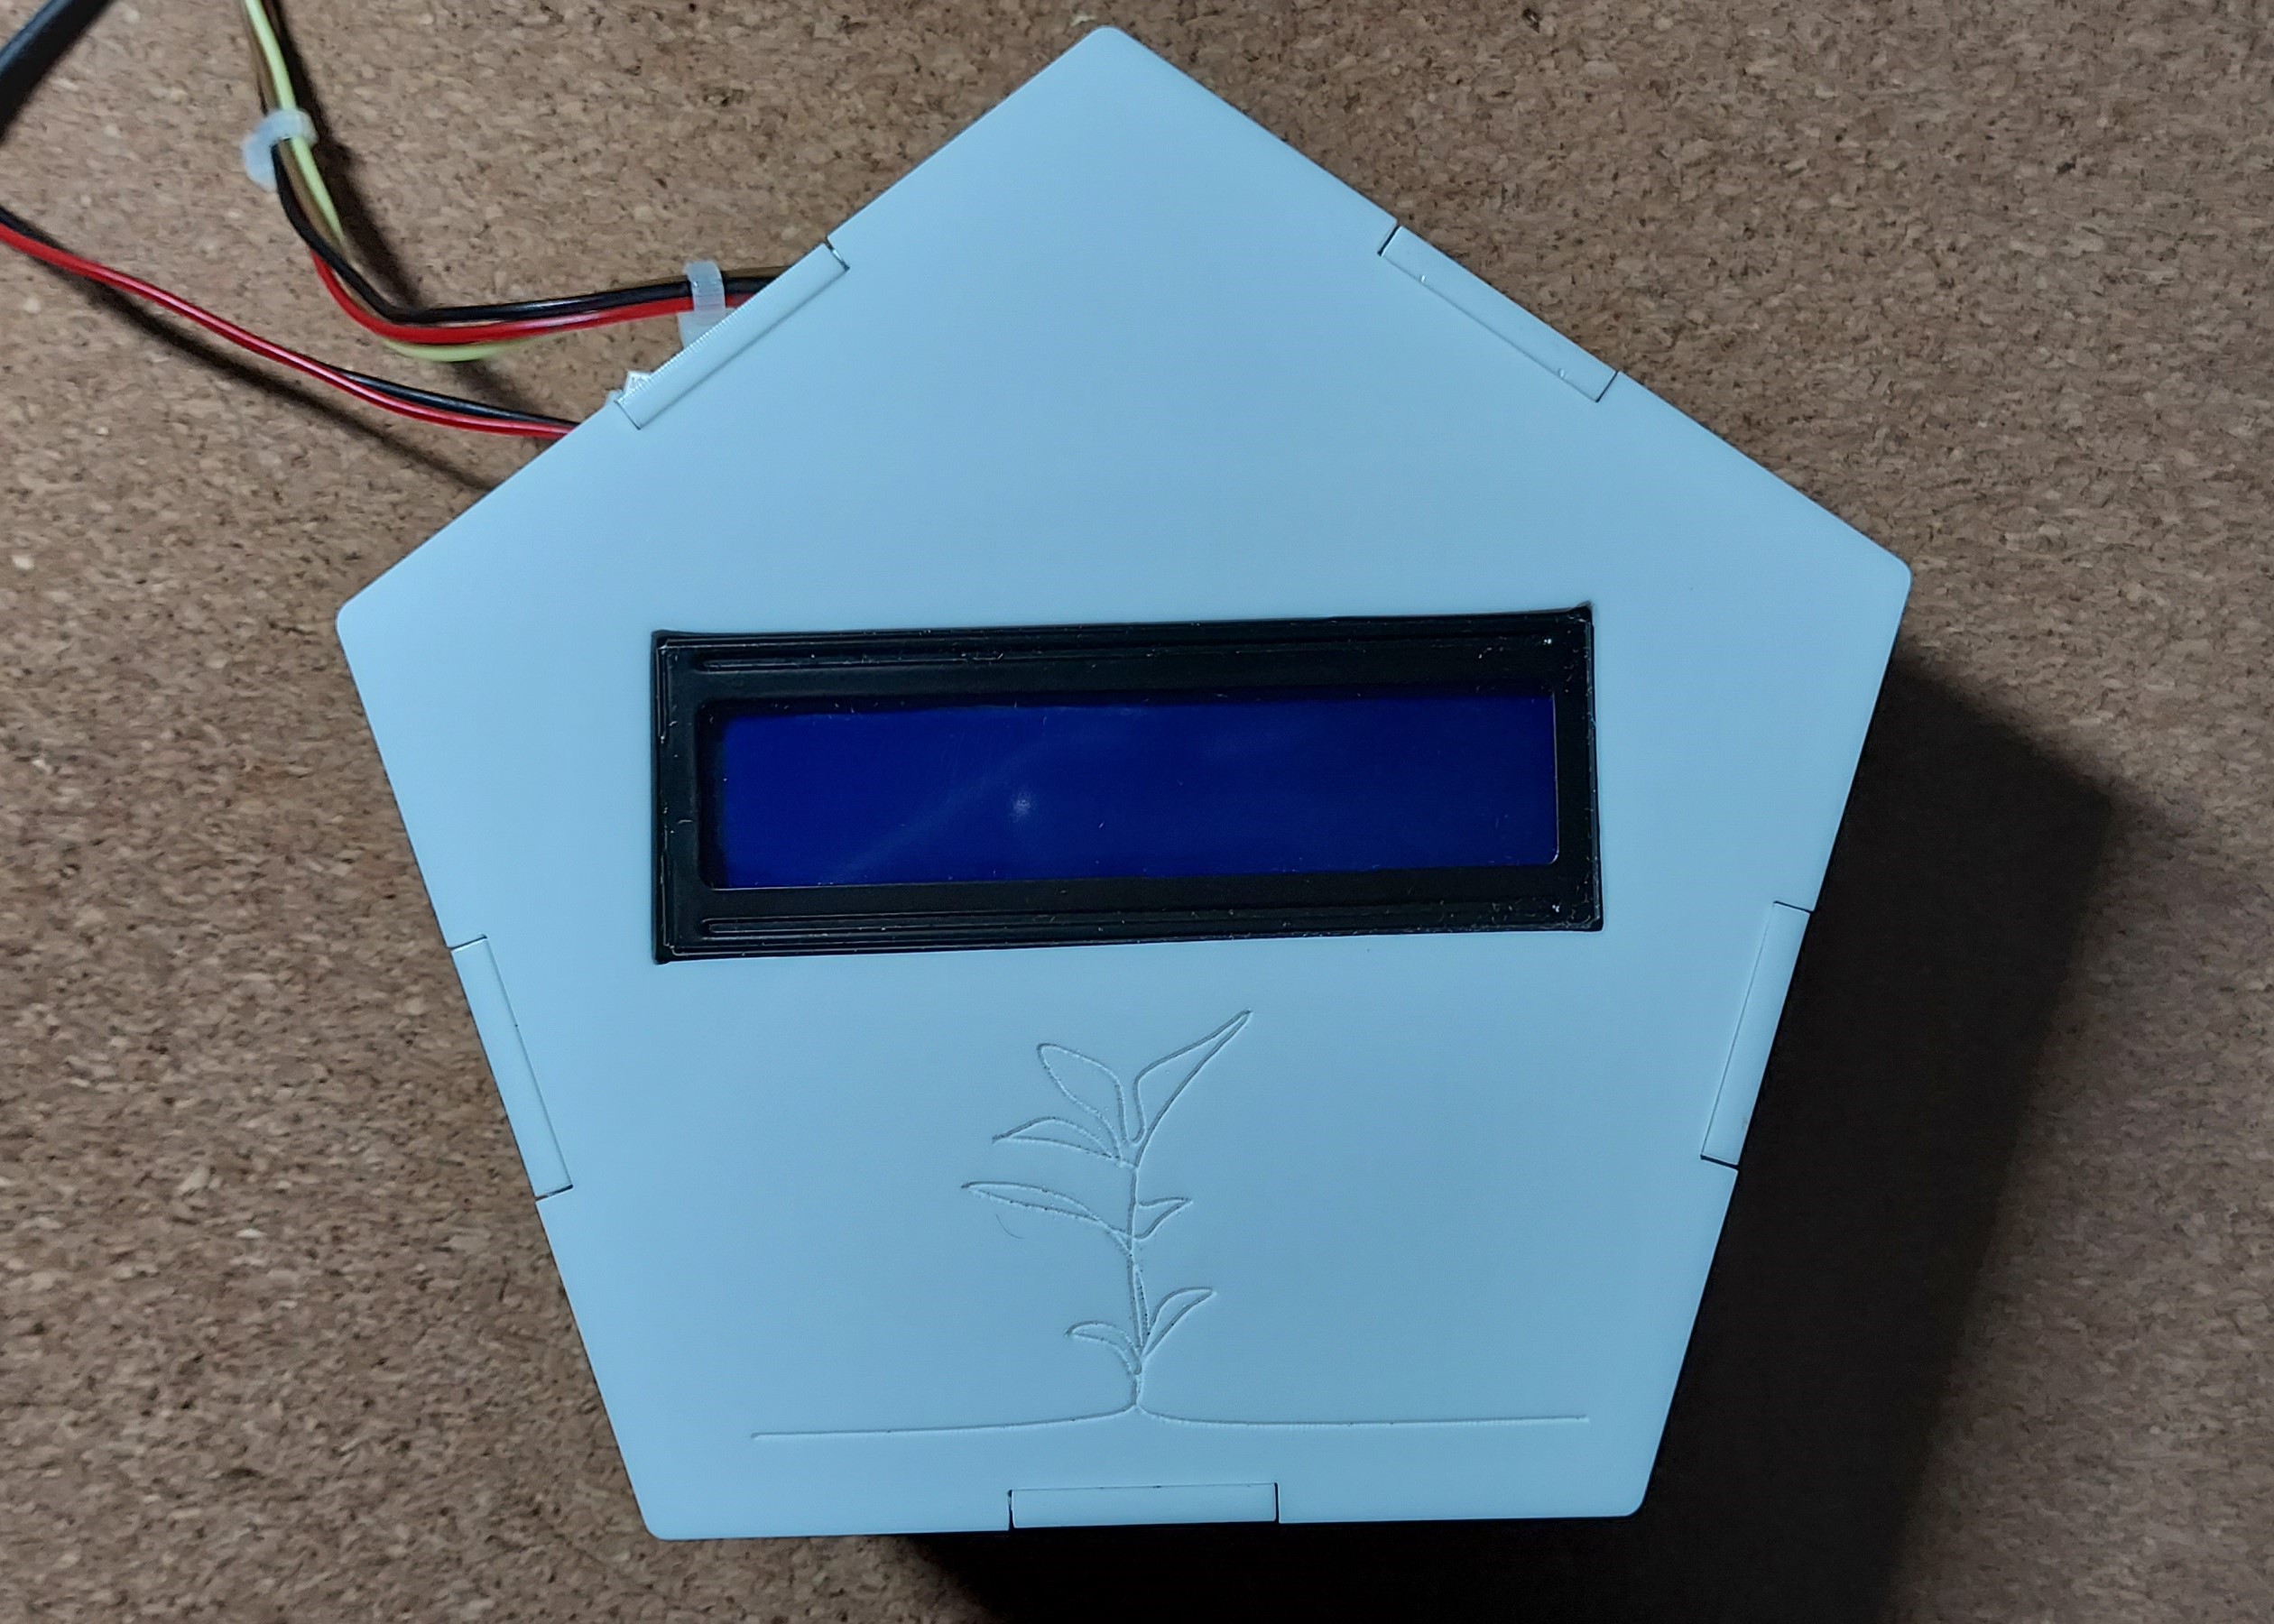
I started by sketching out the design that I wanted. I wanted to create a housing that can be rested on its bottom and back so I came up with a pentagon design.
I decided that the housing was to be laser cut and the other parts I needed to create to be 3D printed (eg. sensor housing, hinge, pcb mount).
Modelling
I started modelling the housing using Fusion360 with the aid of using parameters. The holes for wiring and power supply is not added as these can be drilled after. The back lid is made such that I can open it when needed. I used tabs so that the pieces can be easily attached to eachother.
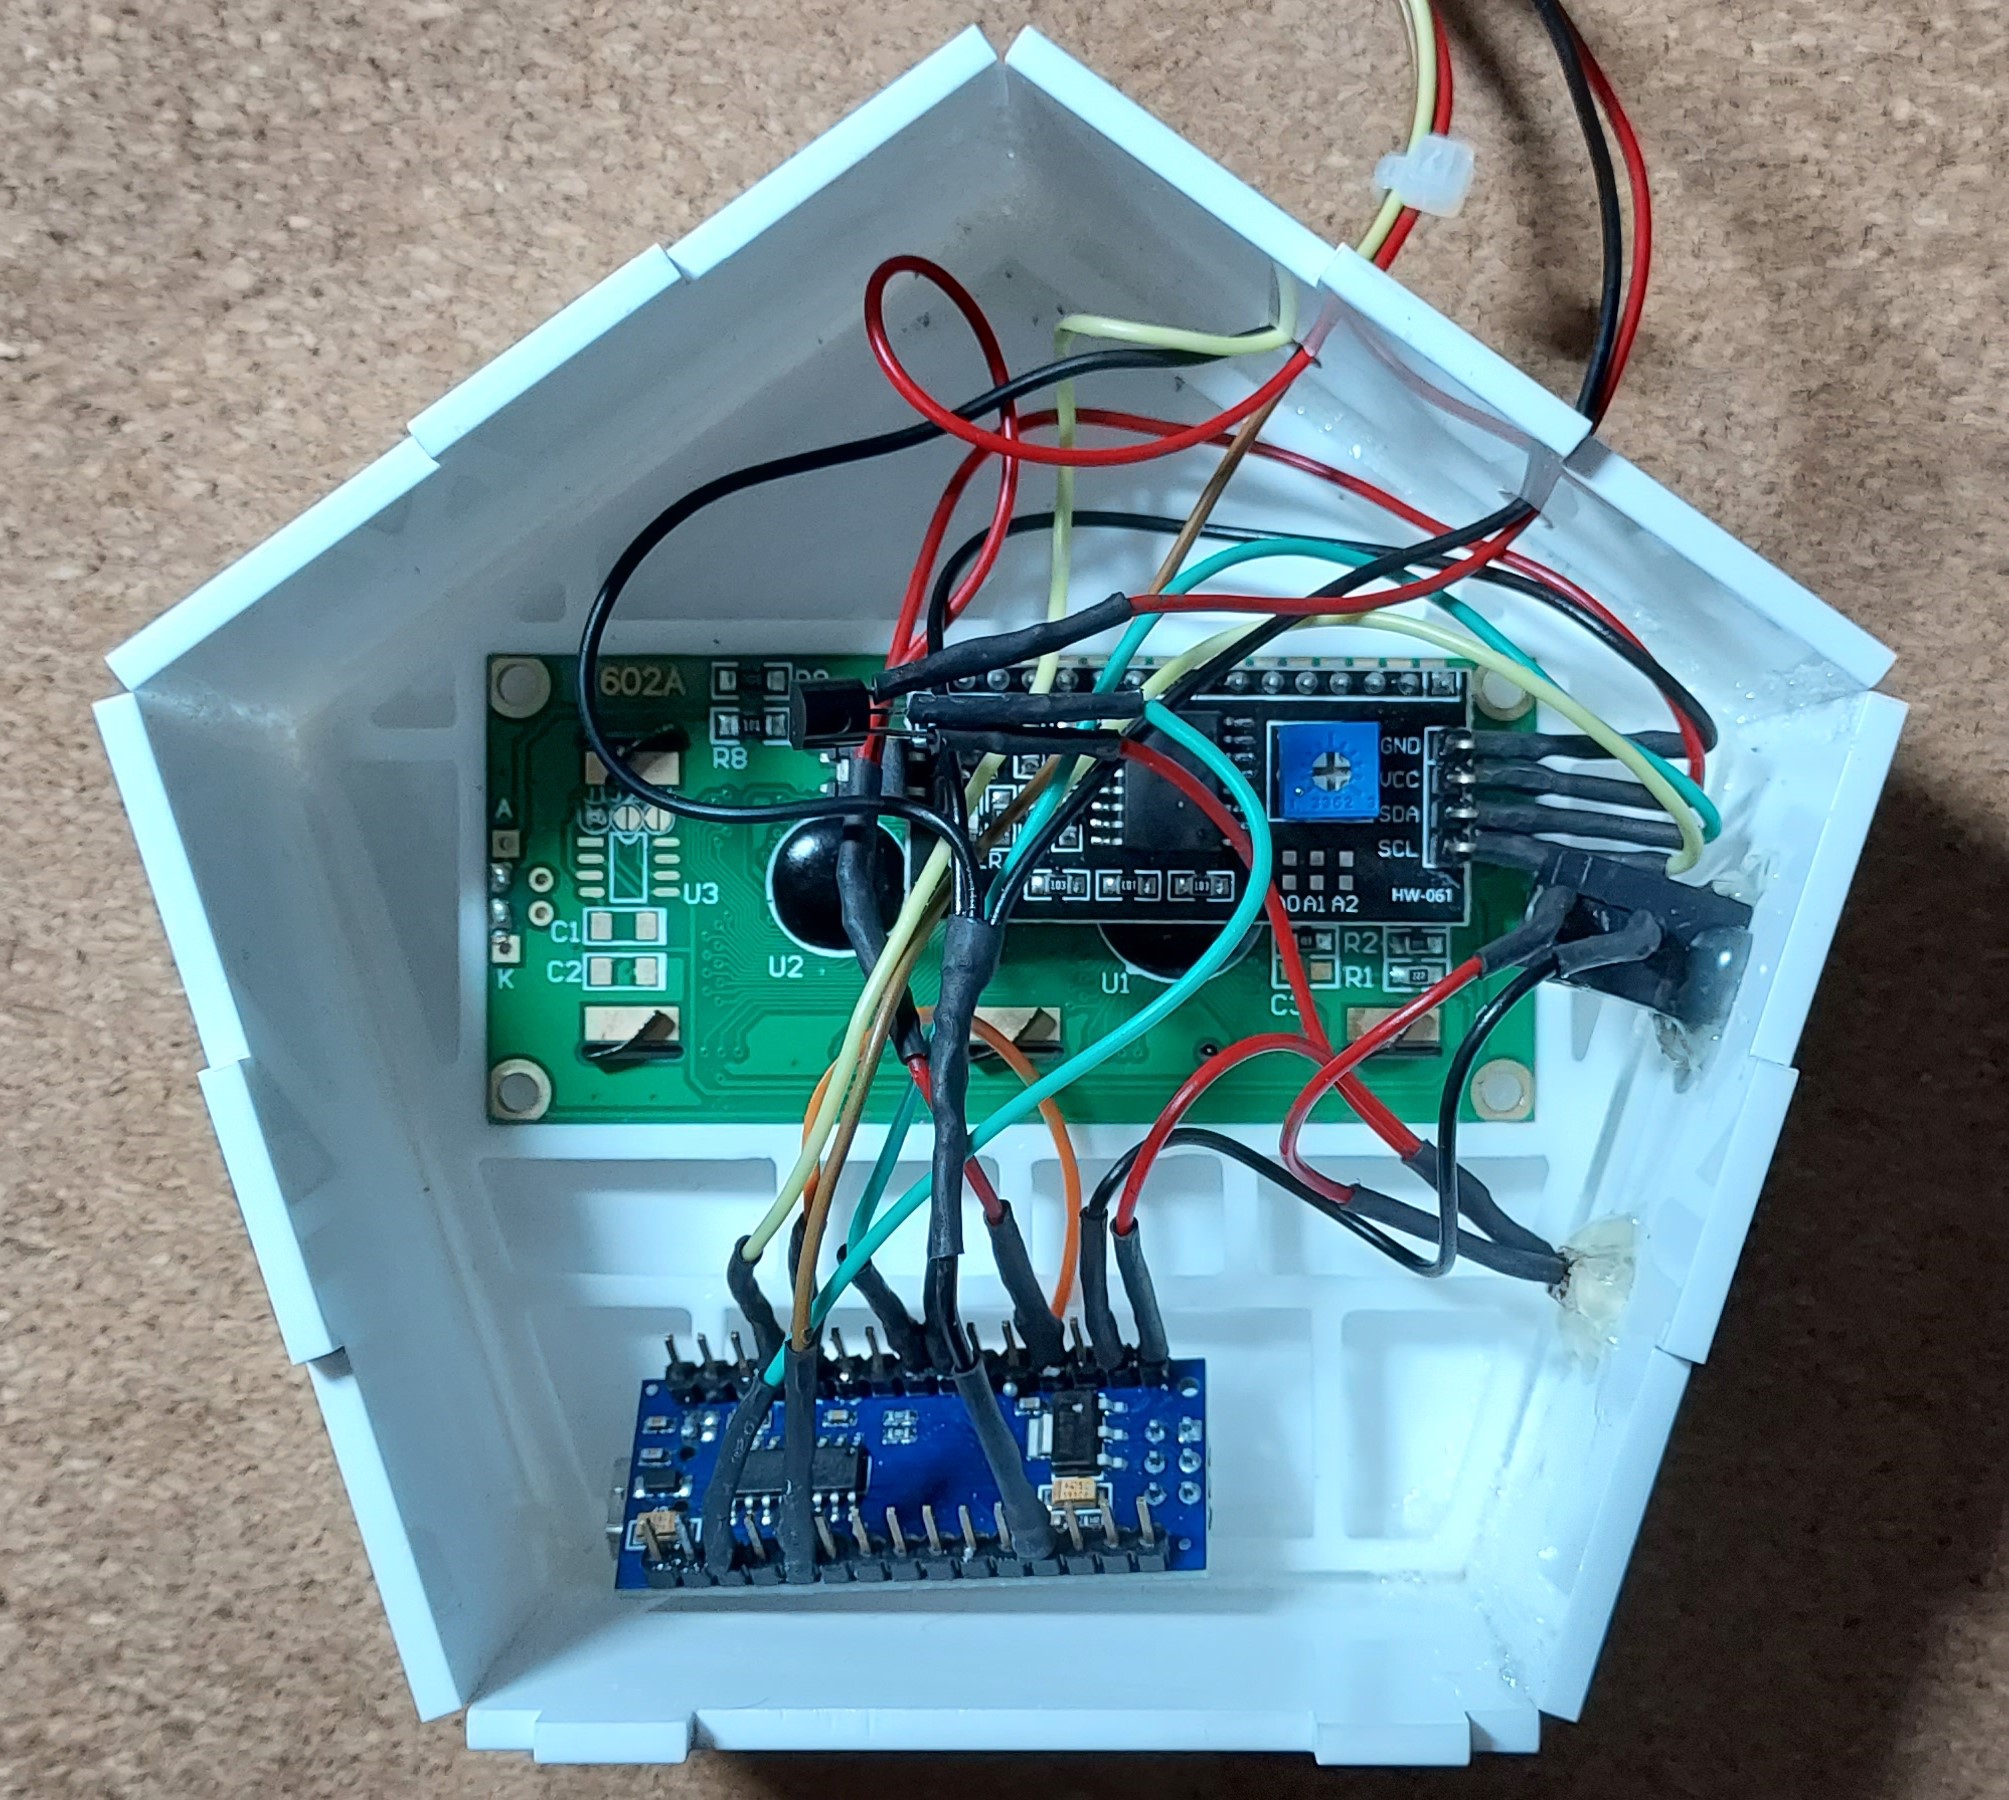
Next, I modelled the PCB mount that i would be using inside the housing to arrange the nano as well as the LCD.
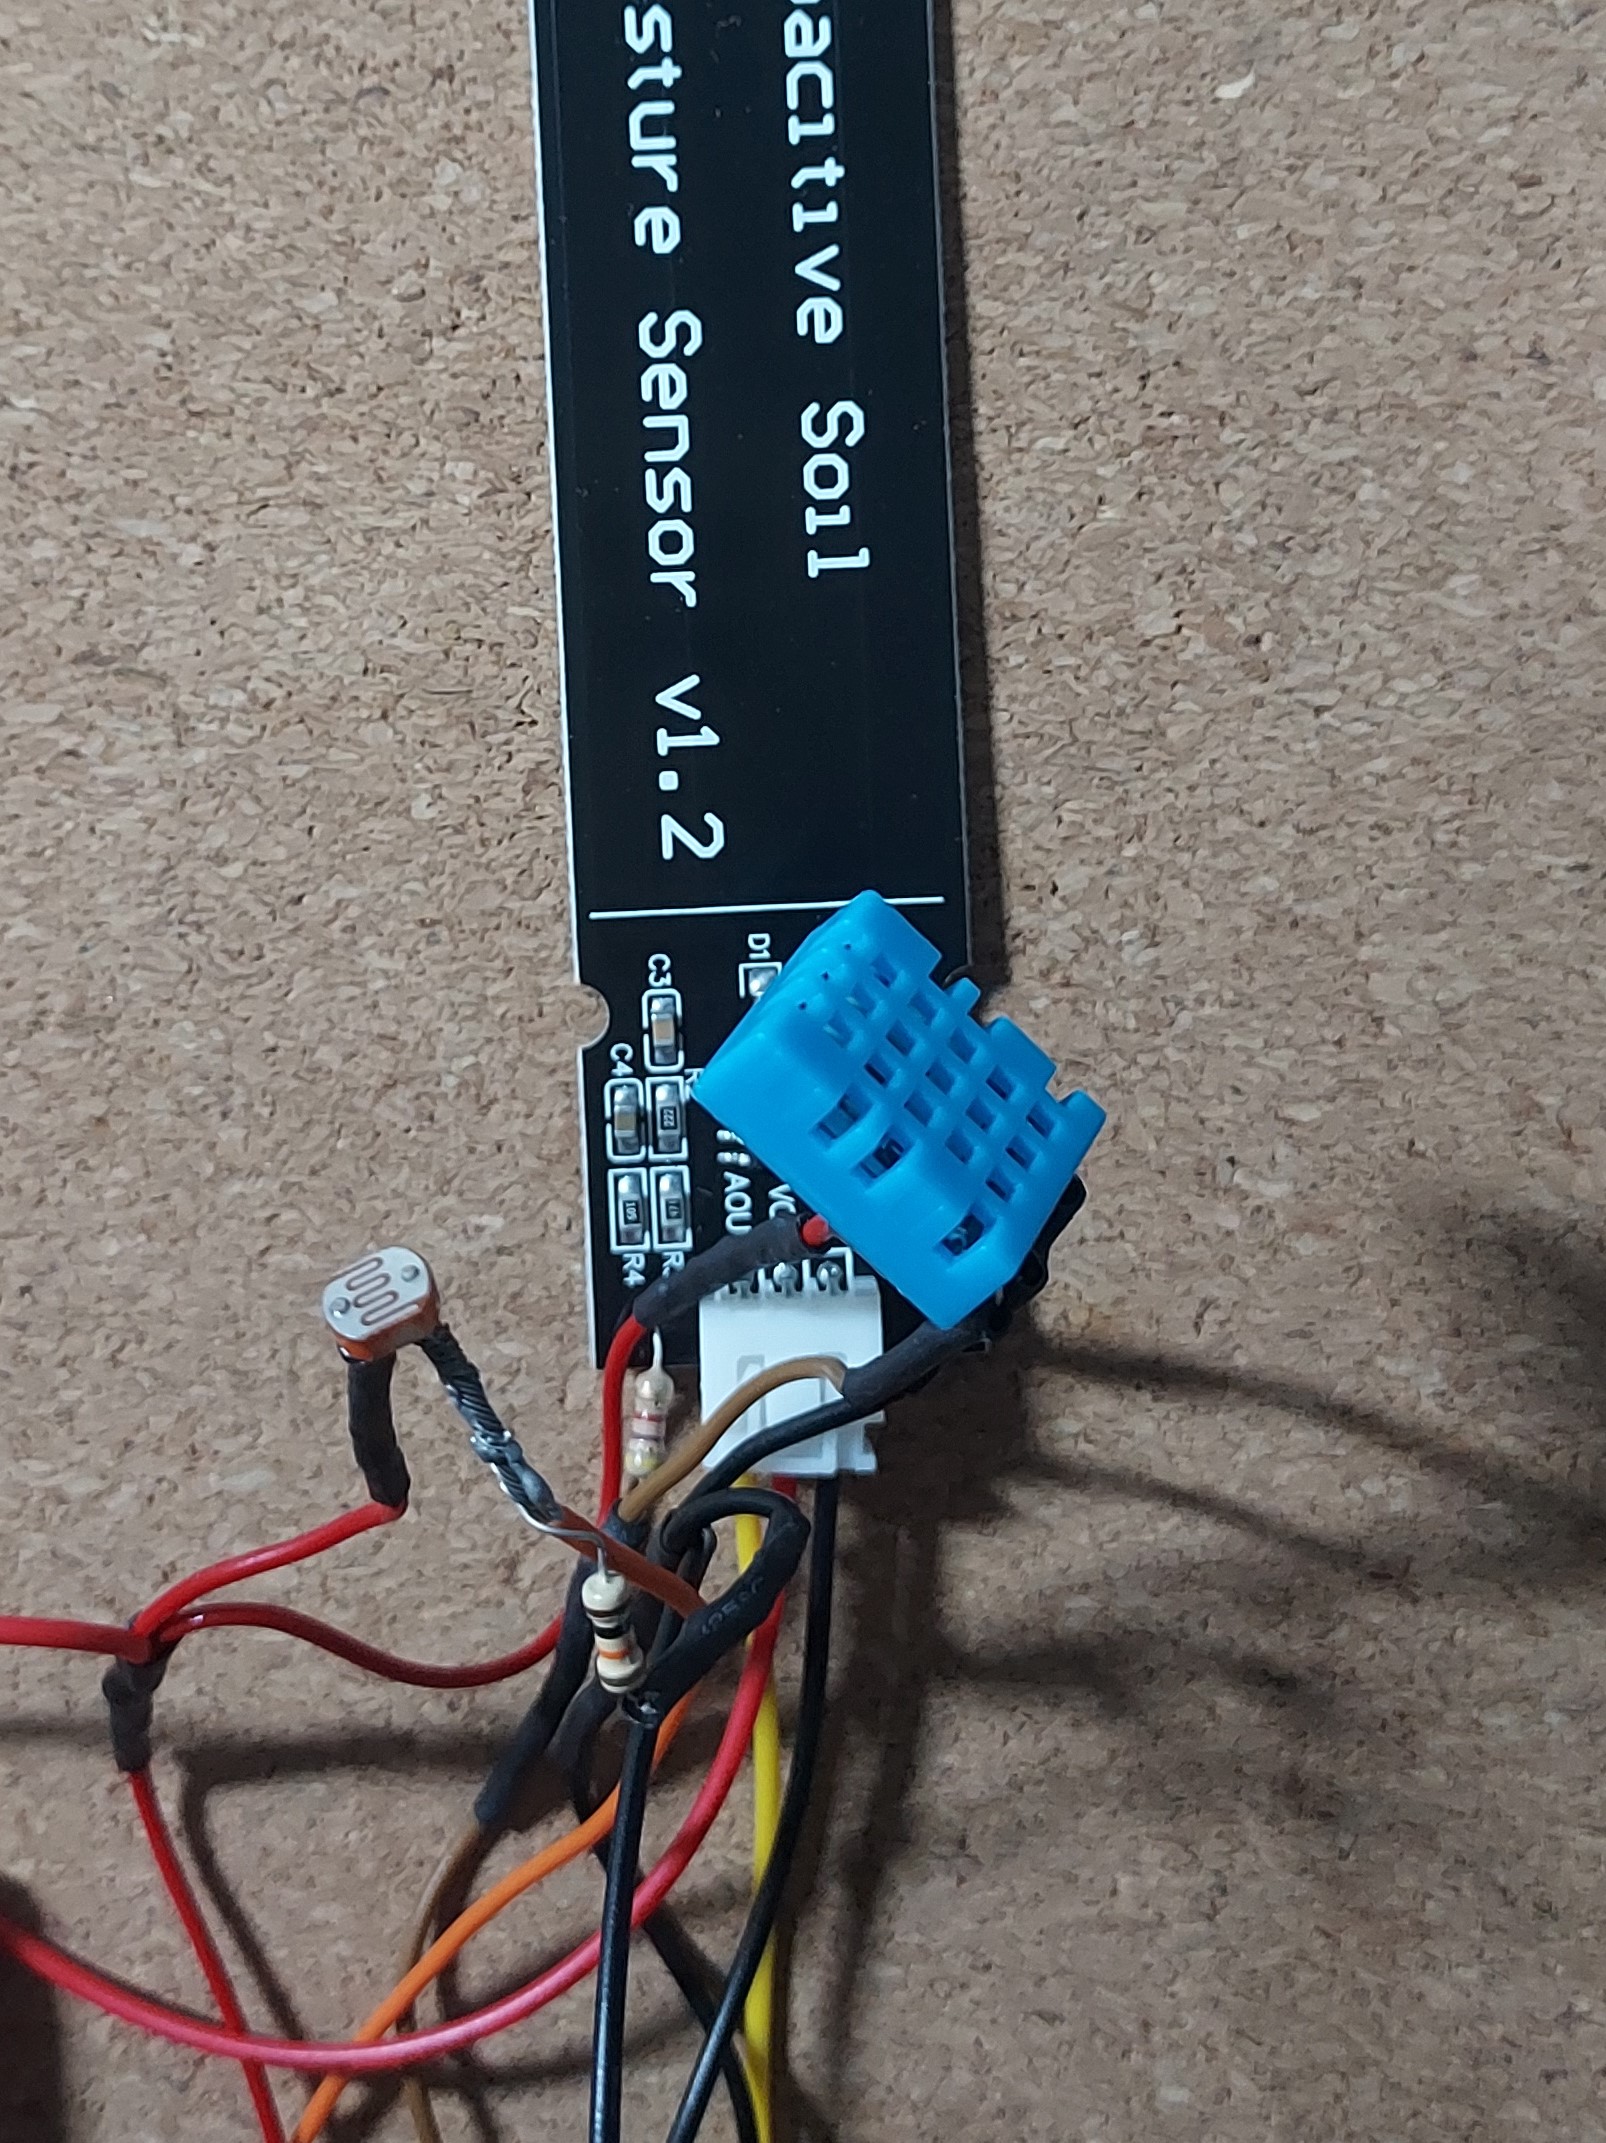
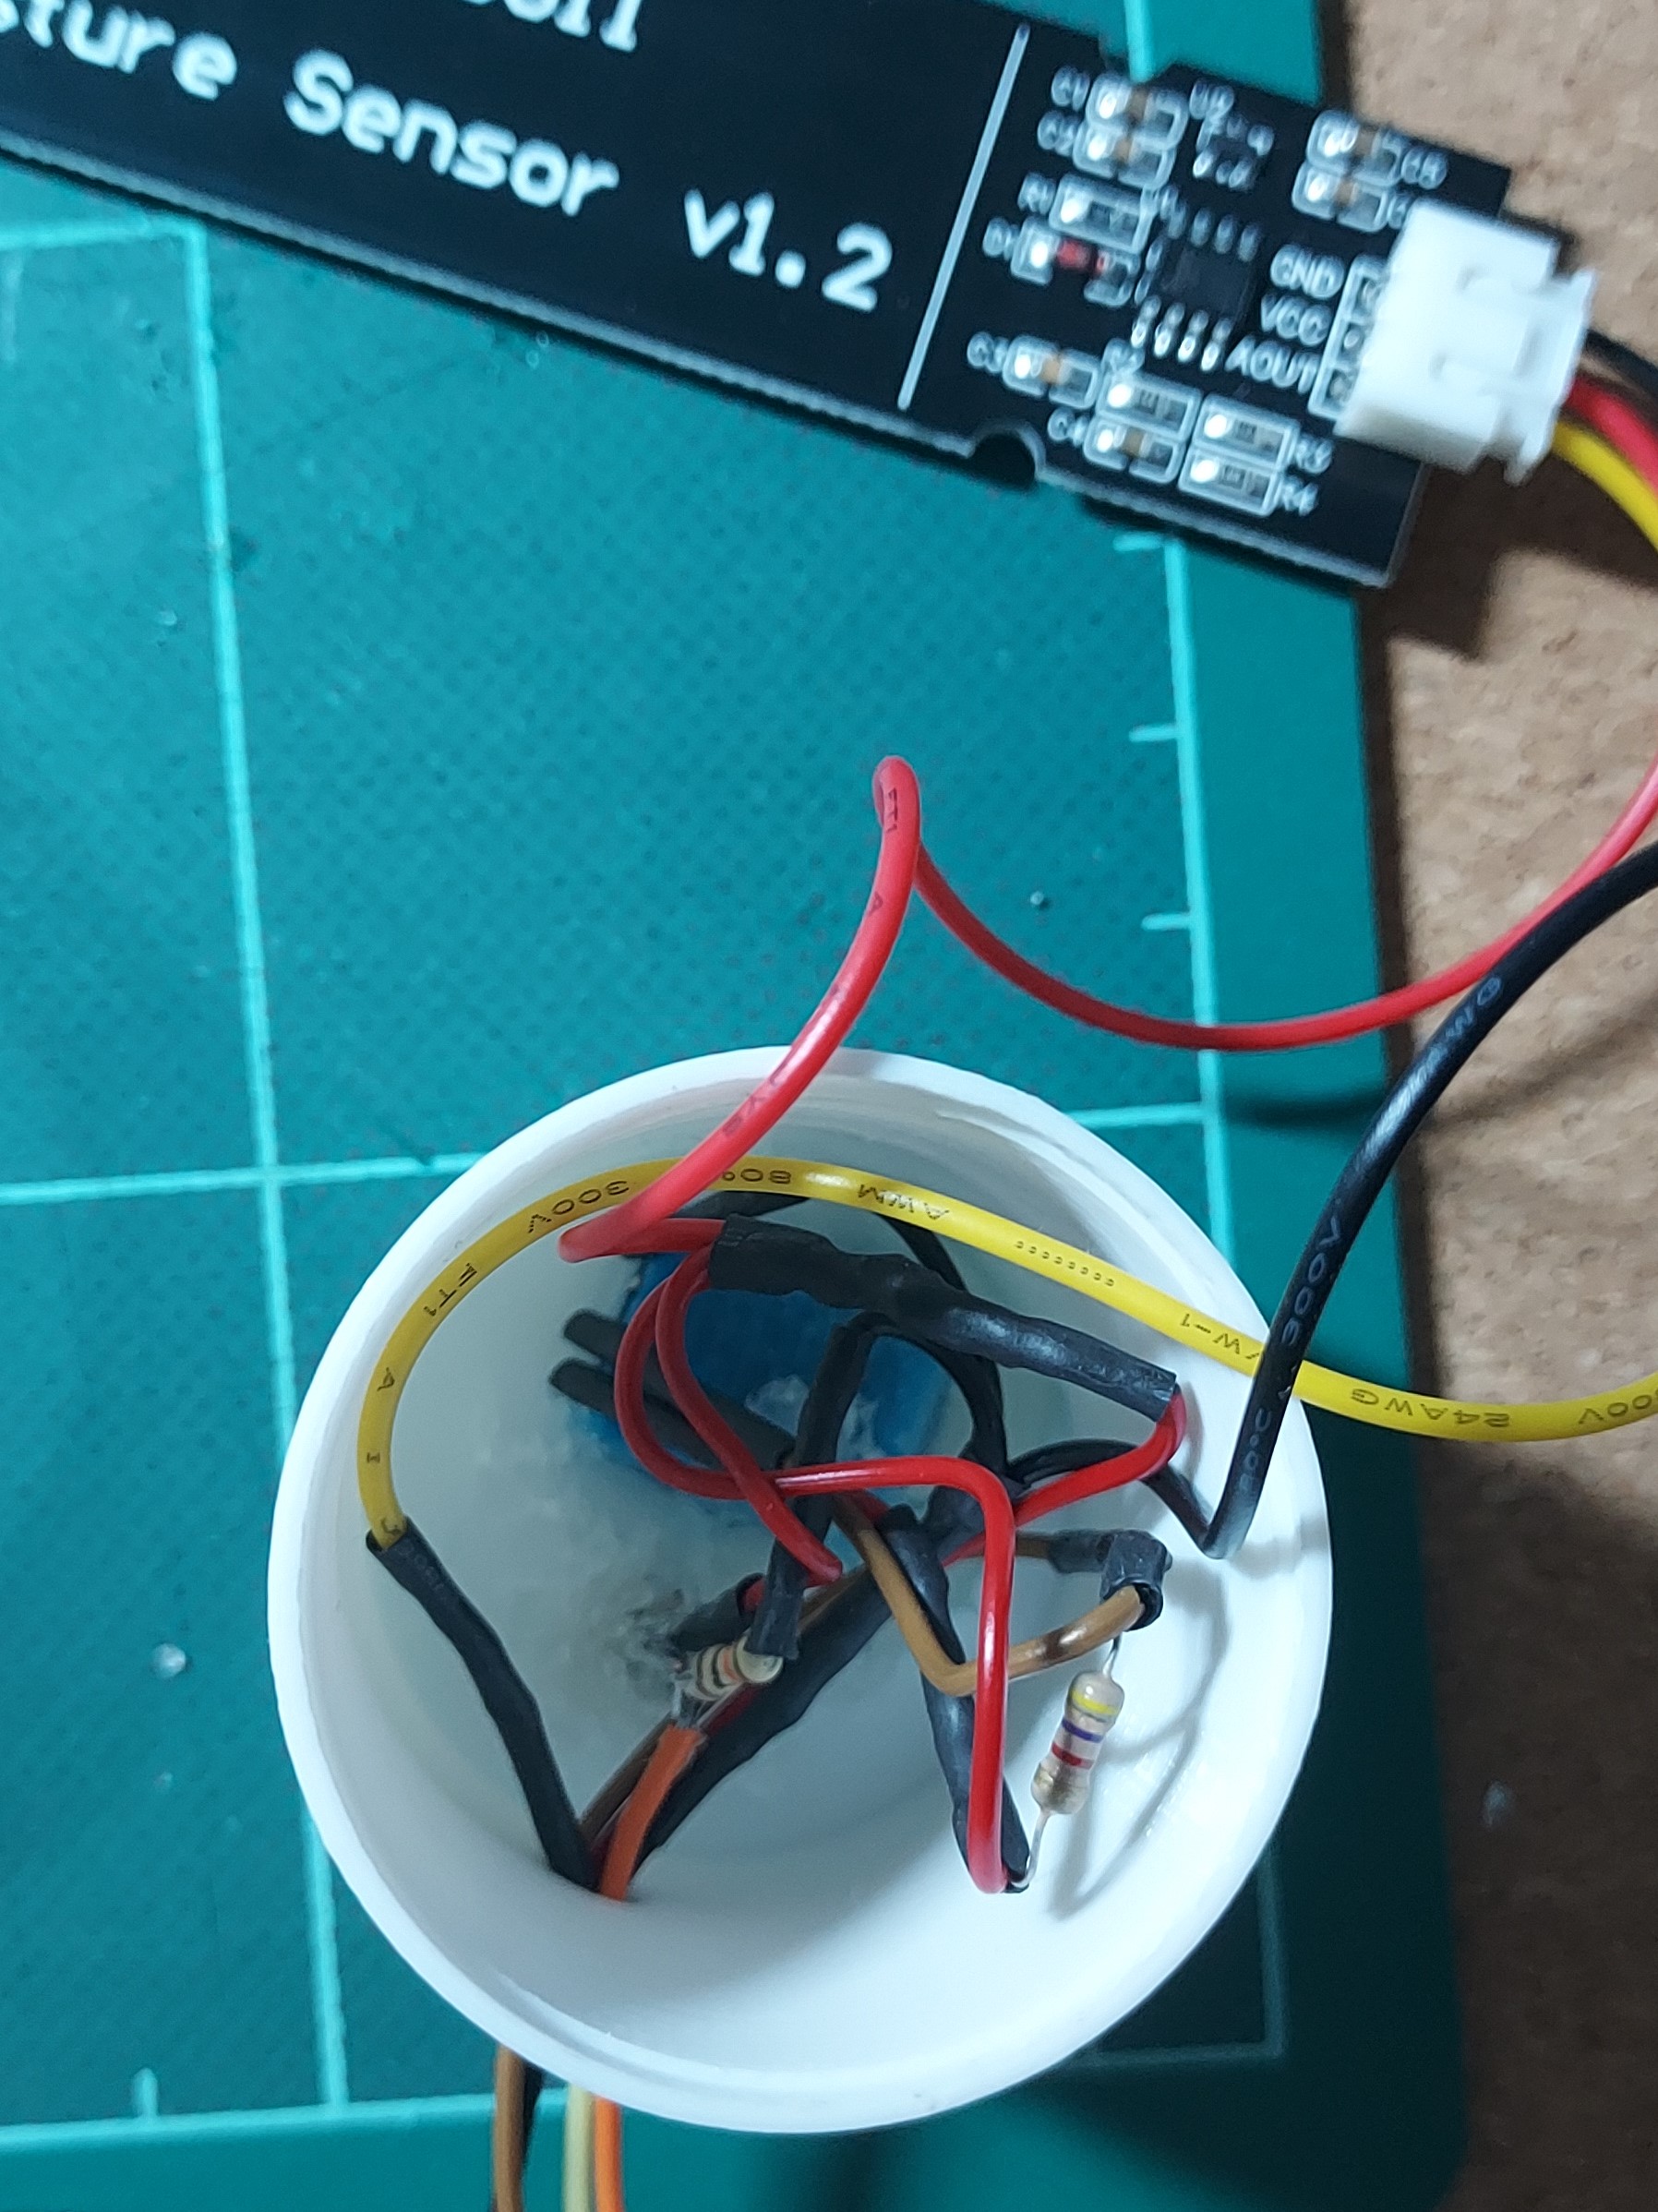
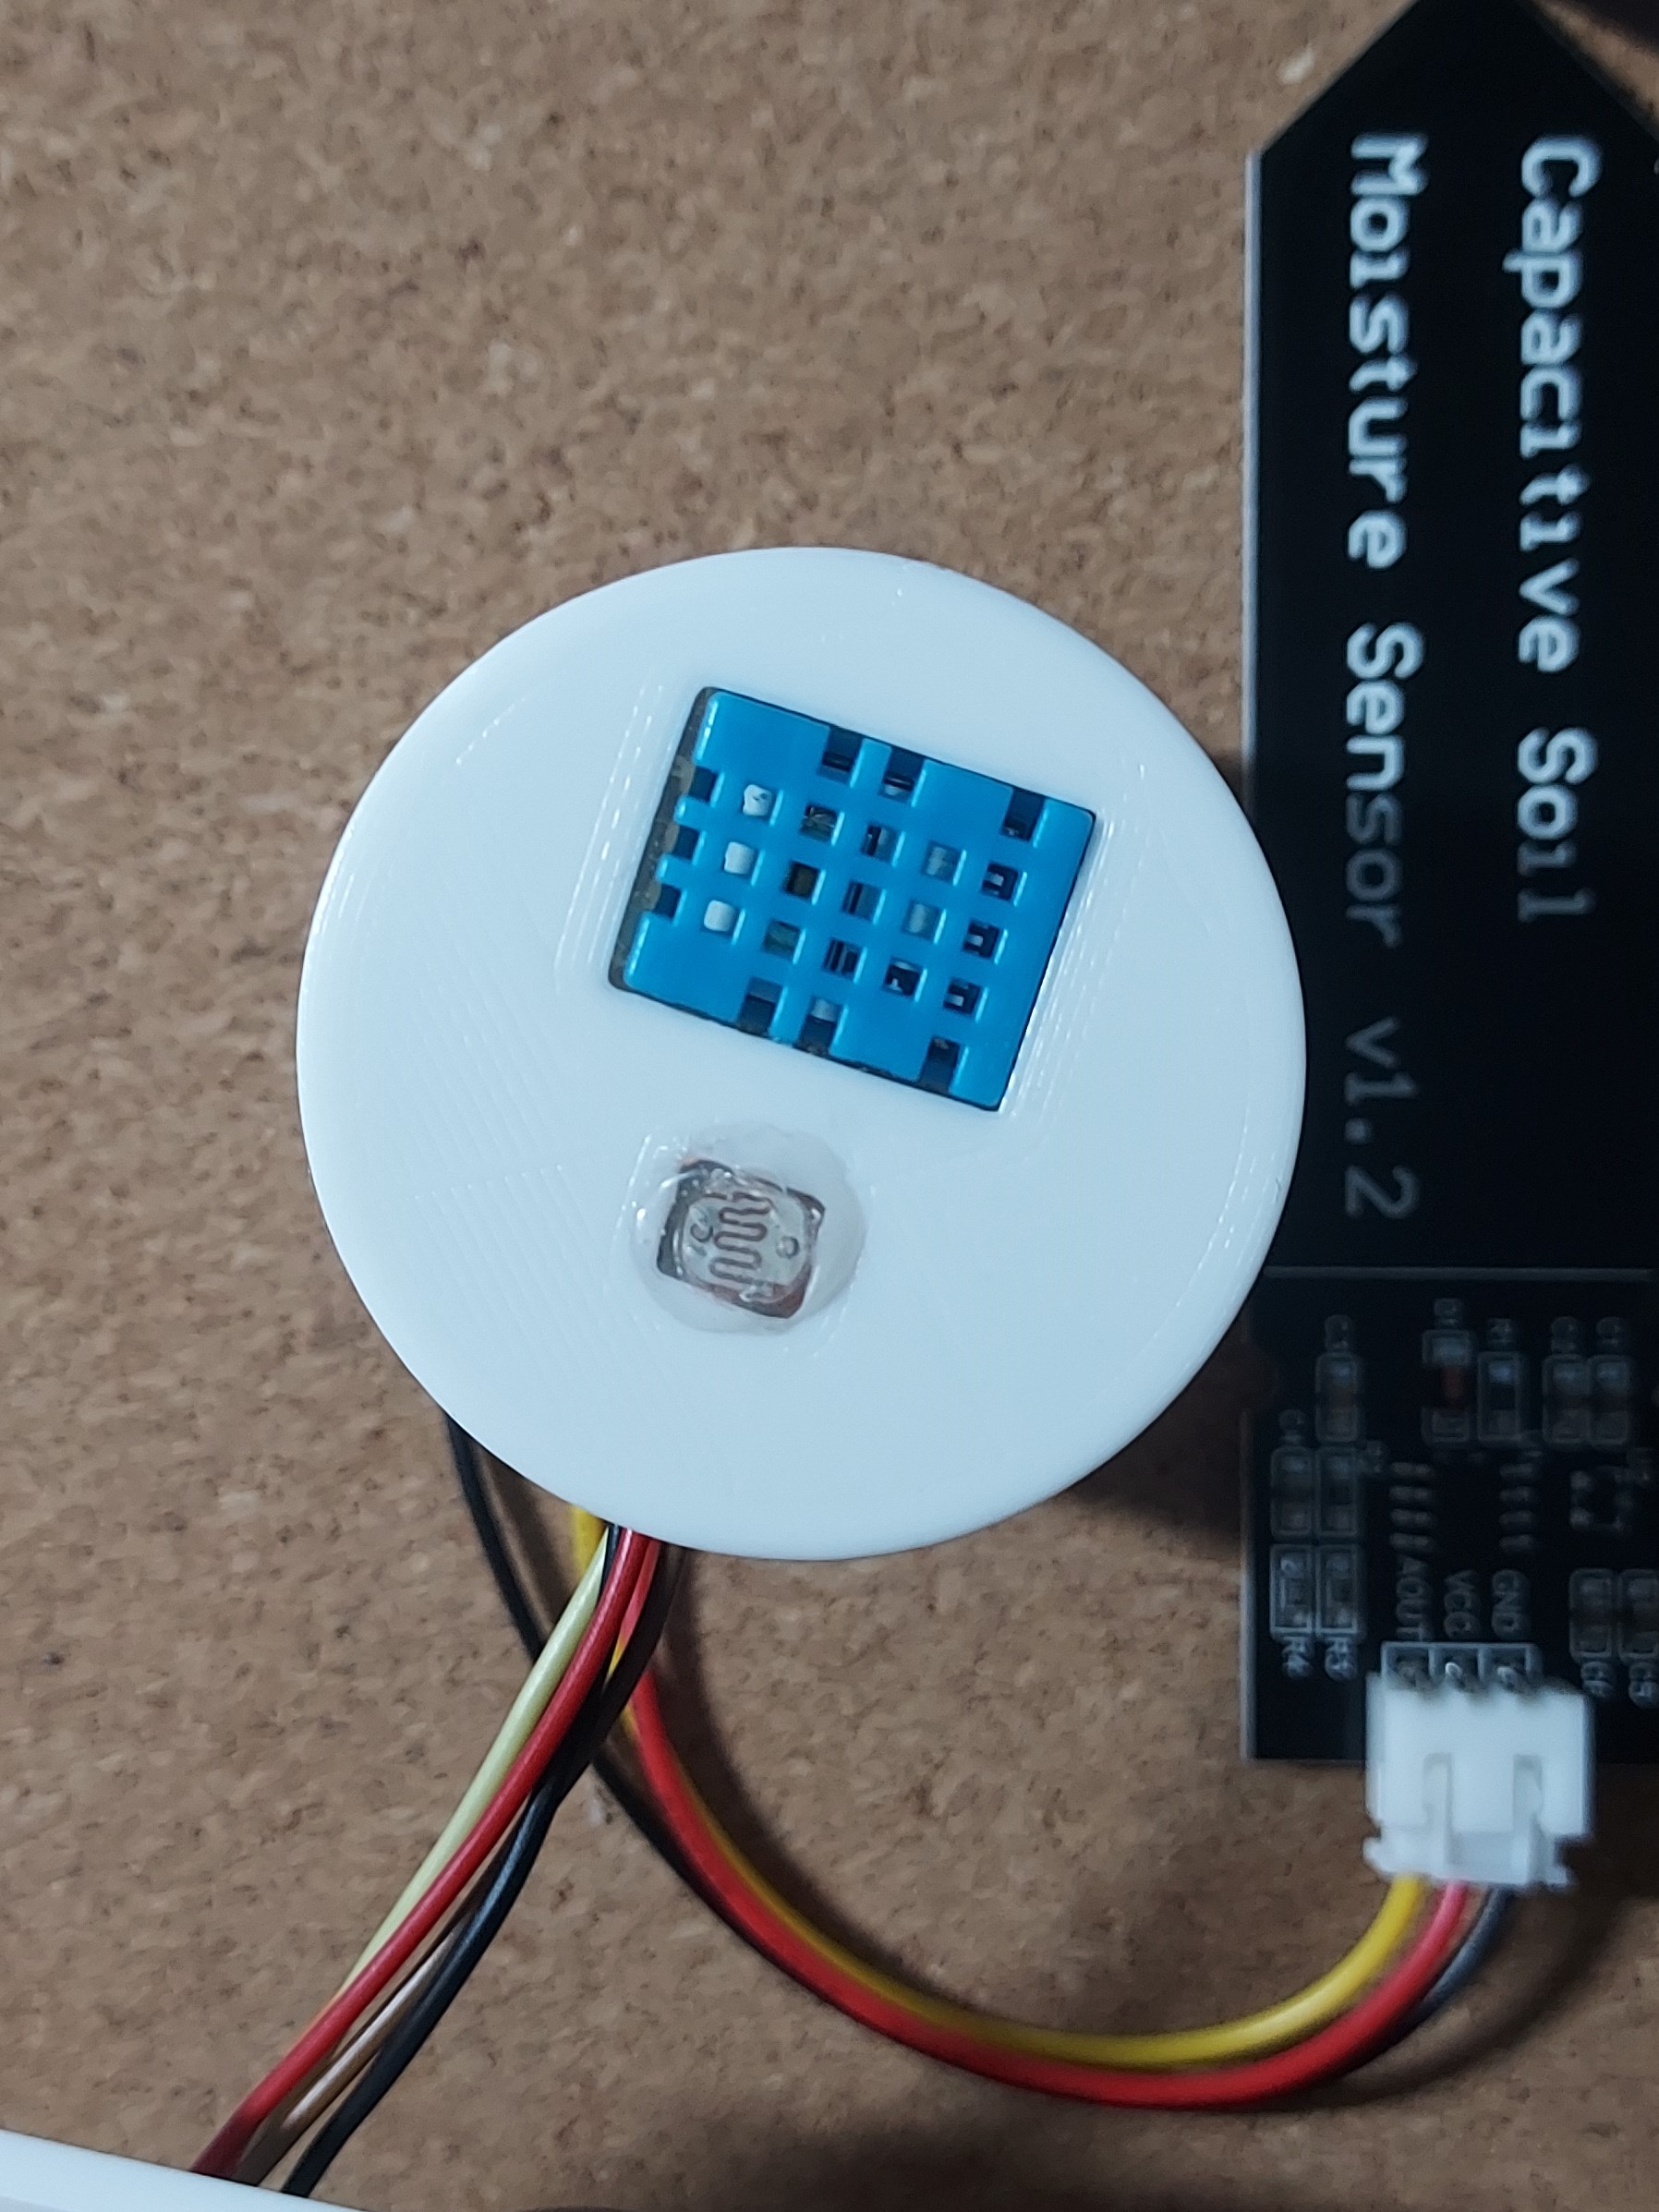
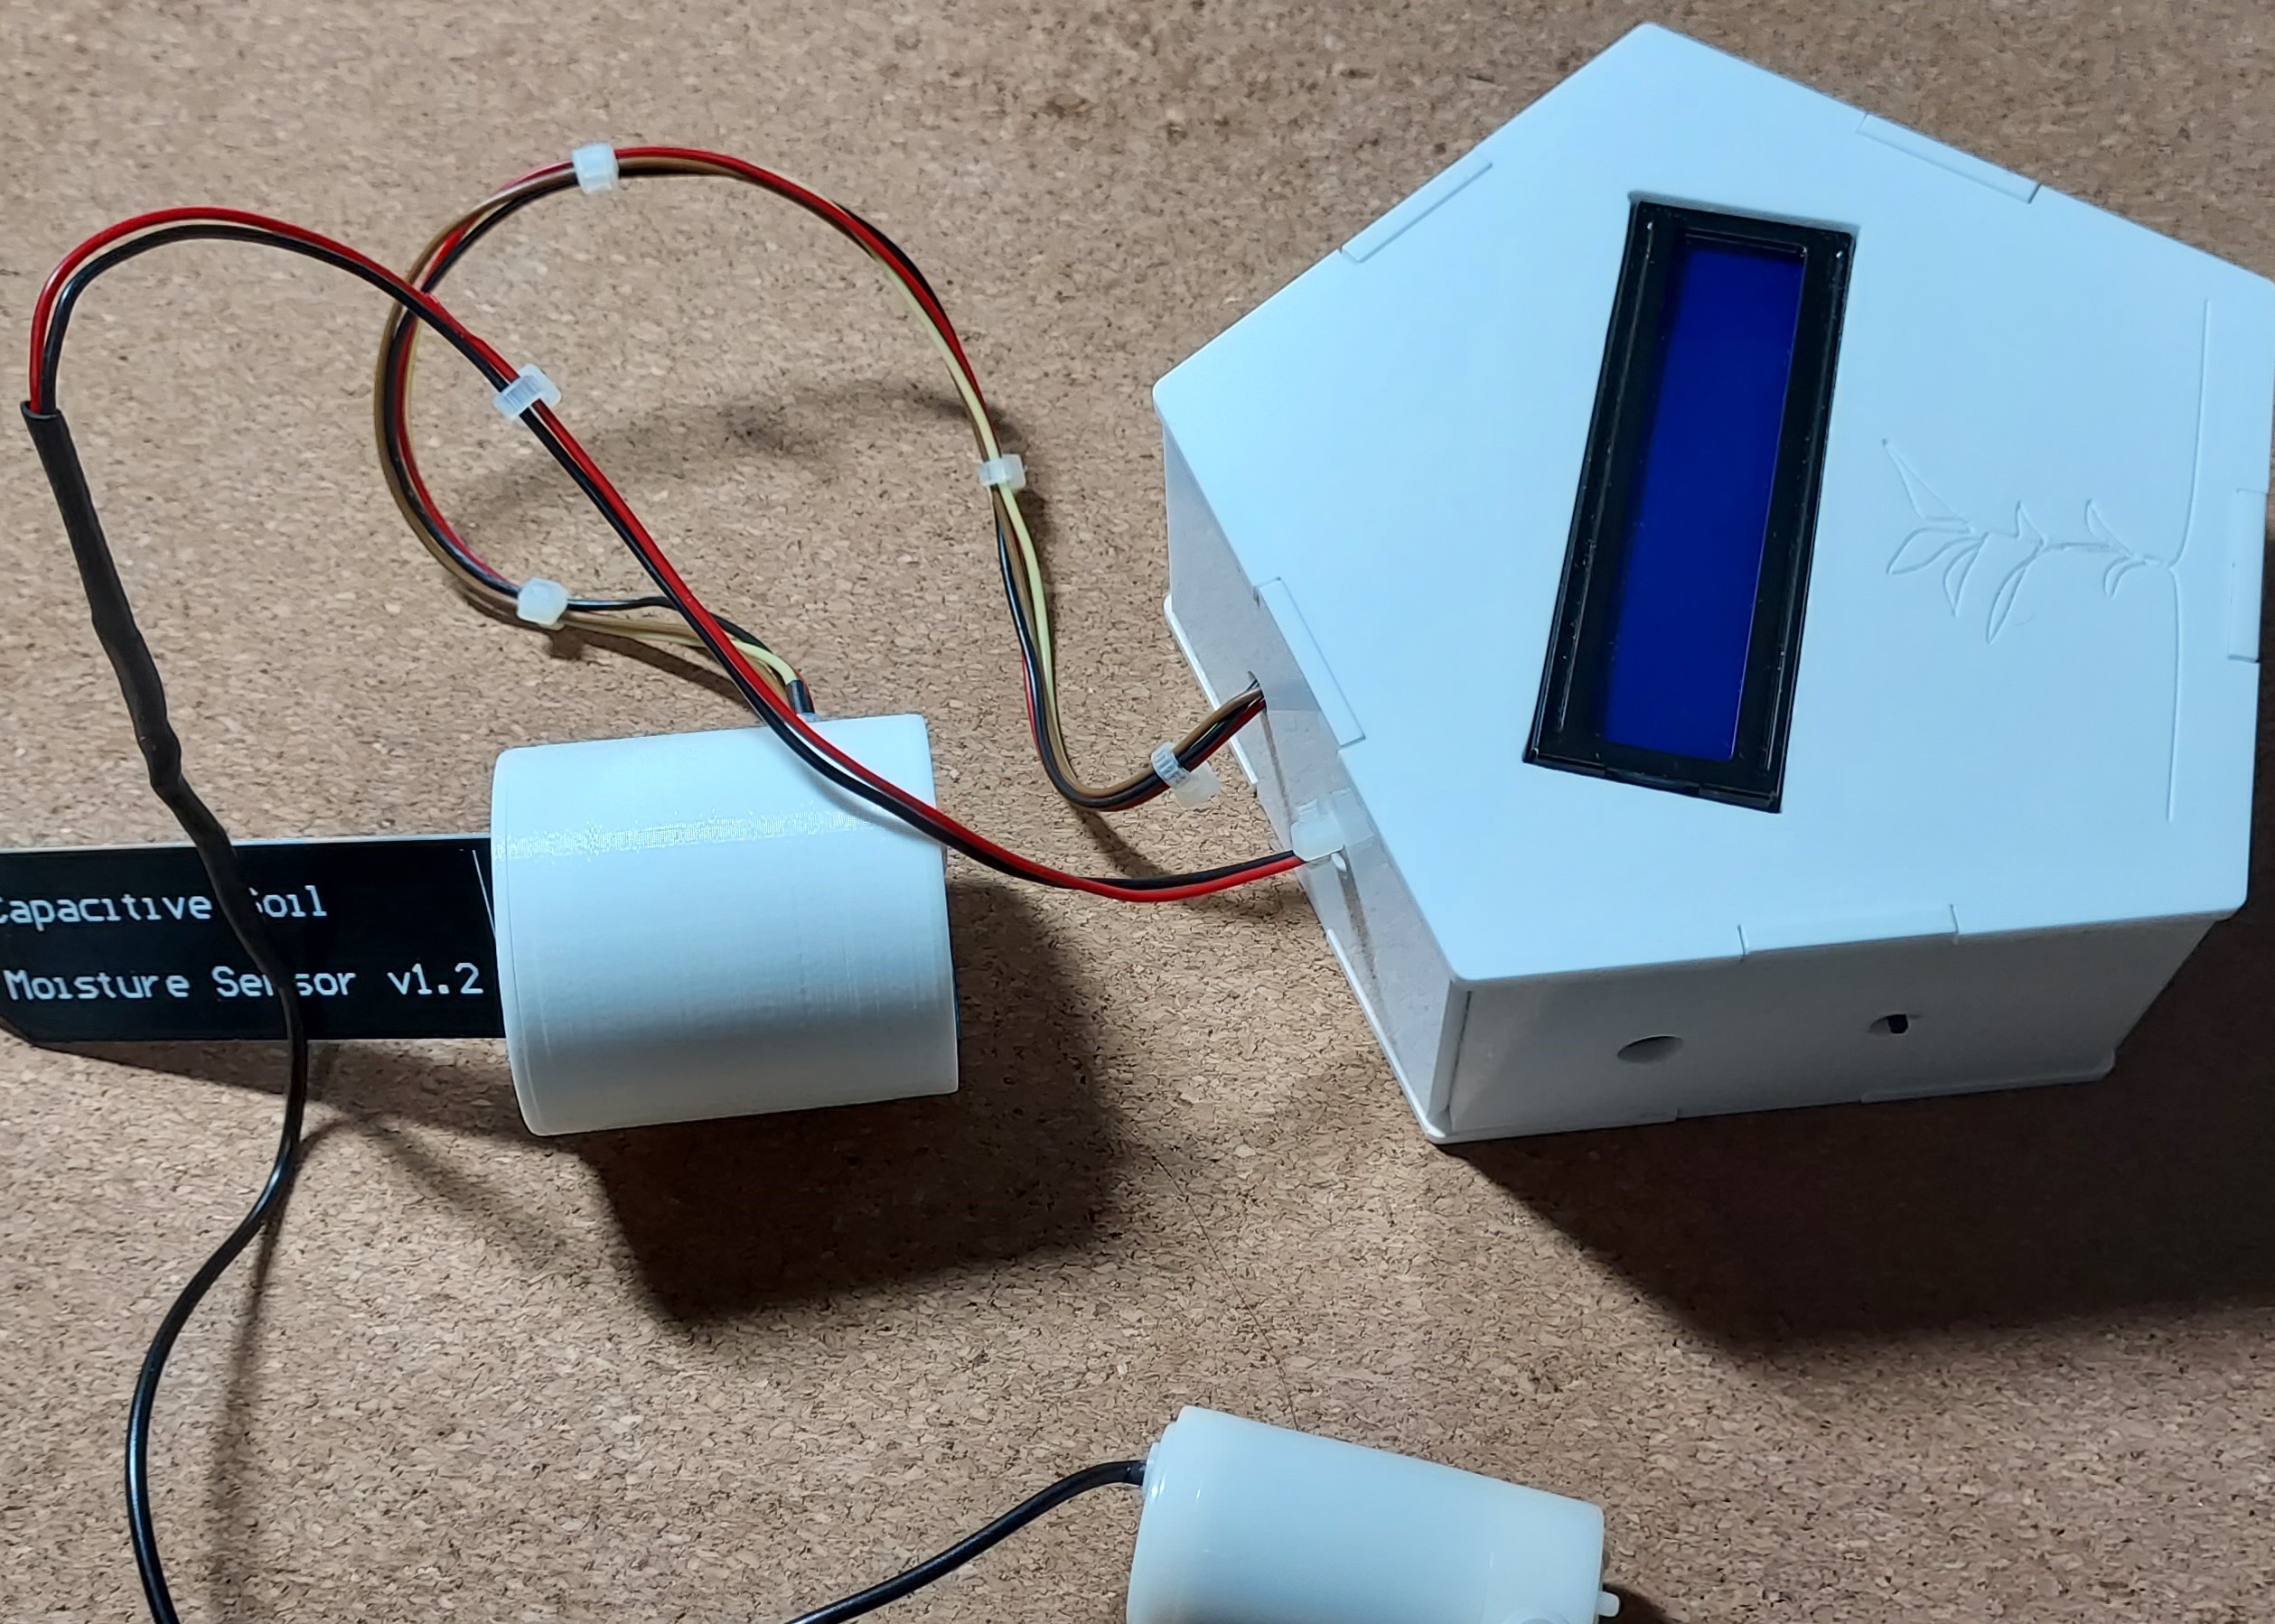
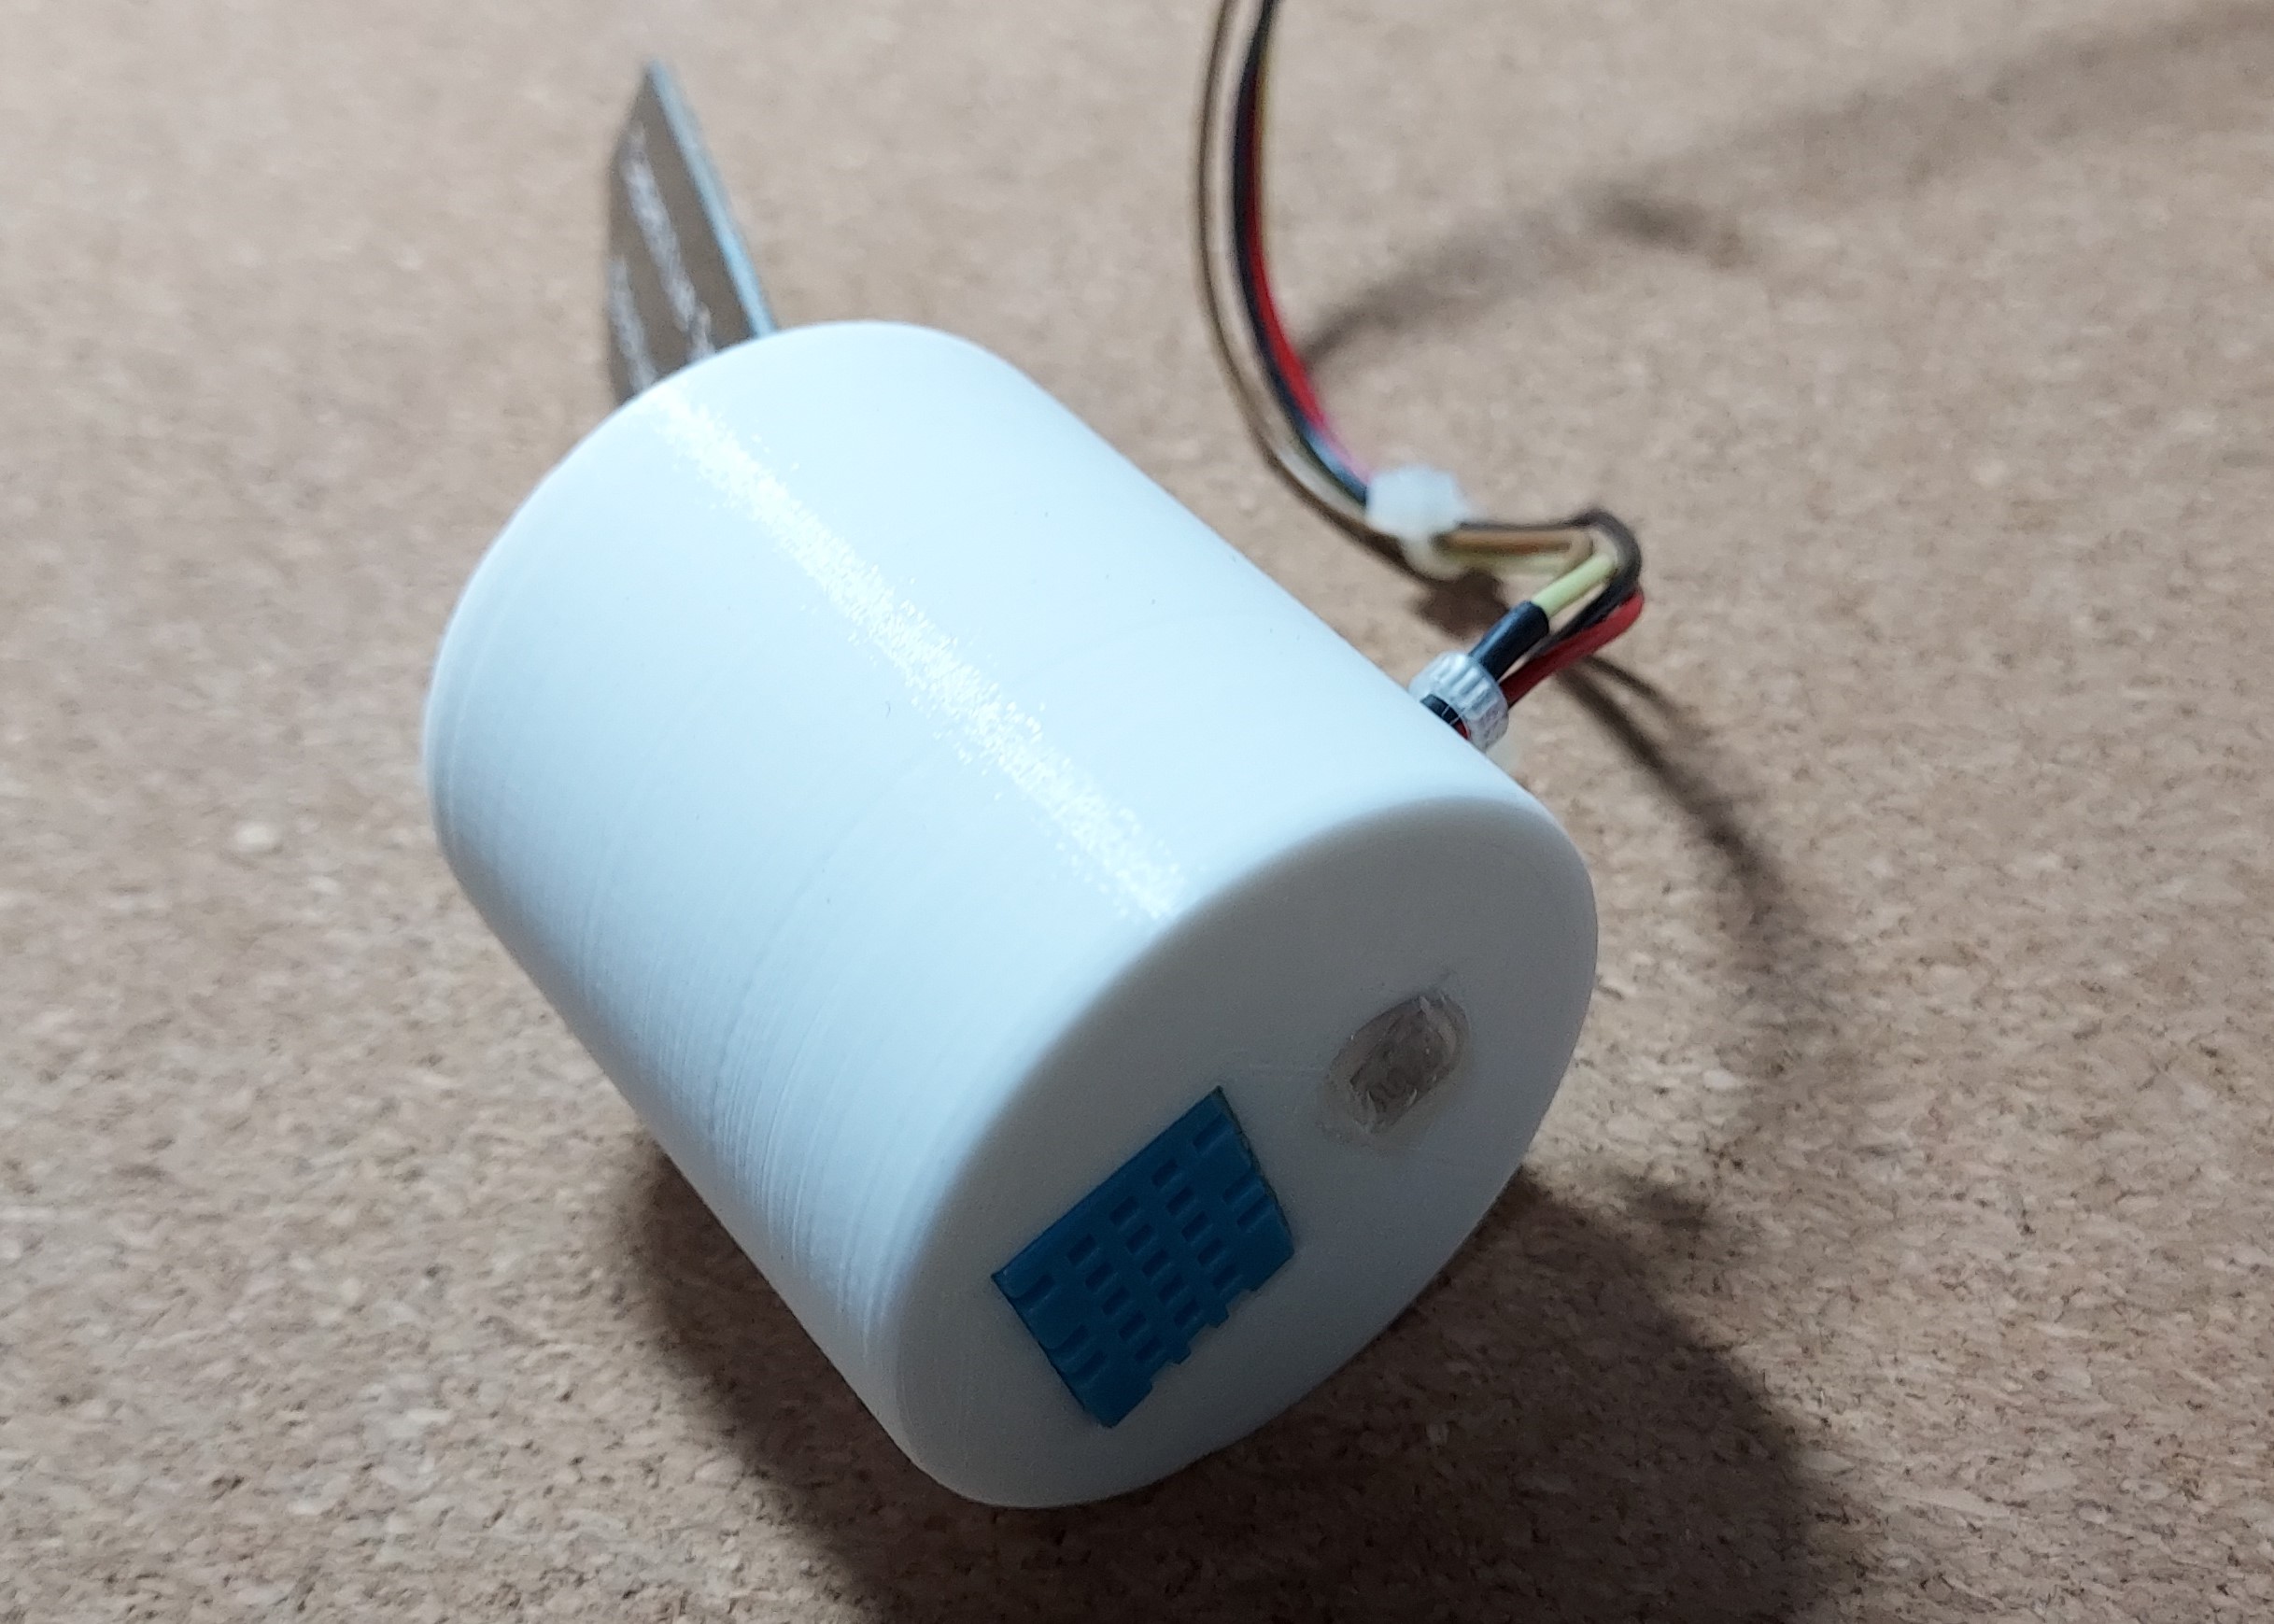
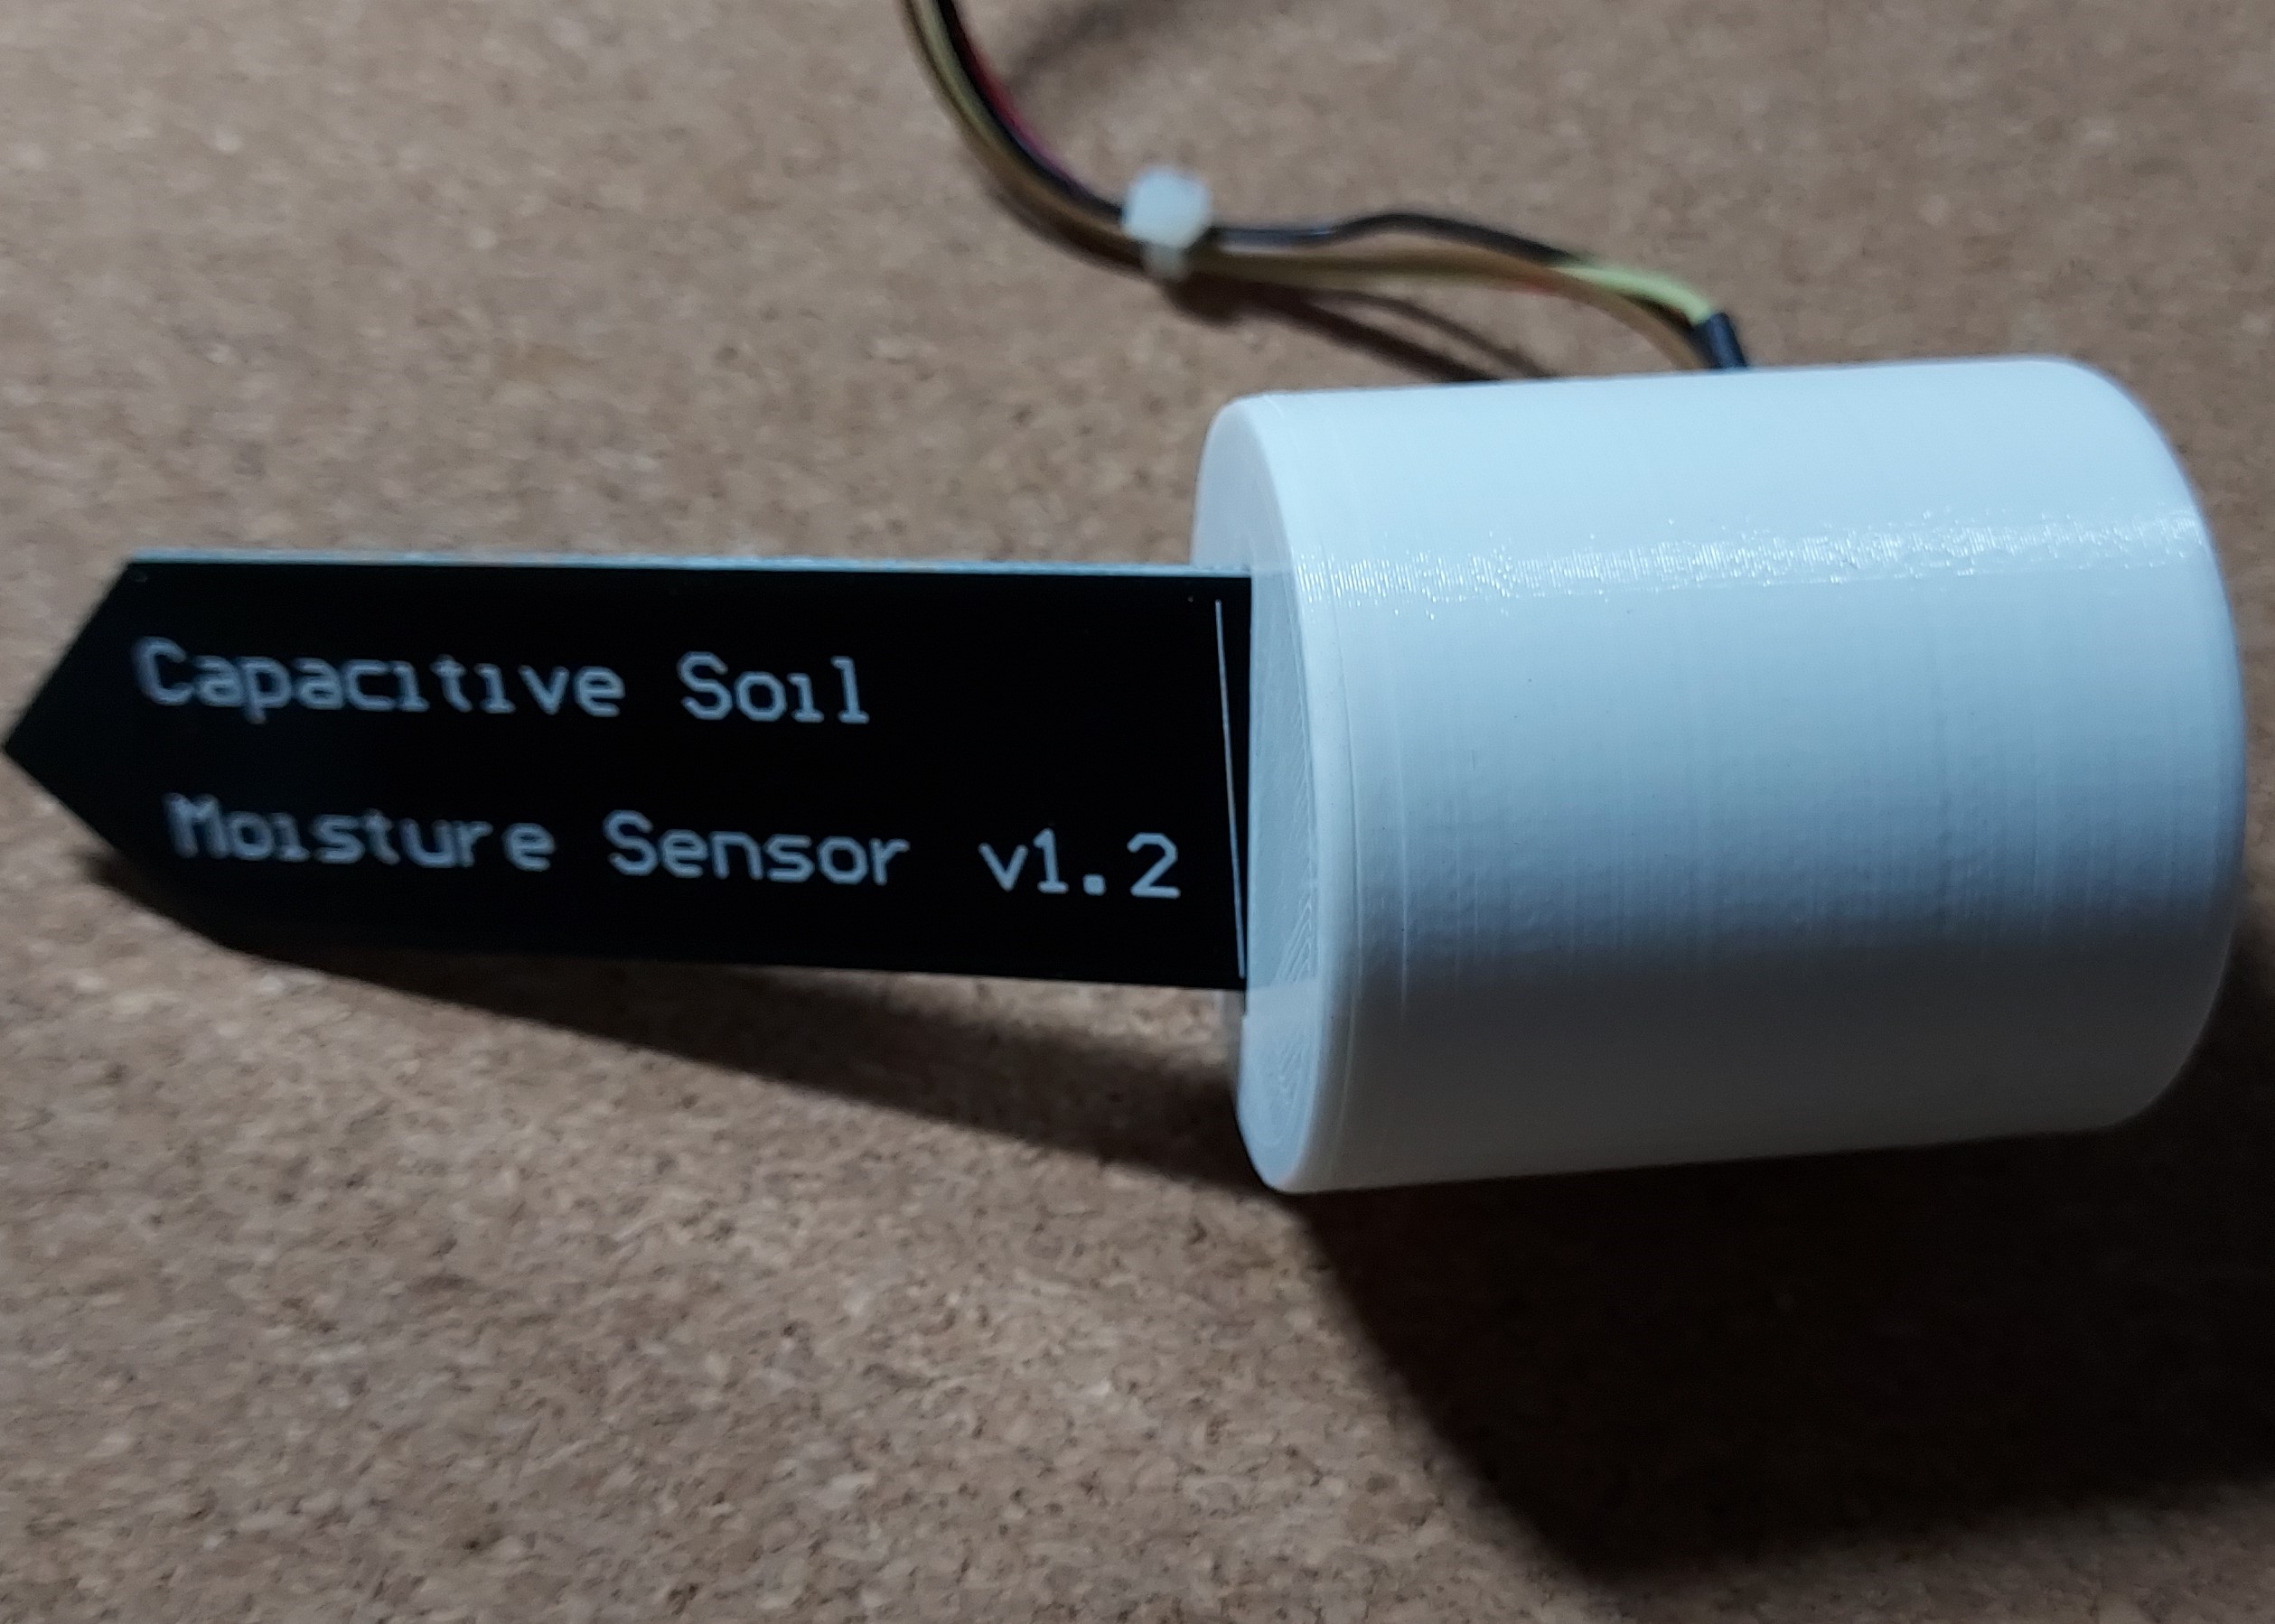
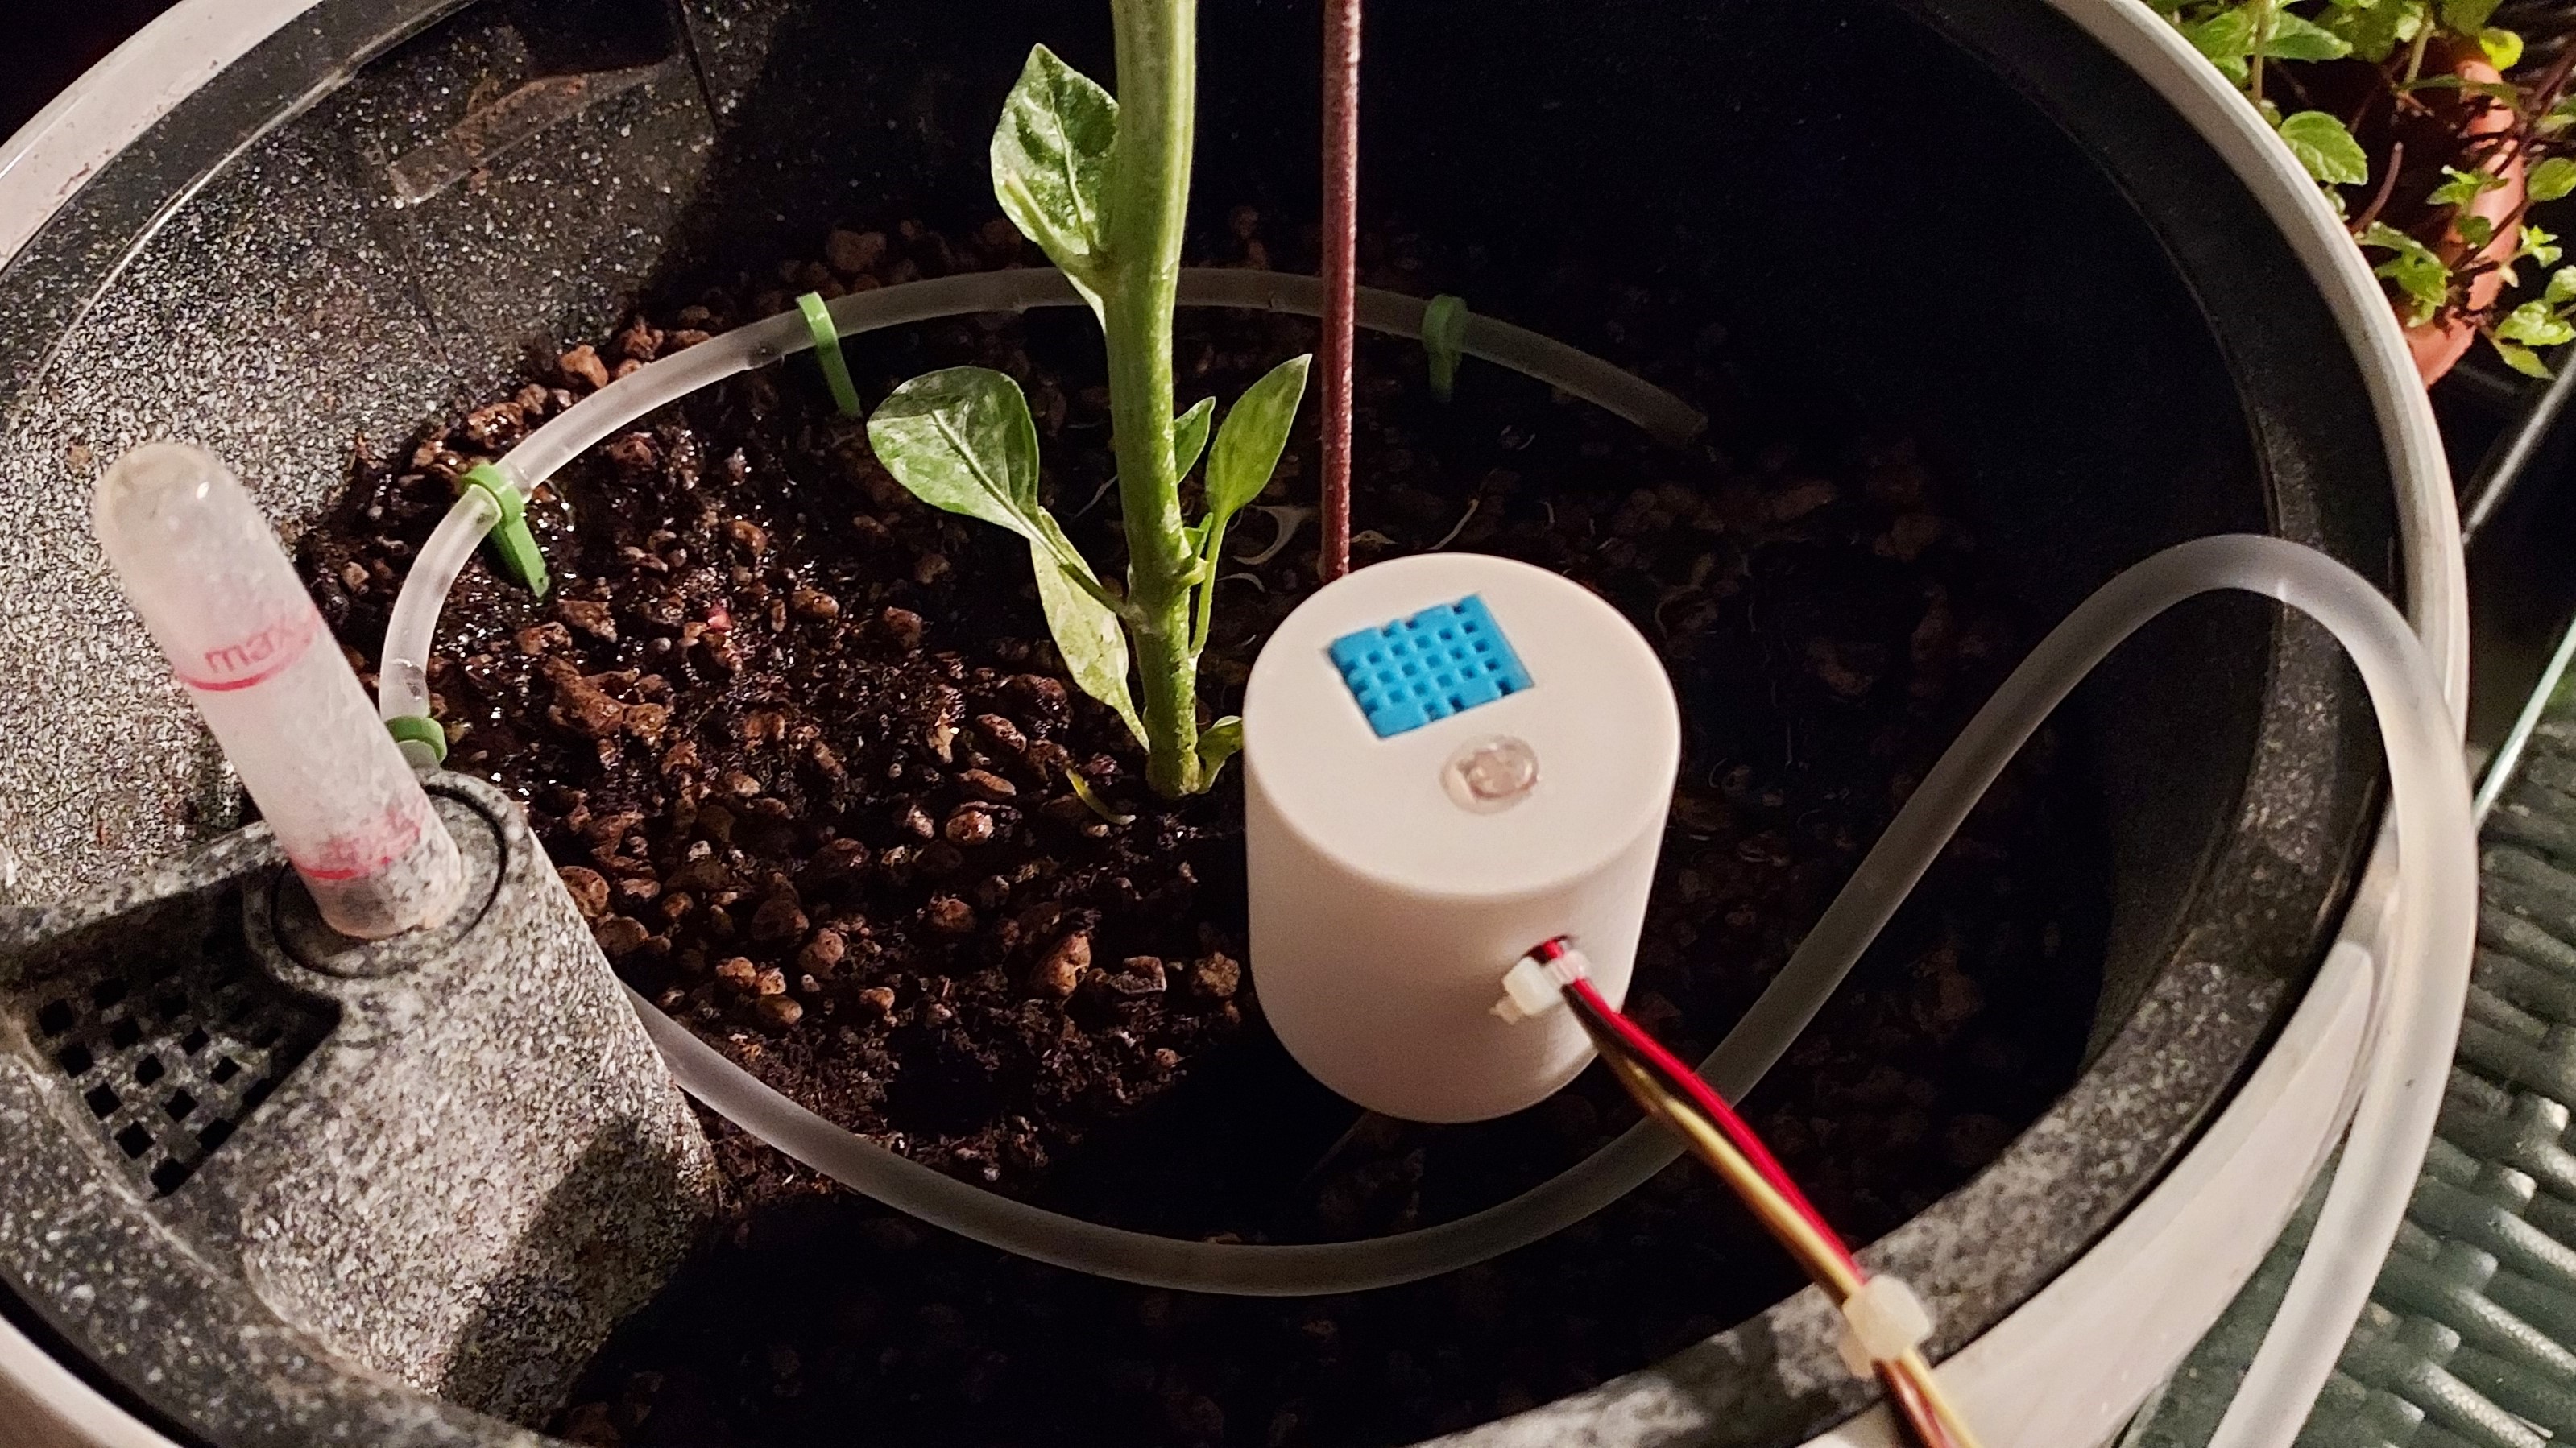
Next, I modelled the sensor housing. There was to be precise holes made for the DHT11 and the LDR (later removed) to fit through. The lid can slo be easily removed when needed and a slot is made for the soil moisture sensor to fit through.
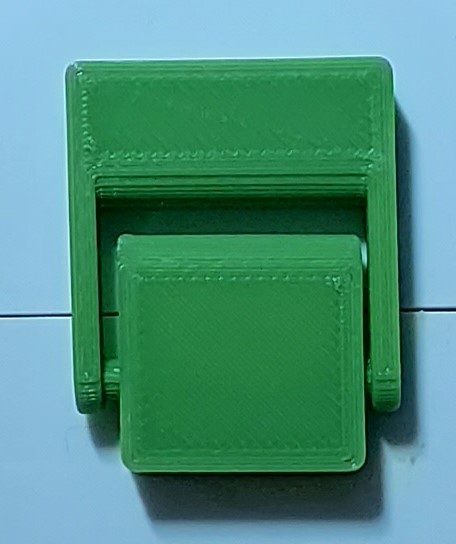
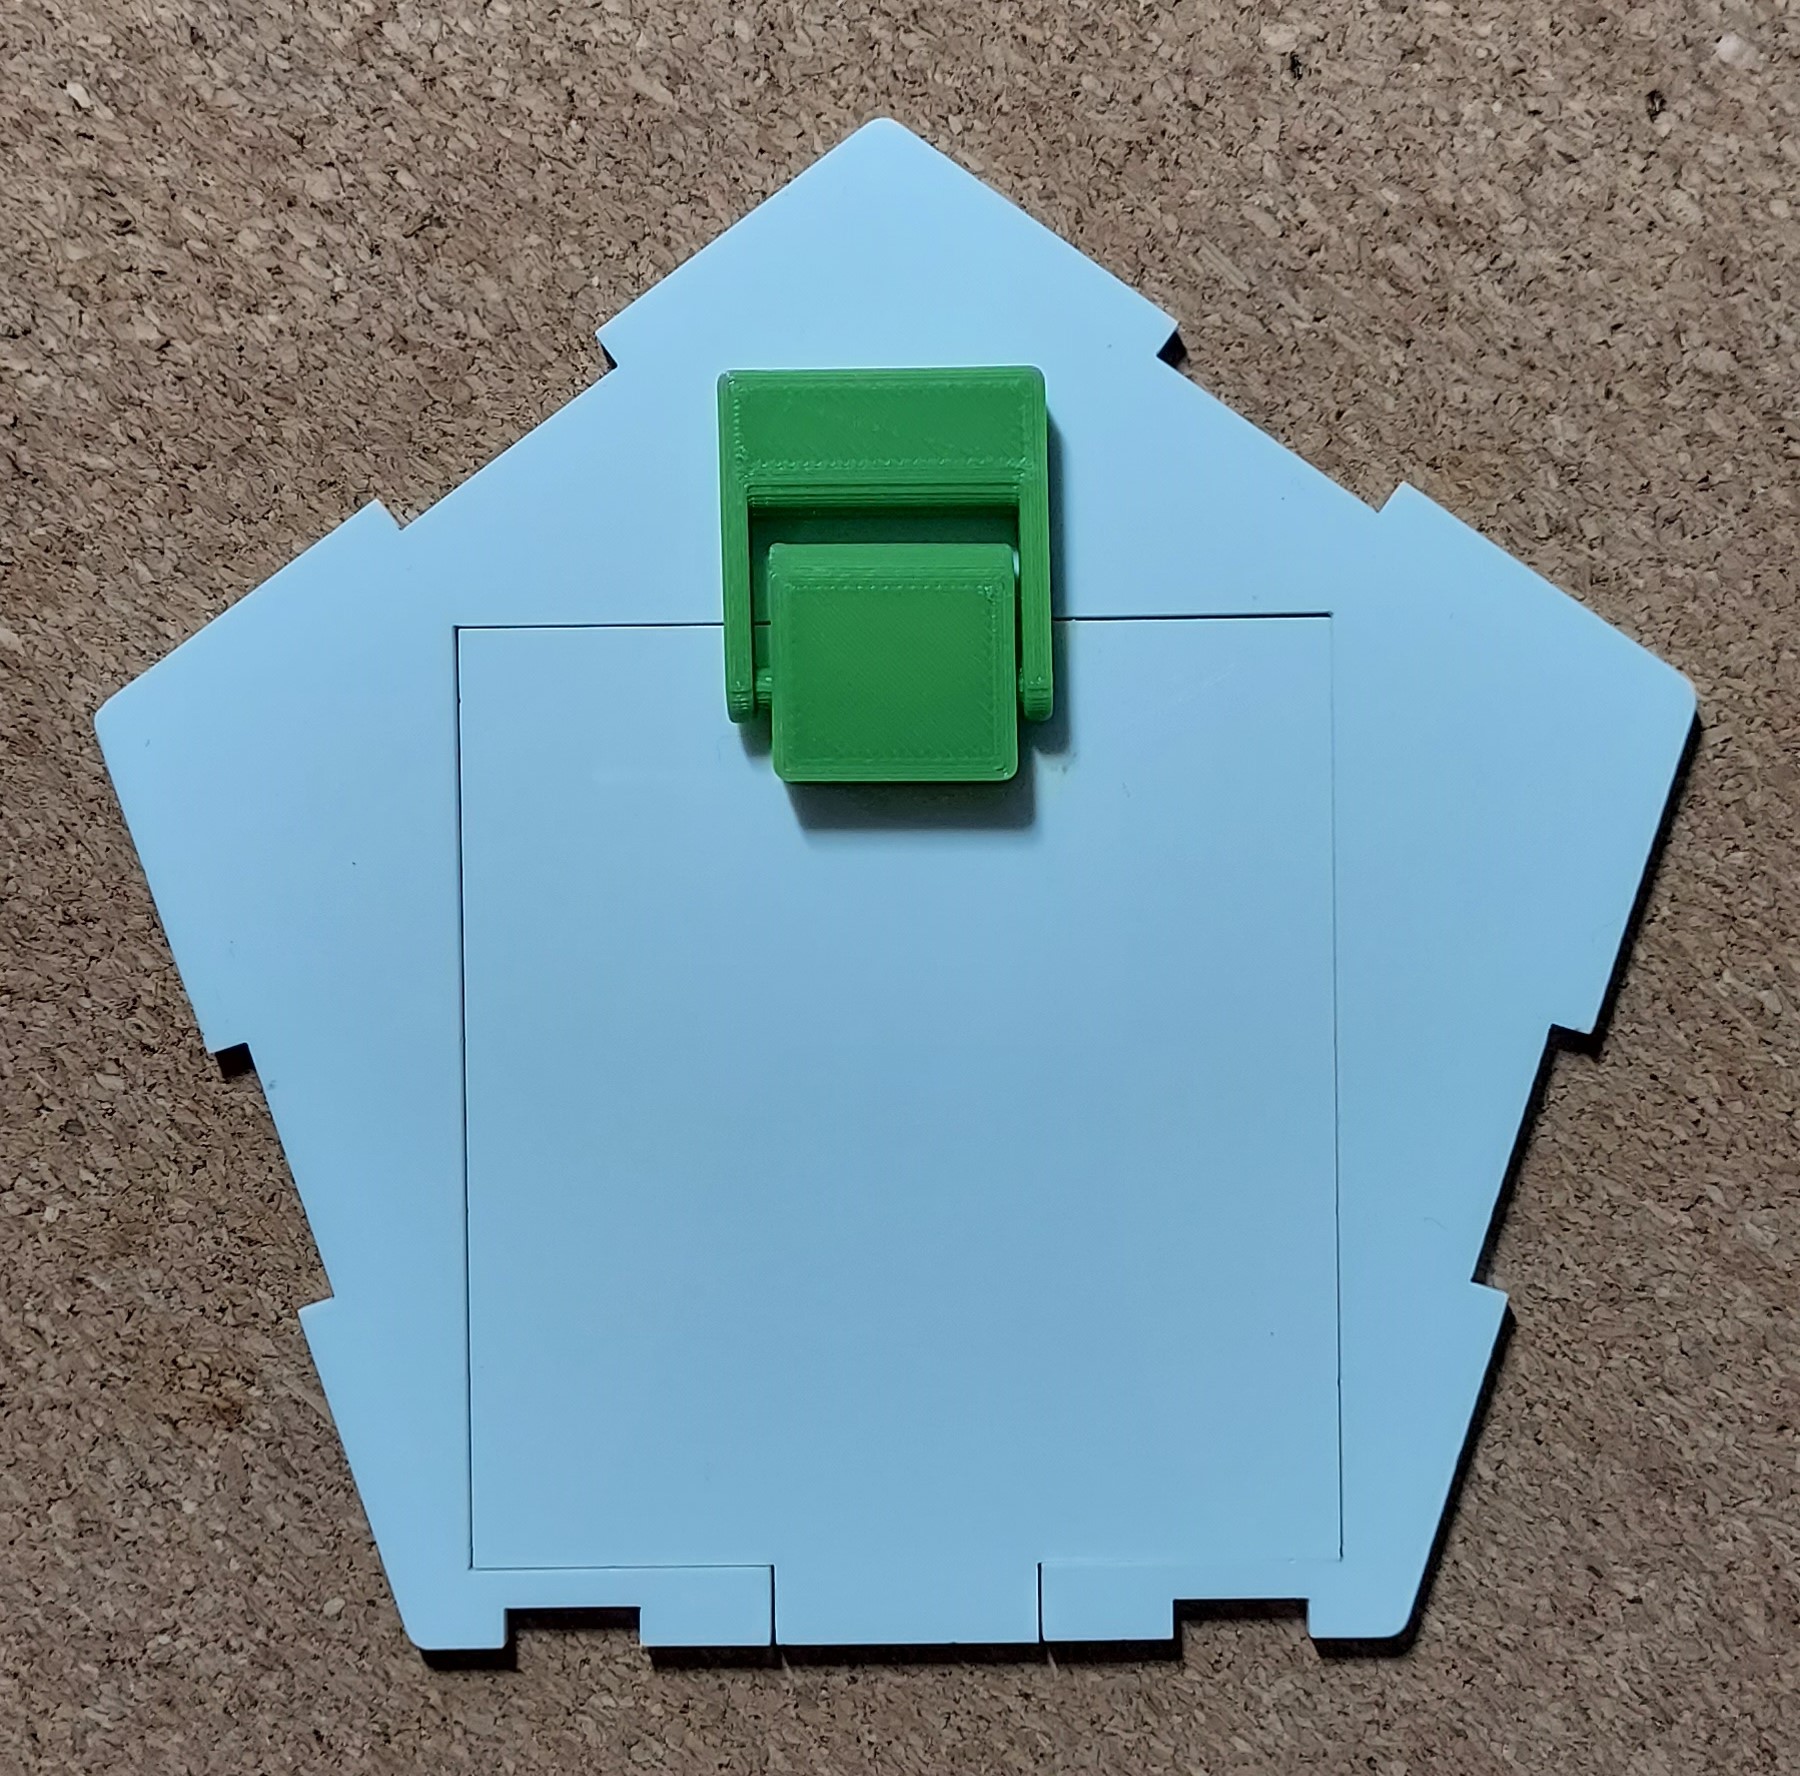
Next, I modelled the hinge that would allow me to open and close the back lid with ease. I had to trial and error a few times to get the clearance correct. This is the finalised design.
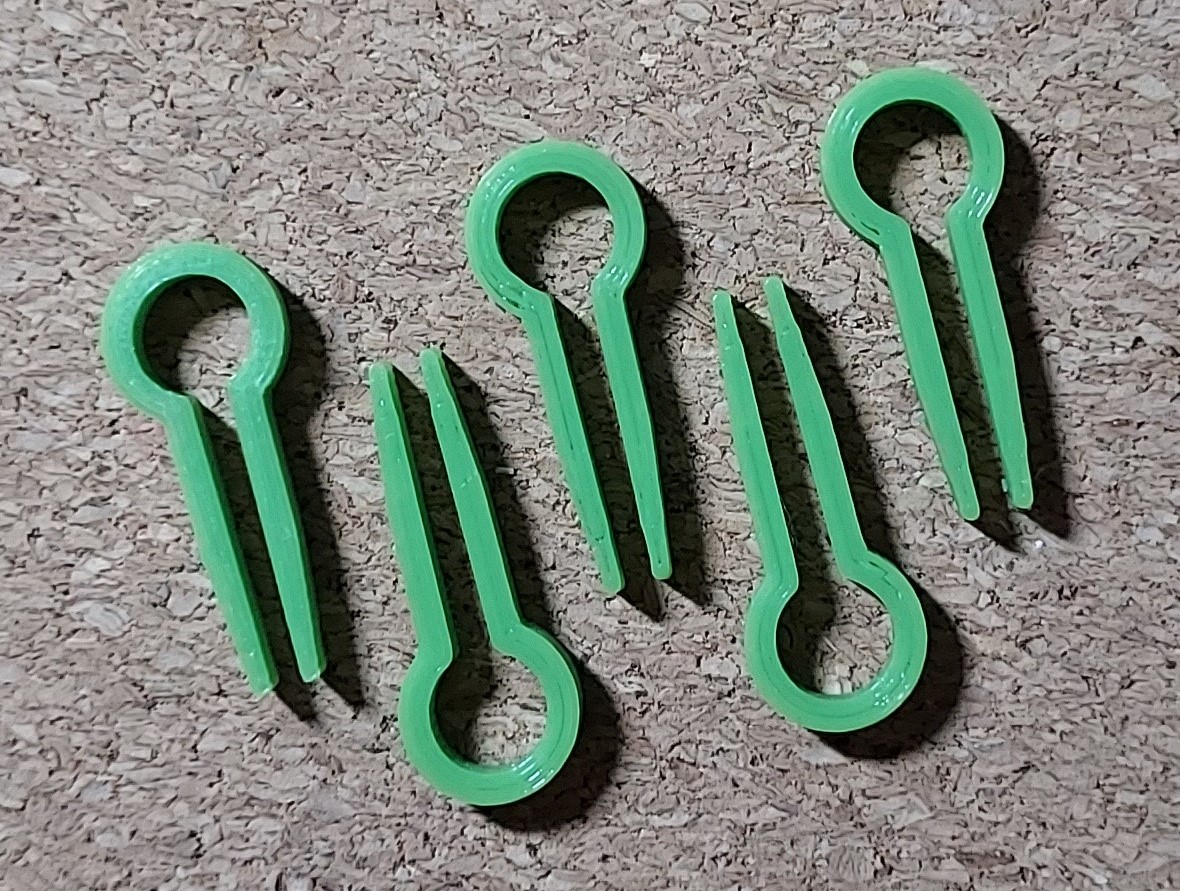
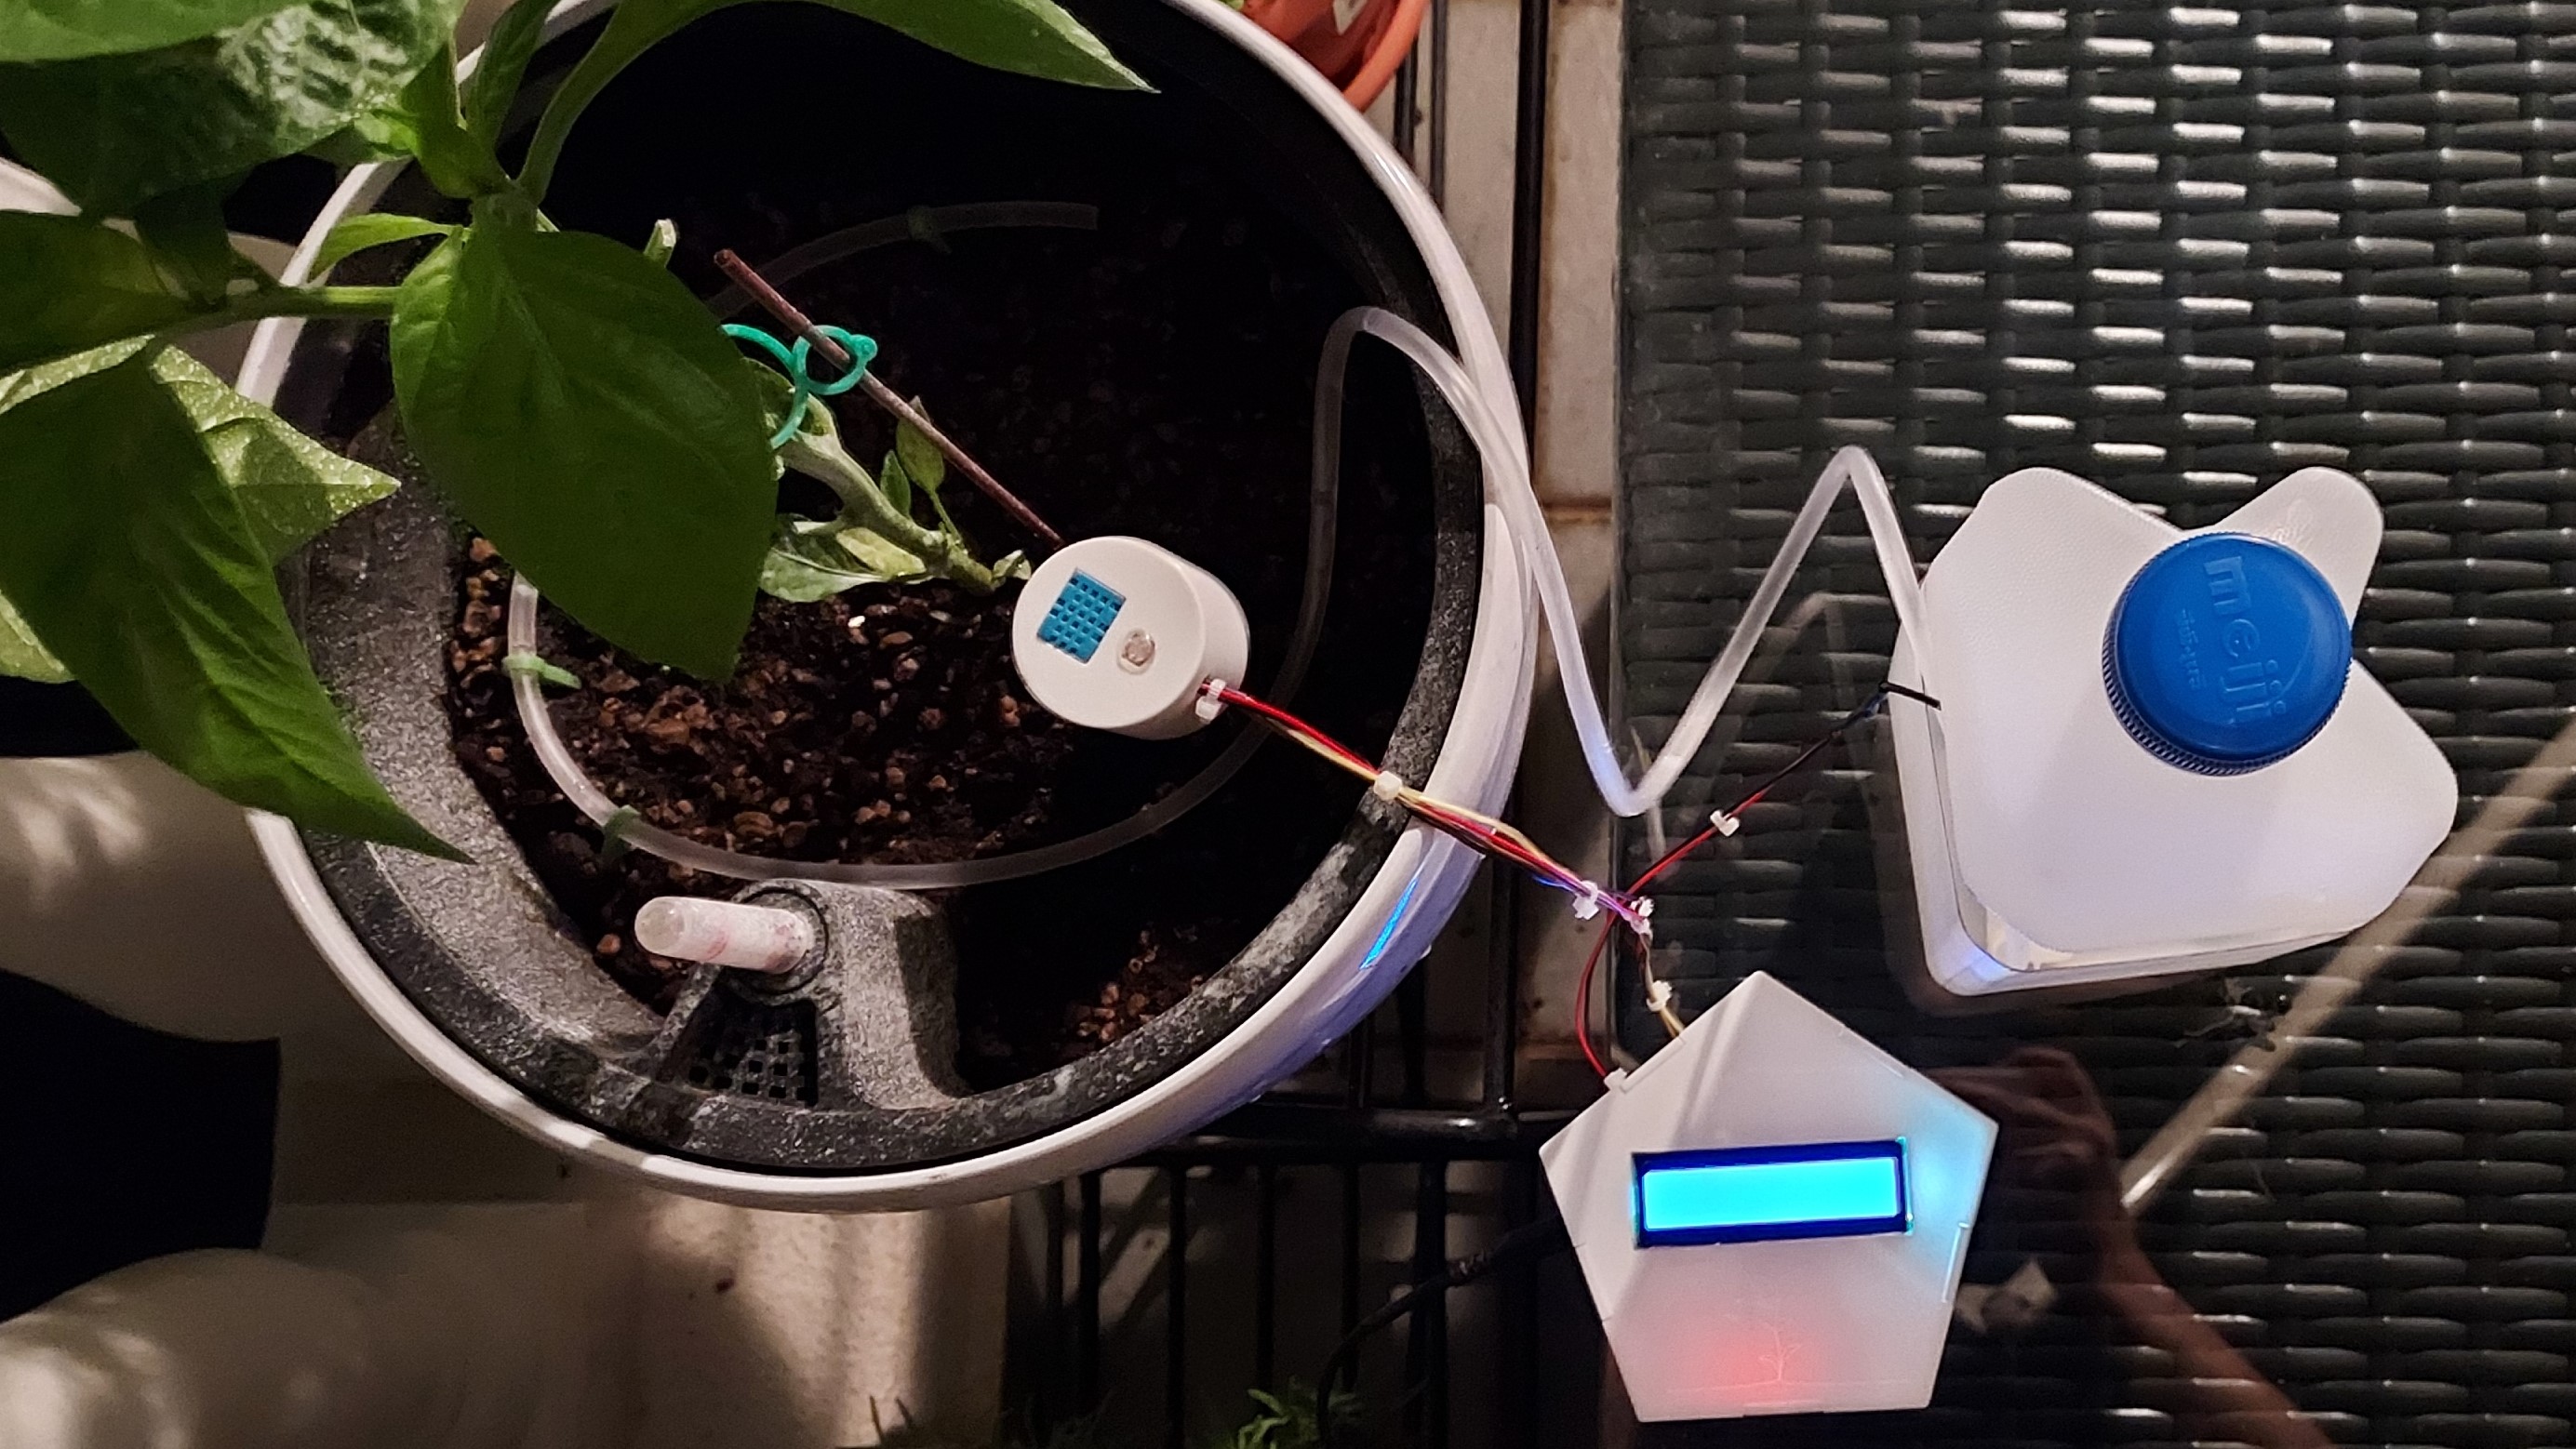
Lastly, to help the water-tube stay better on the surface of the soil, I decided to print a few 'pegs' to stick in the soil.
Printing and Laser Cutting
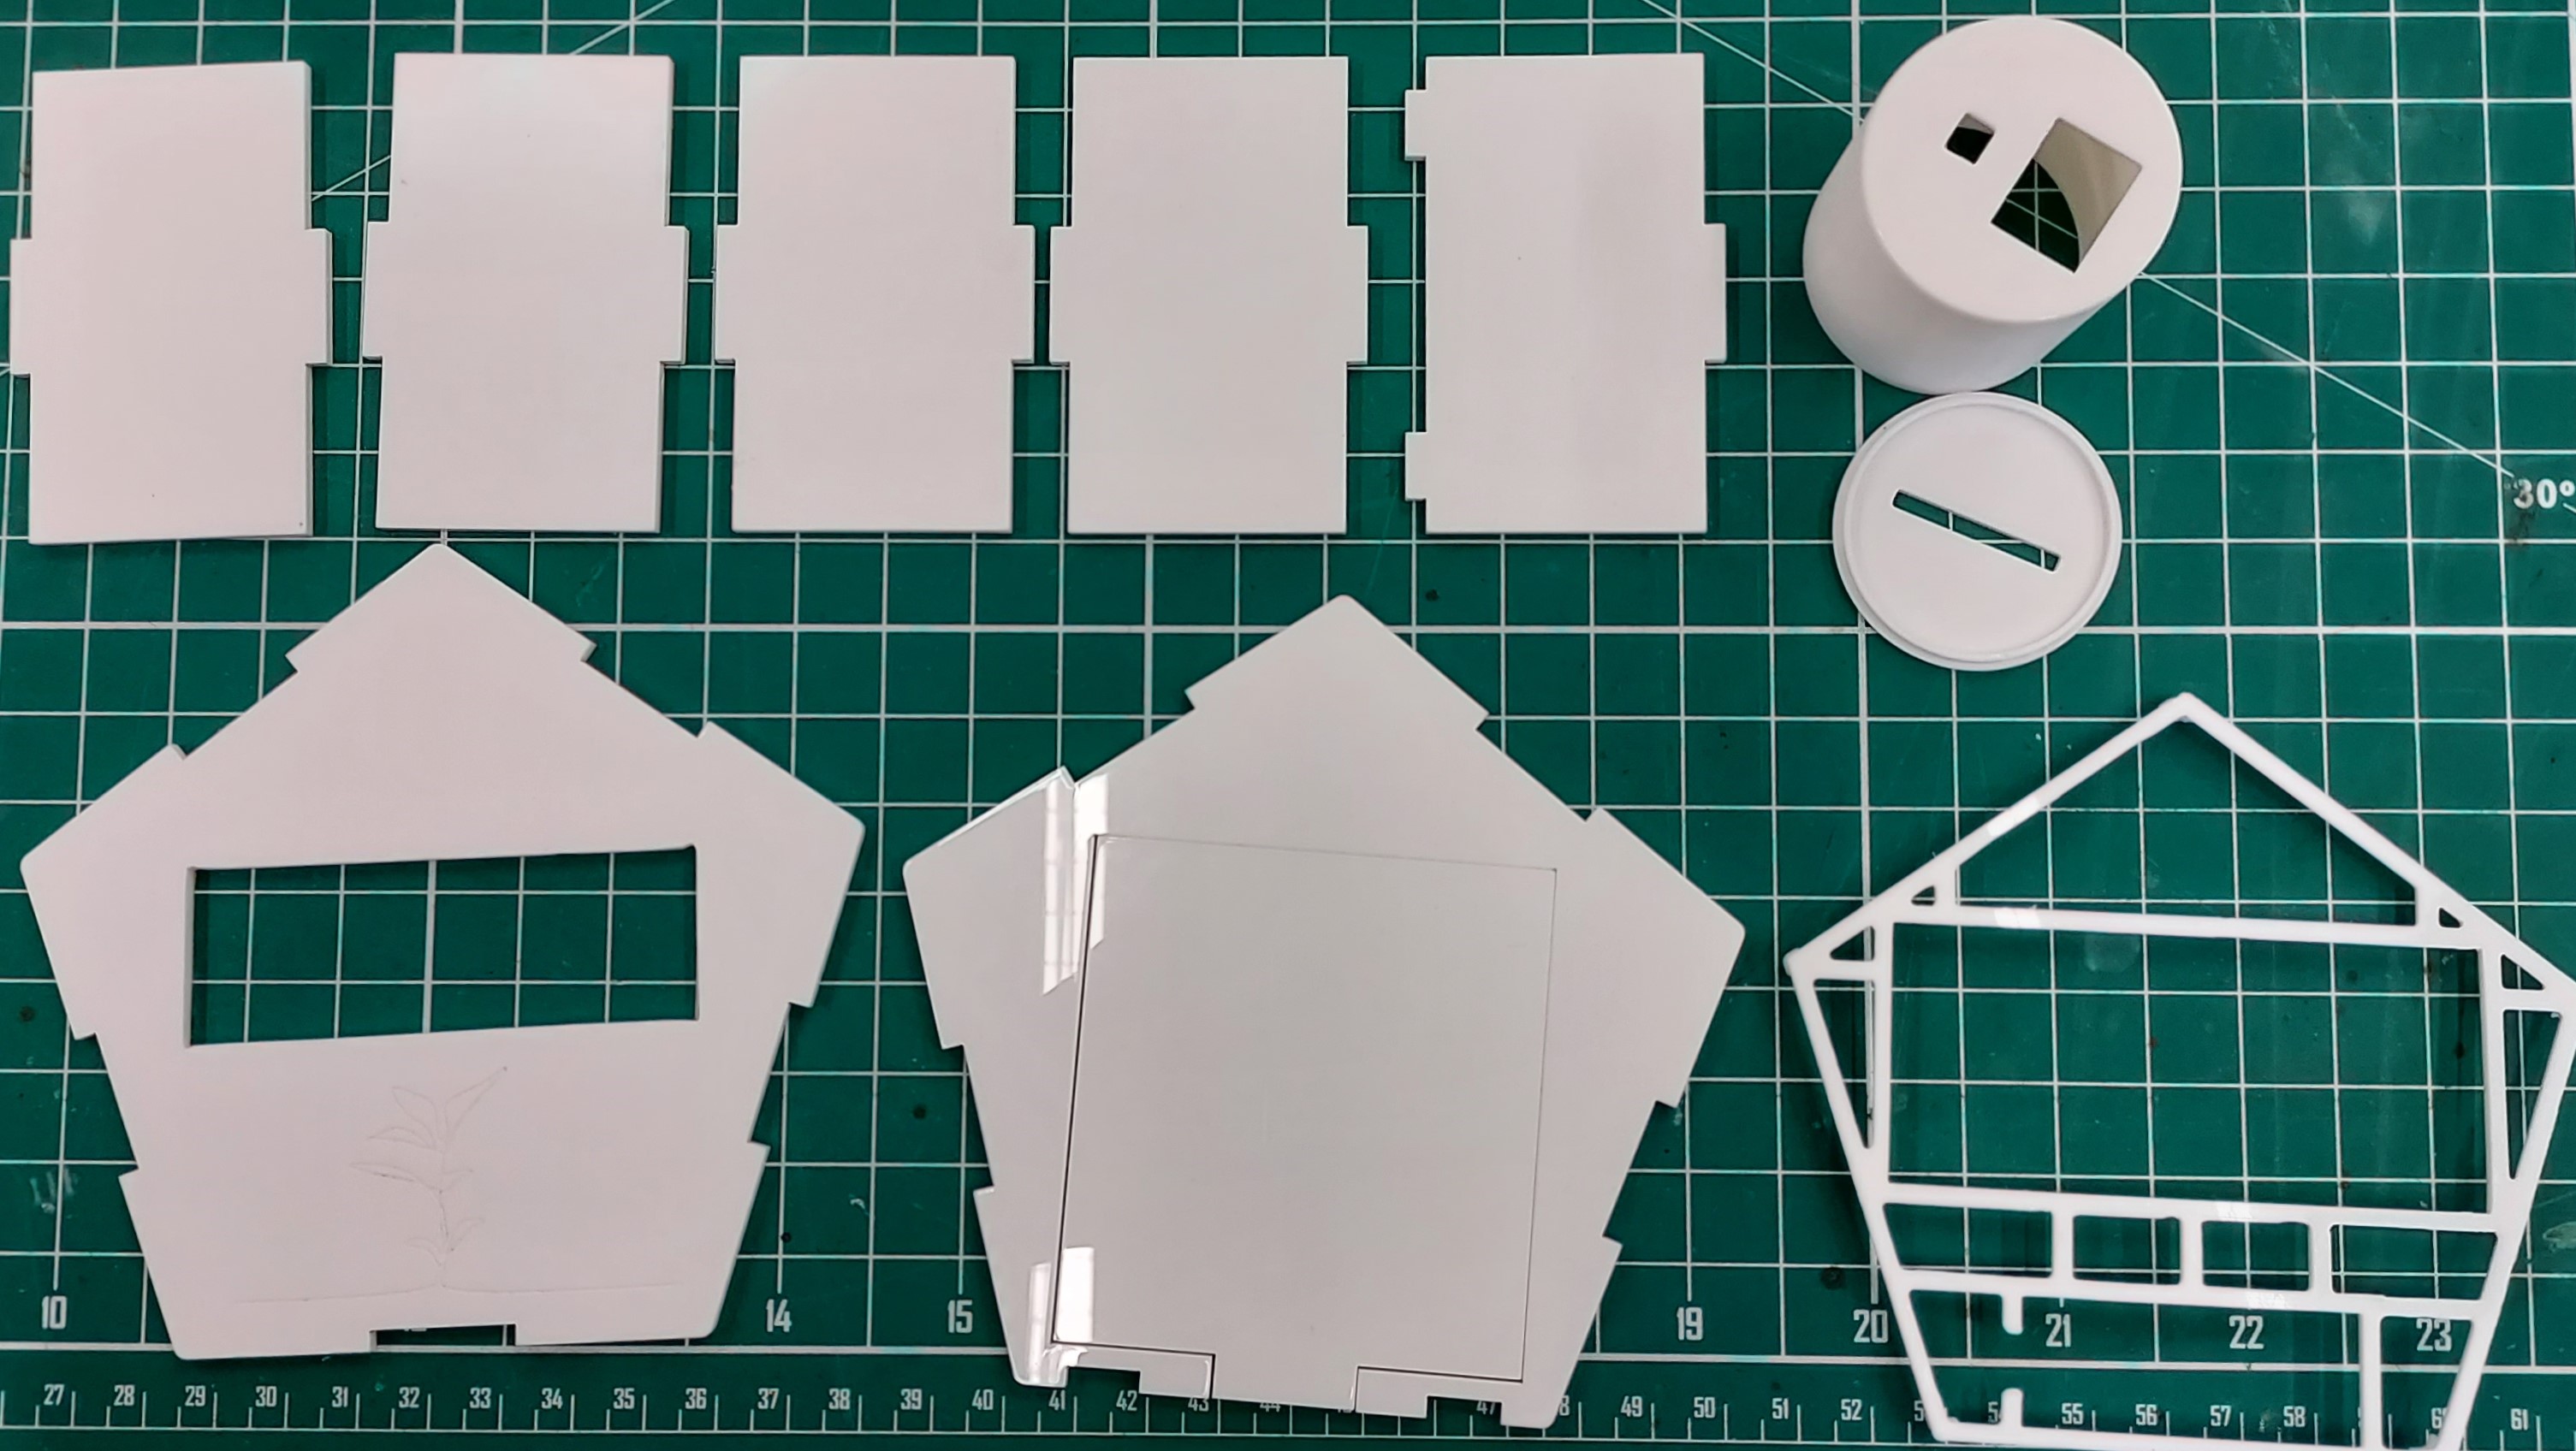
After the modelling was completed I started with the printing and laser cutting of my pieces. To start off, I laser cut my main housing by exporting each file in DXF format and I added a graphic for the front piece of the housing before laser cutting. Then I printed the pcb mount, sensor housing and the hinges and the pegs I would be using.
Circuitry
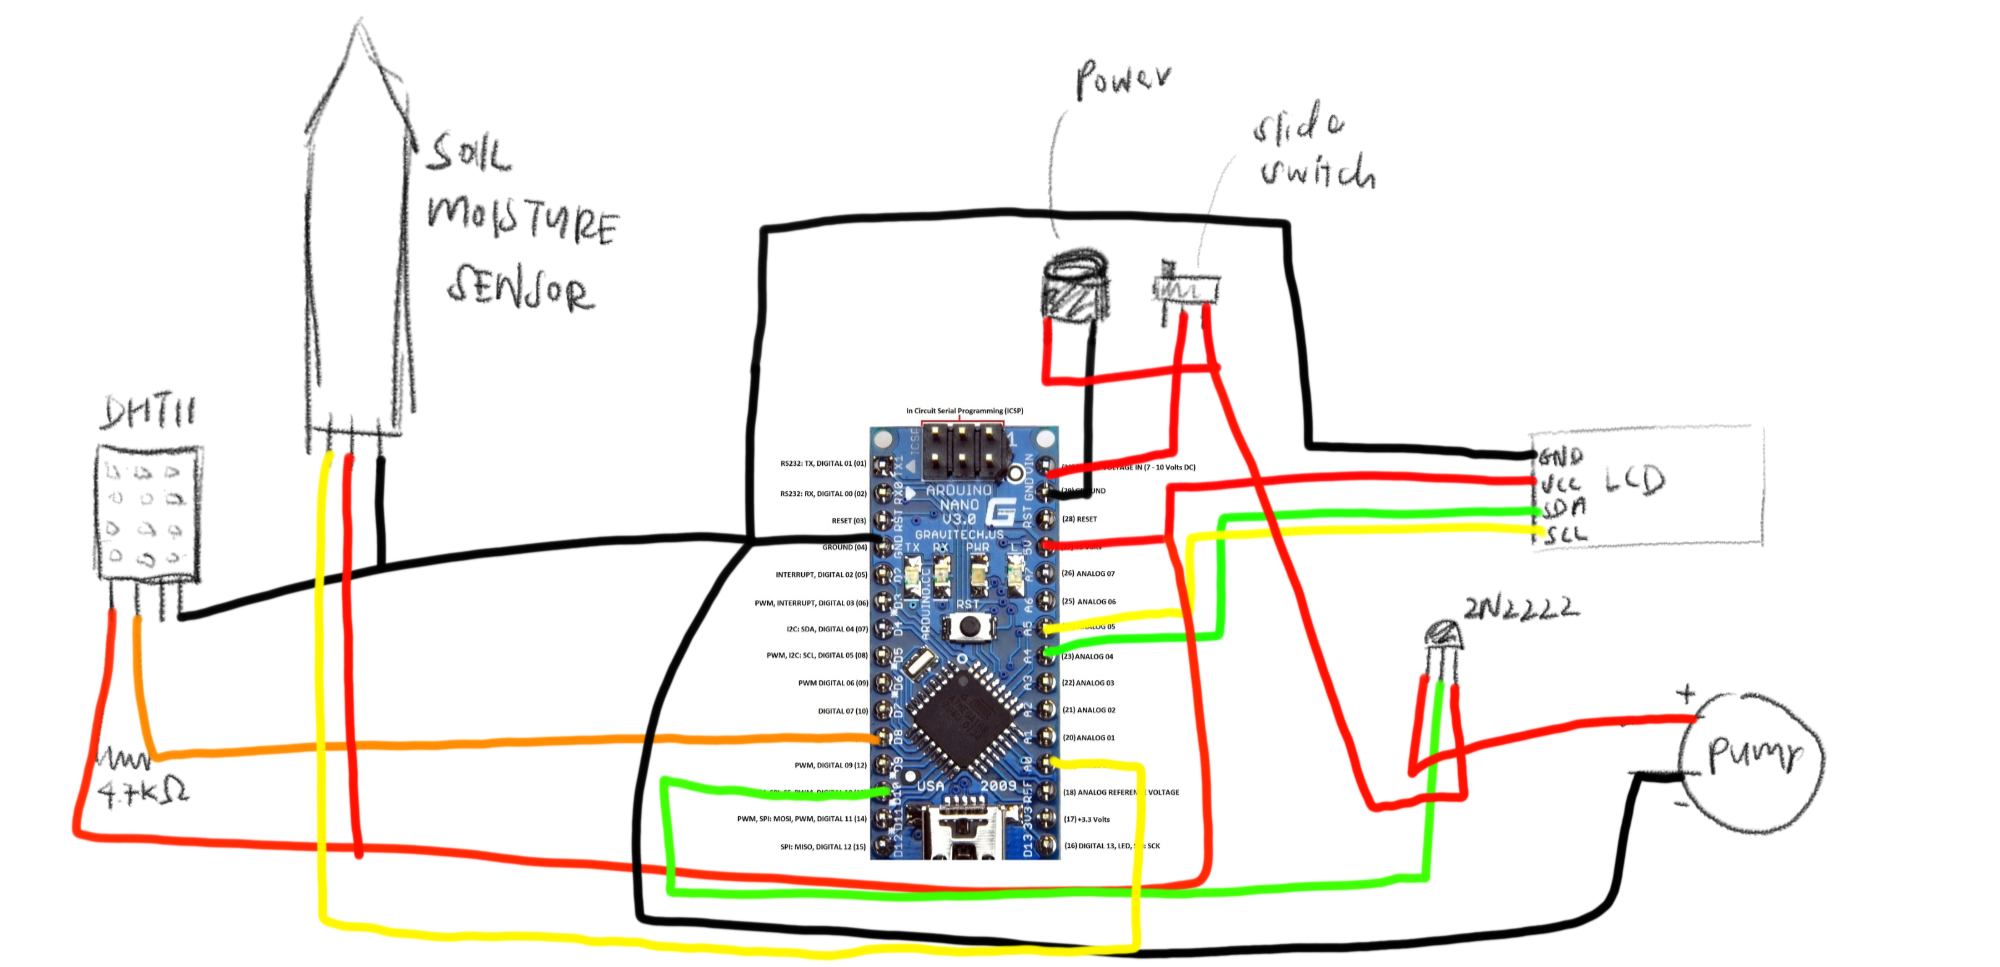
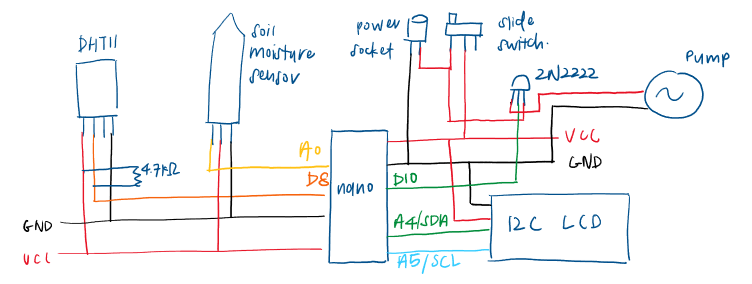
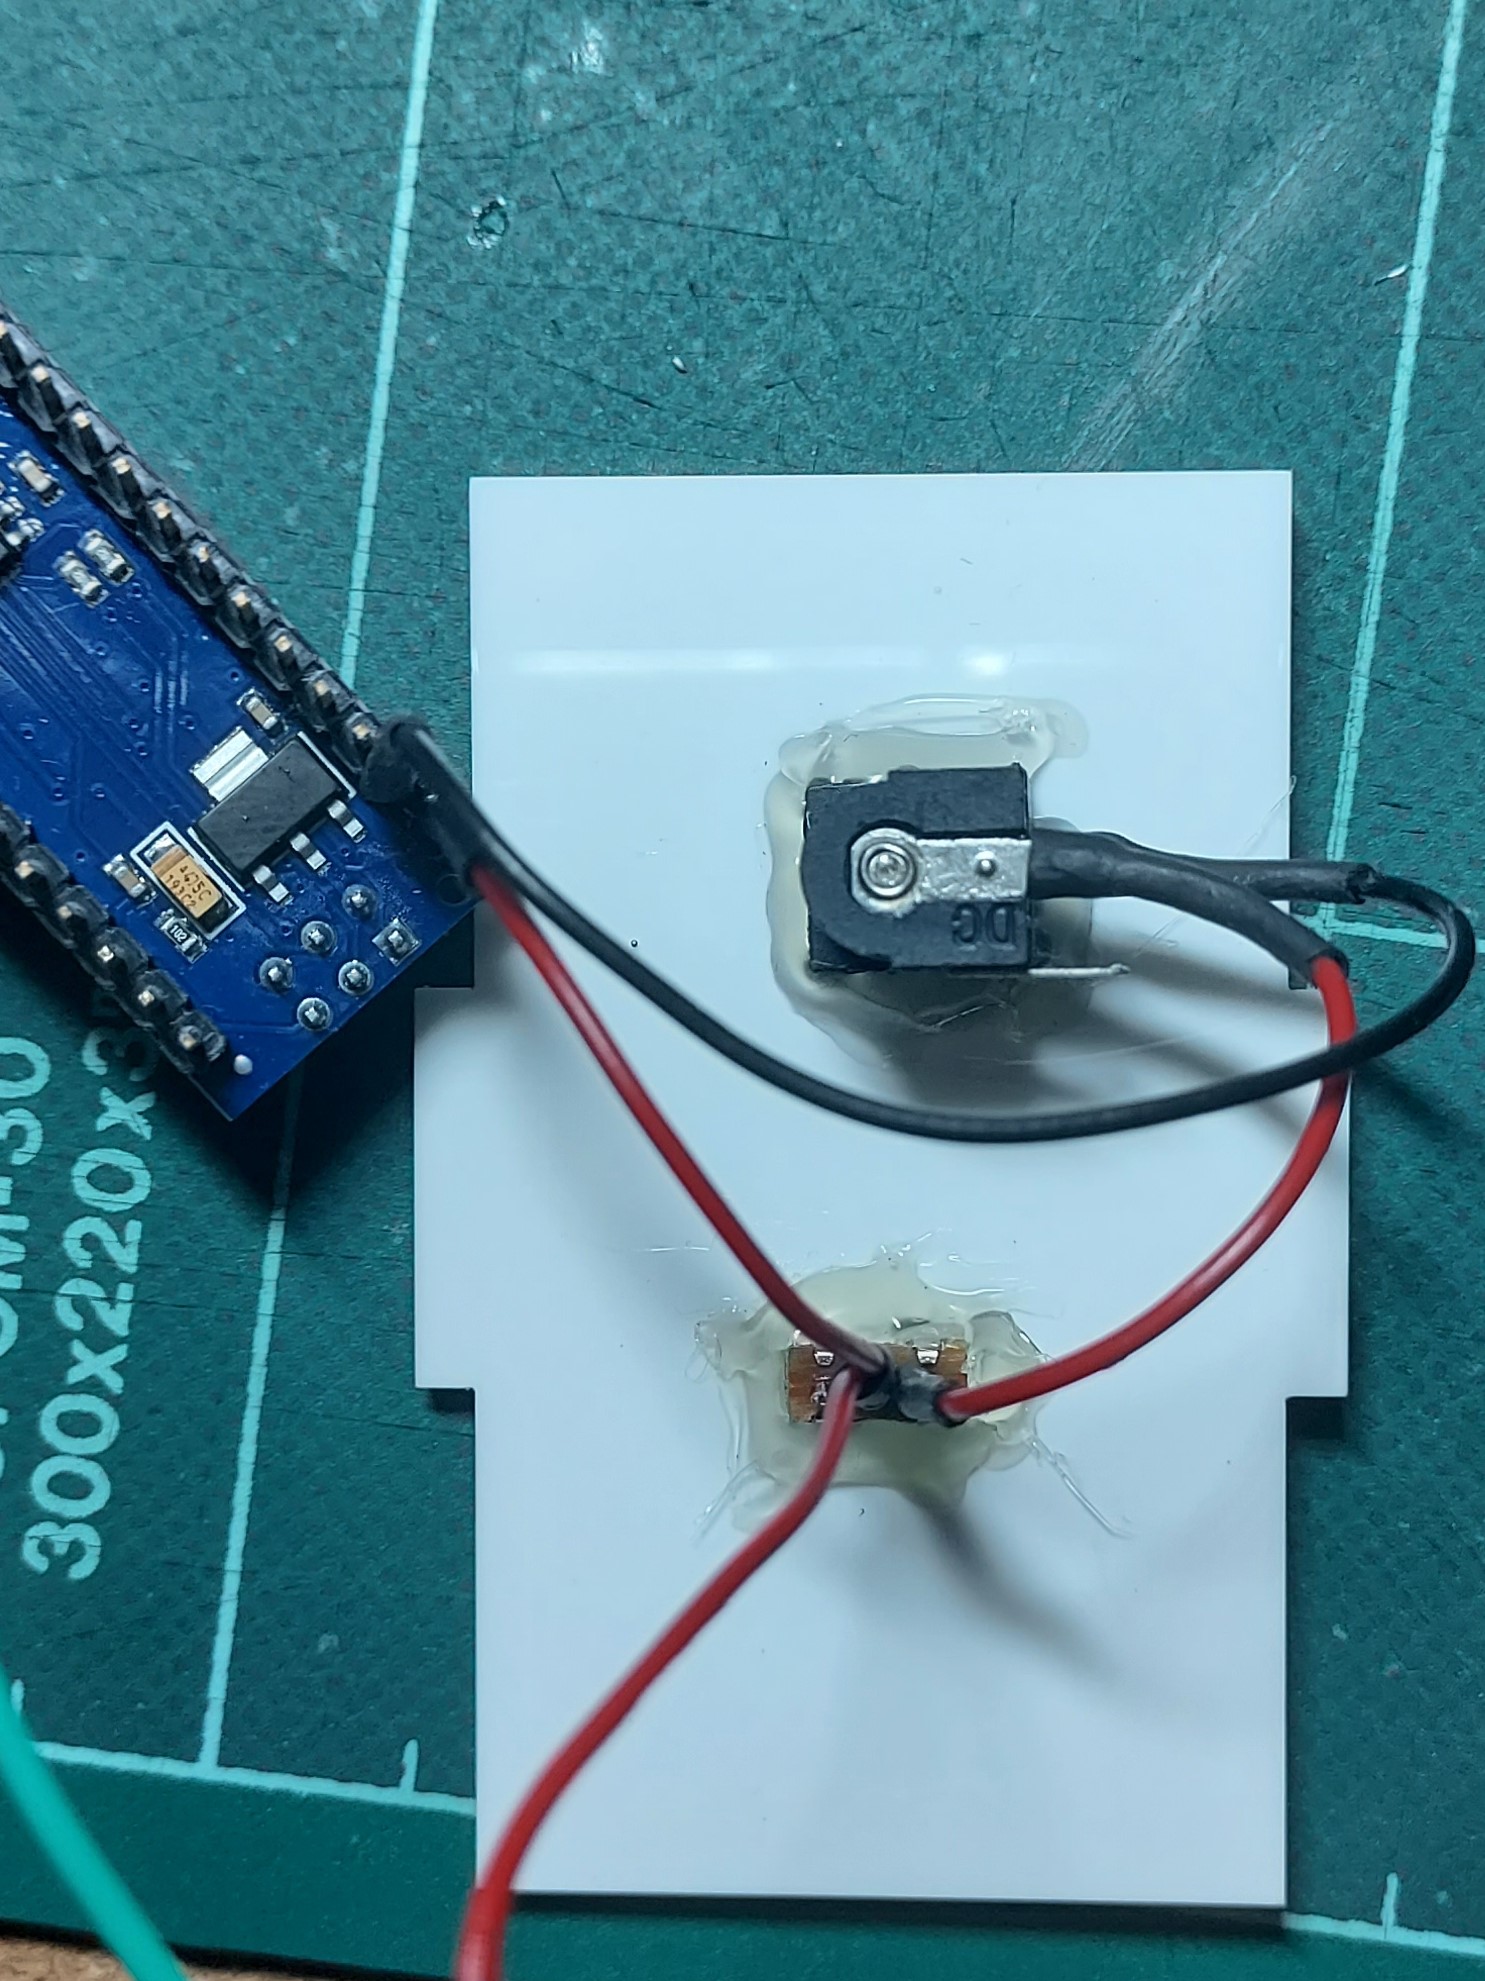
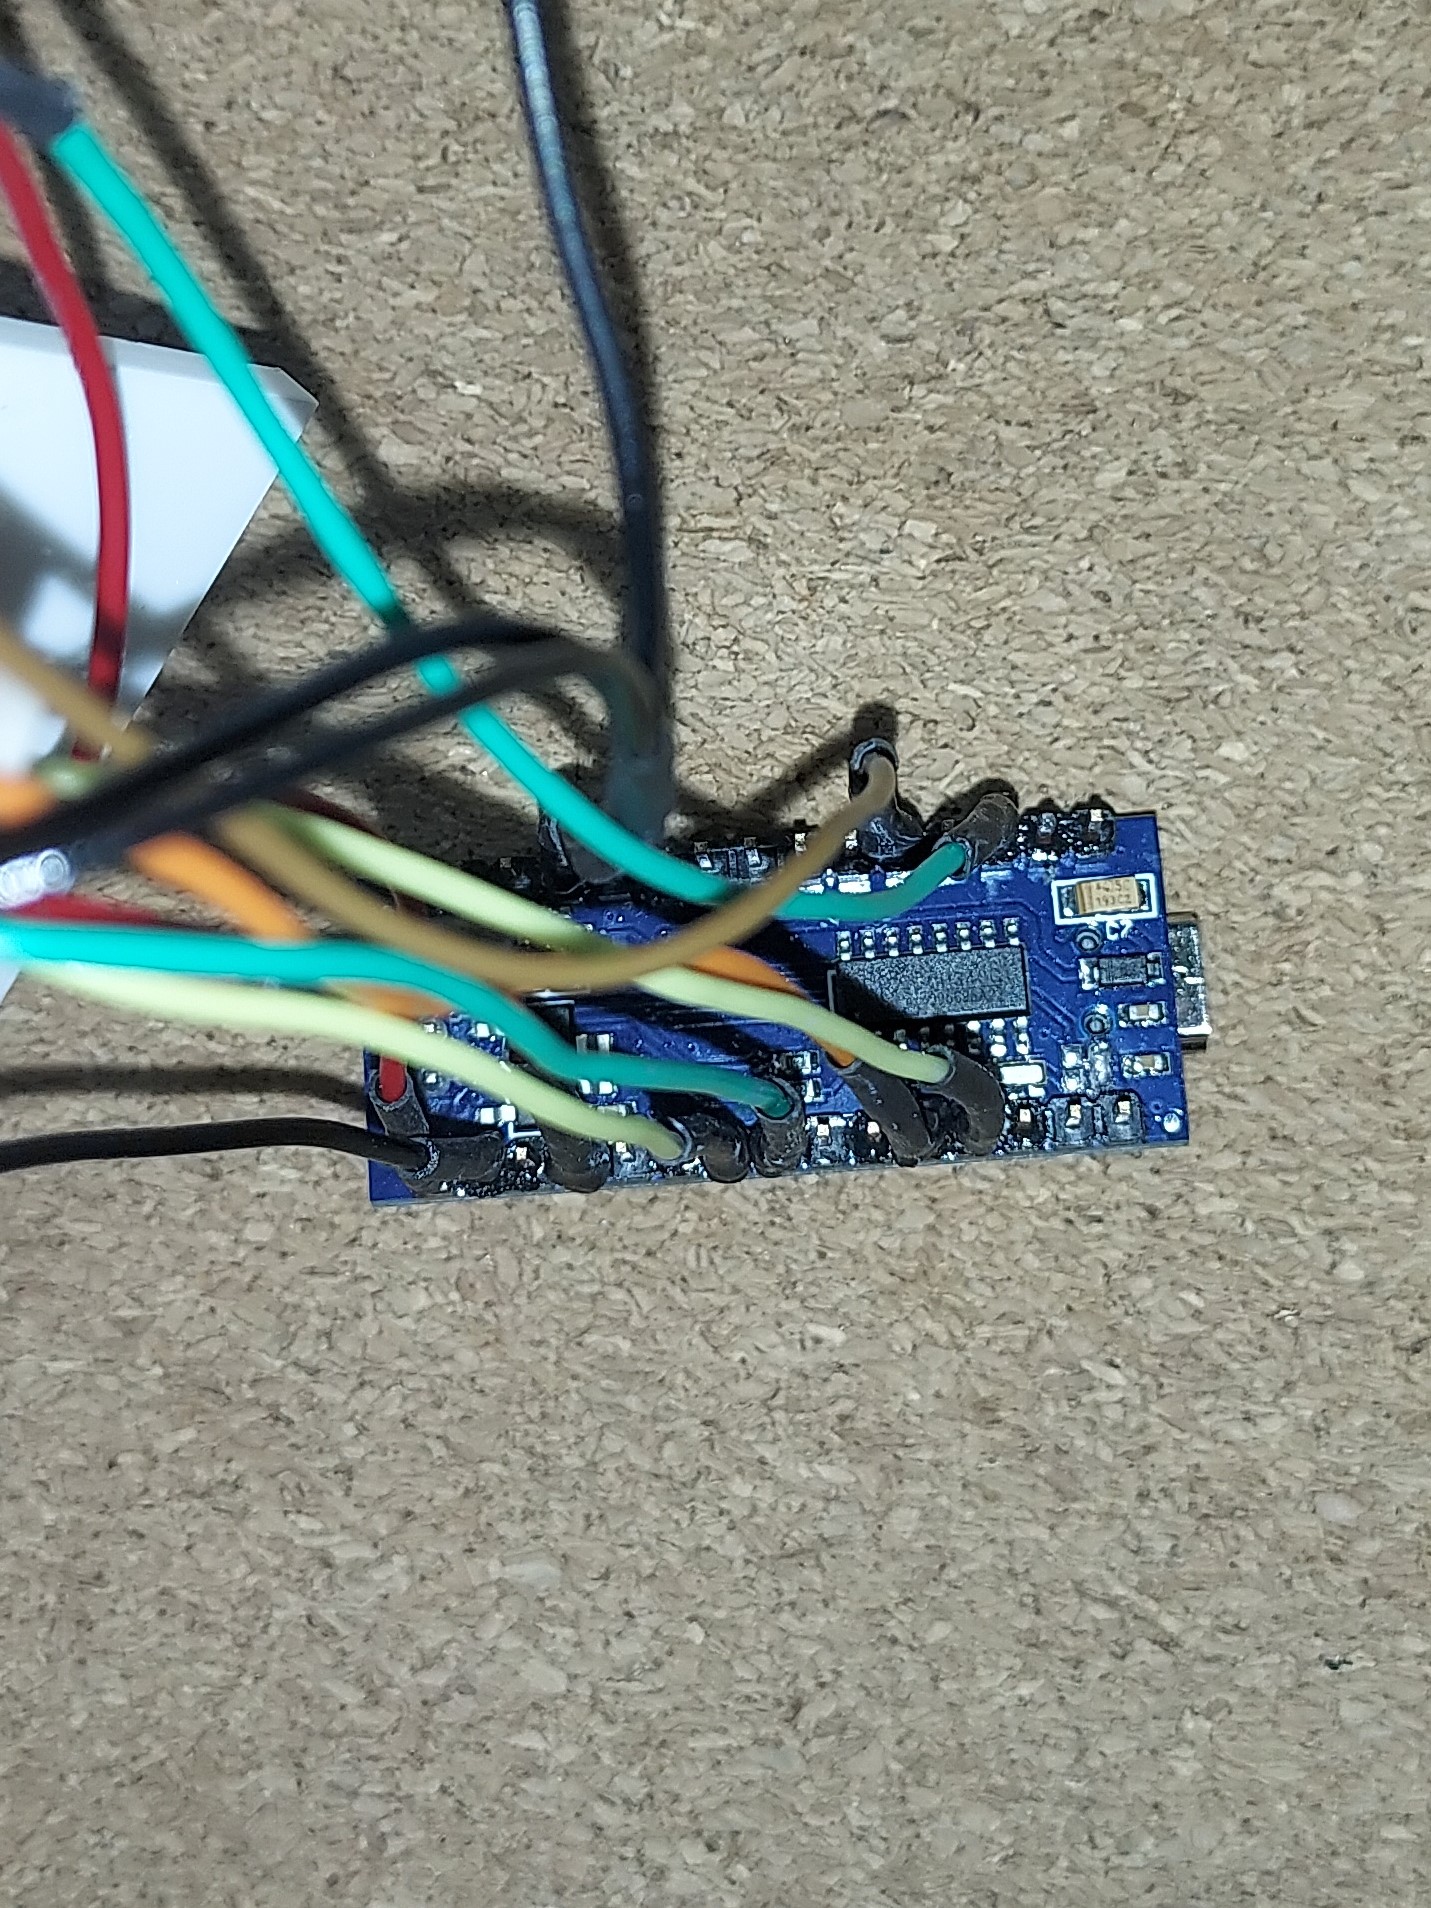
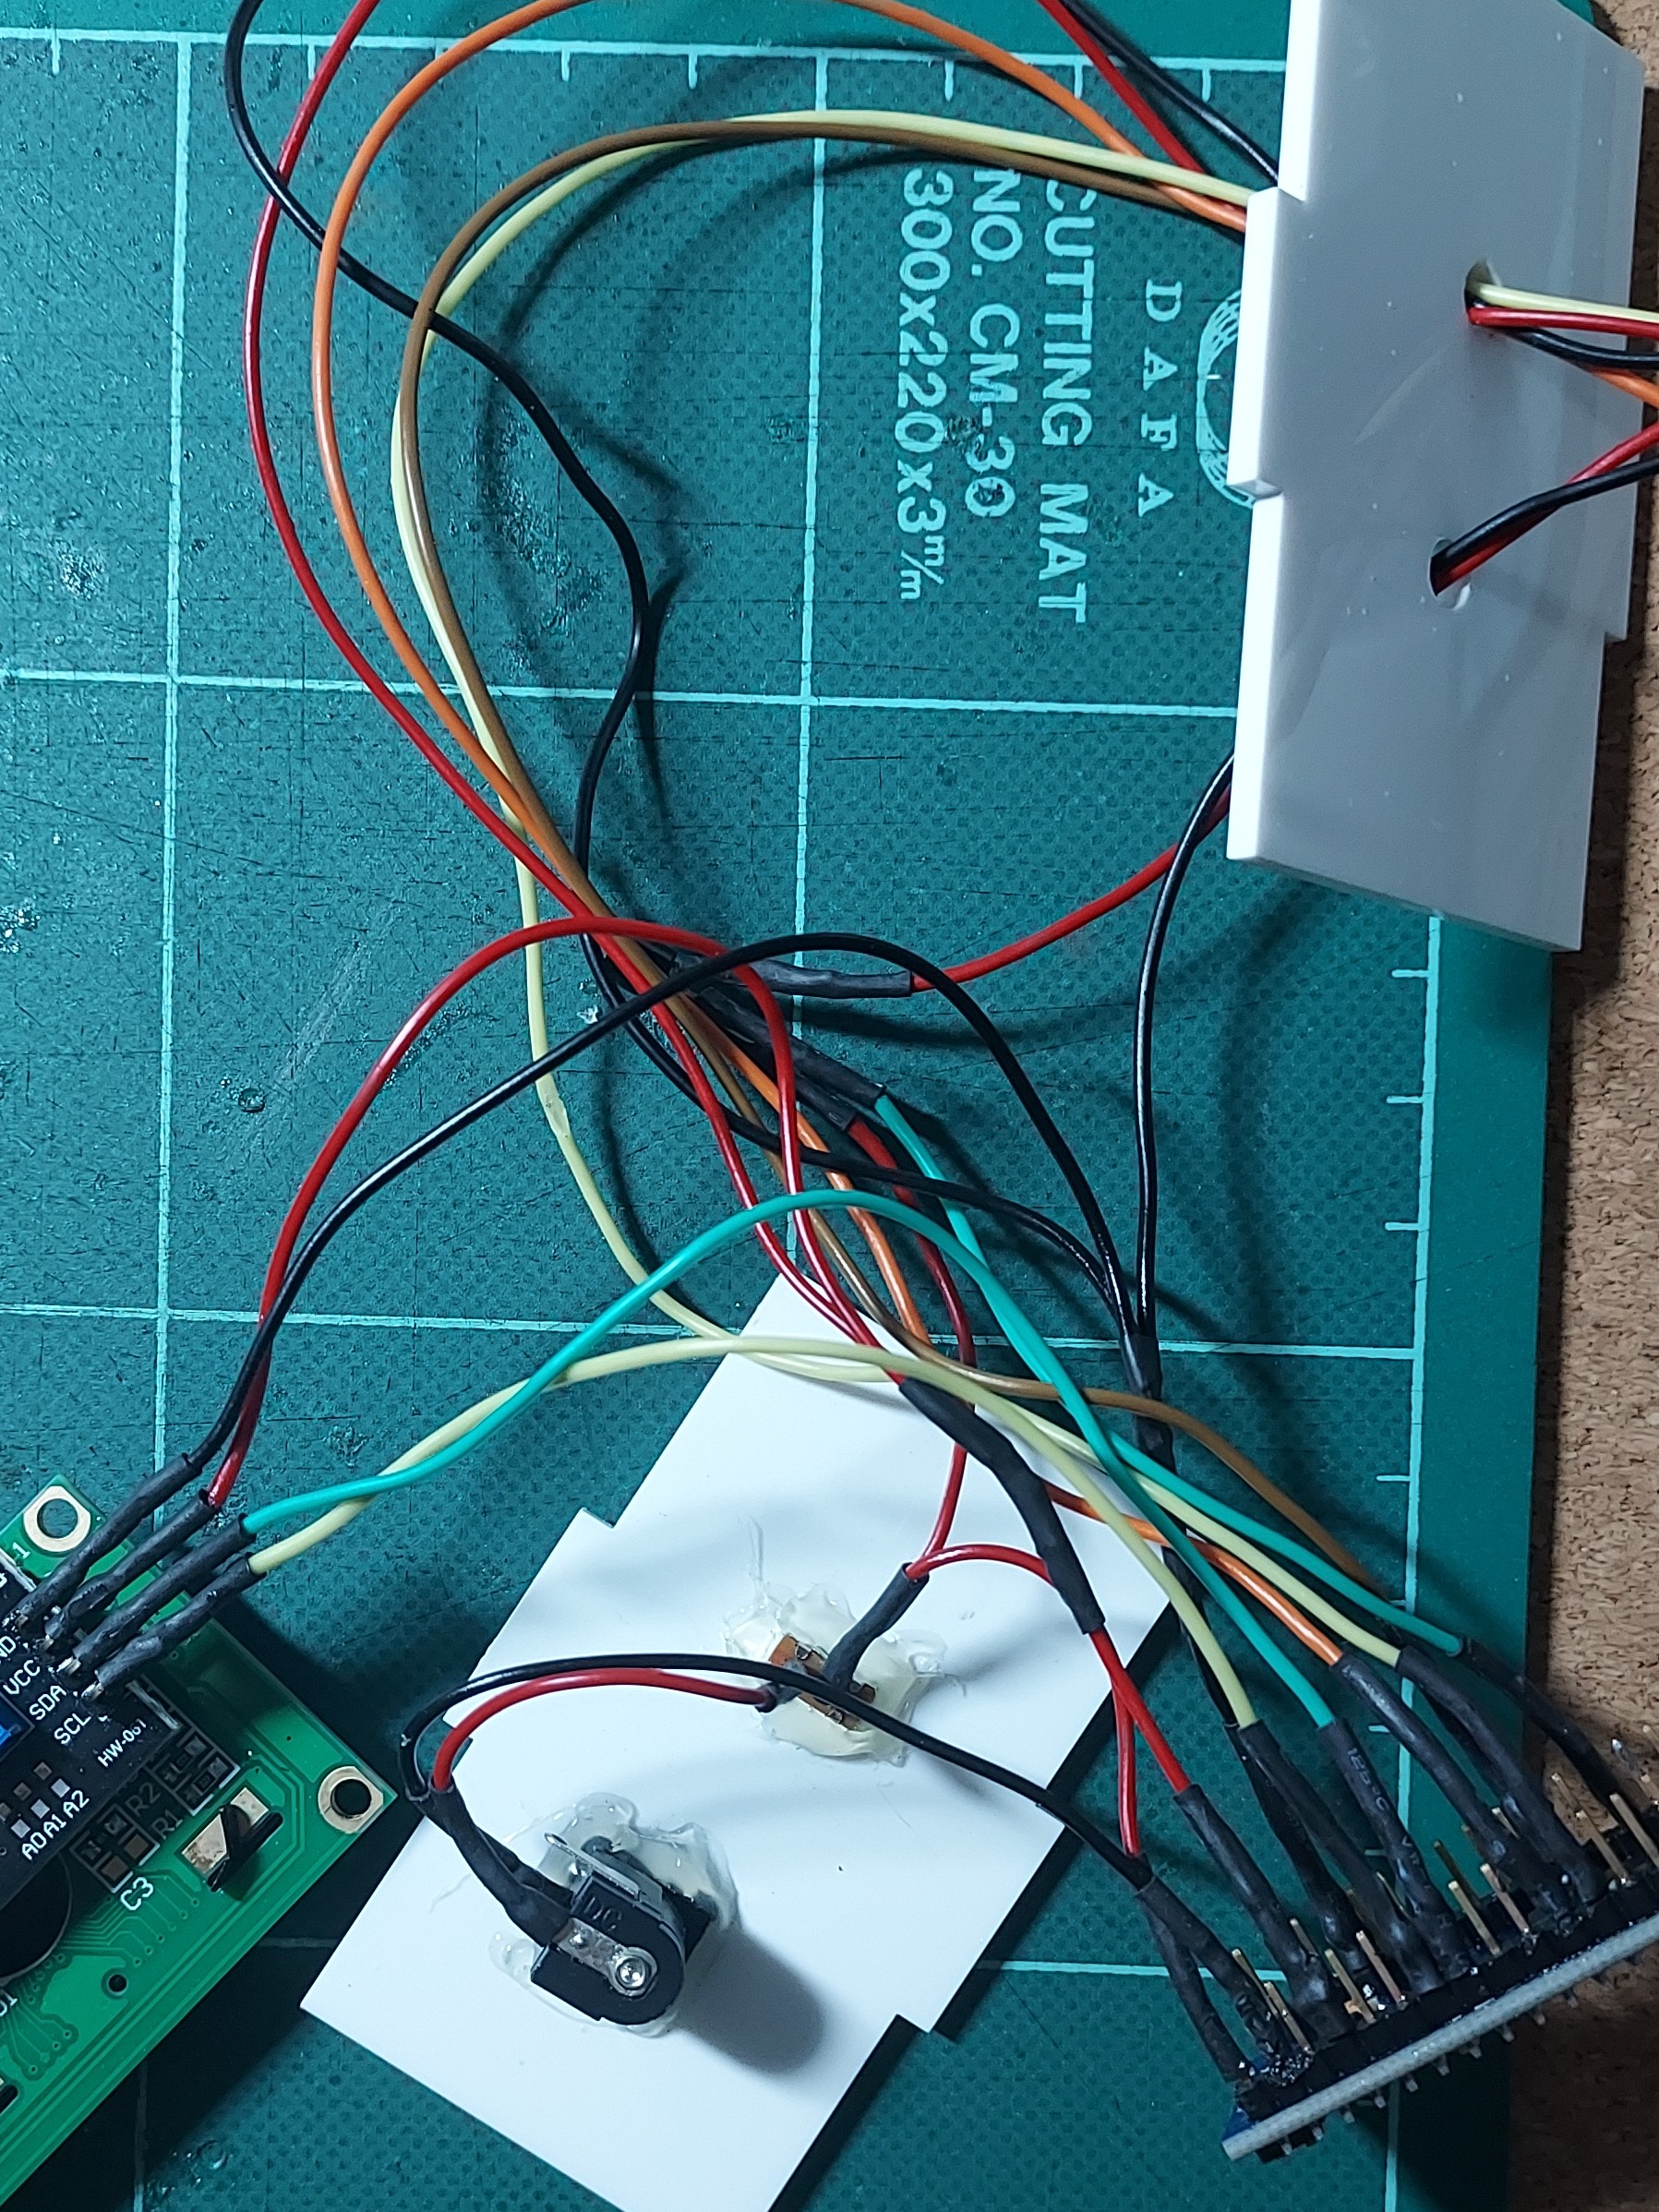
I used the circuit that I drew out above. I connected the wires to the nano by soldering it. I used heat shrink wires to make sure my soldered parts are protected. As this was my first time soldering, I found it pretty difficult and I took pretty to solder my first few connections. However, after soldering more, I found that I was able to complete the soldering process much quicker. Below are some pictures of what I soldered.
Programming
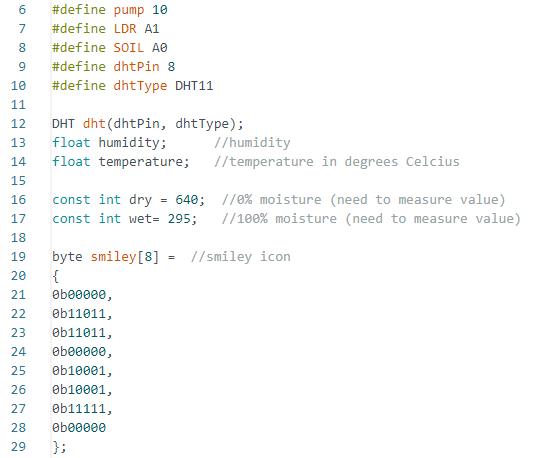
To start of the Arduino Code for my nano I put in the libraries I would be using.
Next, I input all the variables I would be using in this code.
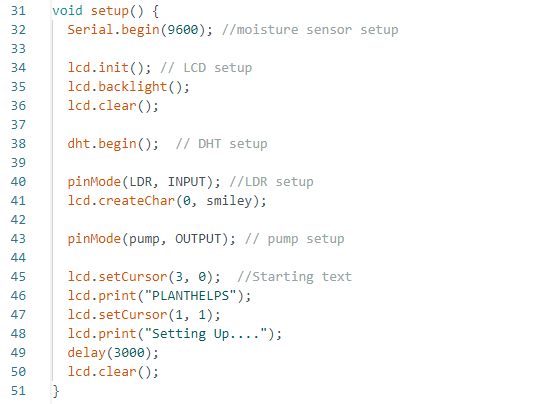
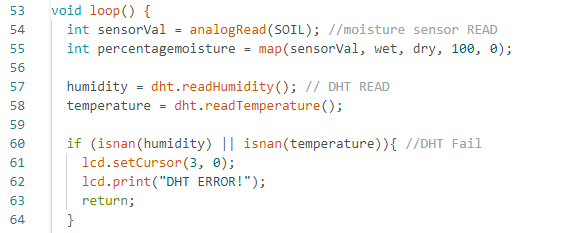
Then, I wrote the void setup(). This included all the setups of the different electronics I used. This is only run once. To finish it off I added a setup loading screen.
Next, I wrote the codes for all the input values and the necessary calculations. This was done in void loop().
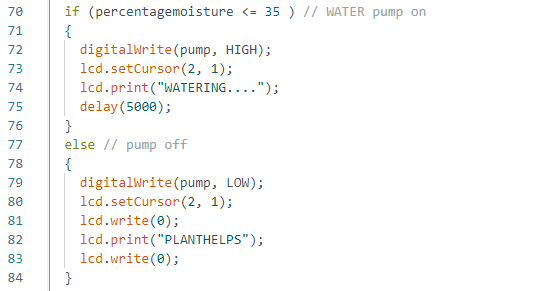
Next, I wrote the code using an if else statement for when the pump should be activated.
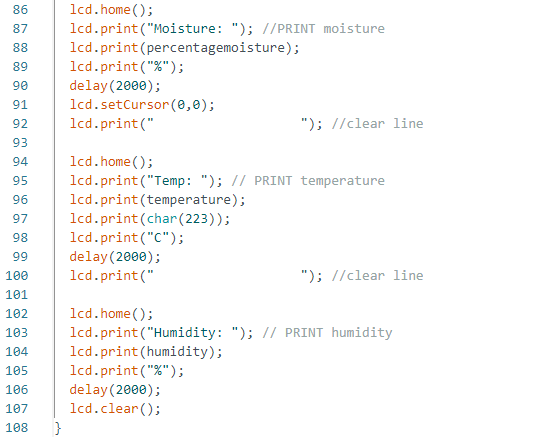
Lastly, I wrote the code for the LCD output.
The full code for my Arduino code can be found here.
Assembly
After I finished the coding, I started to assemble my project. I first attached my hinge onto the back pieces of the housing. For this, I used UHU glue as I didnt have acrylic glue on hand. This allowed for the opening and closing of the back lid.
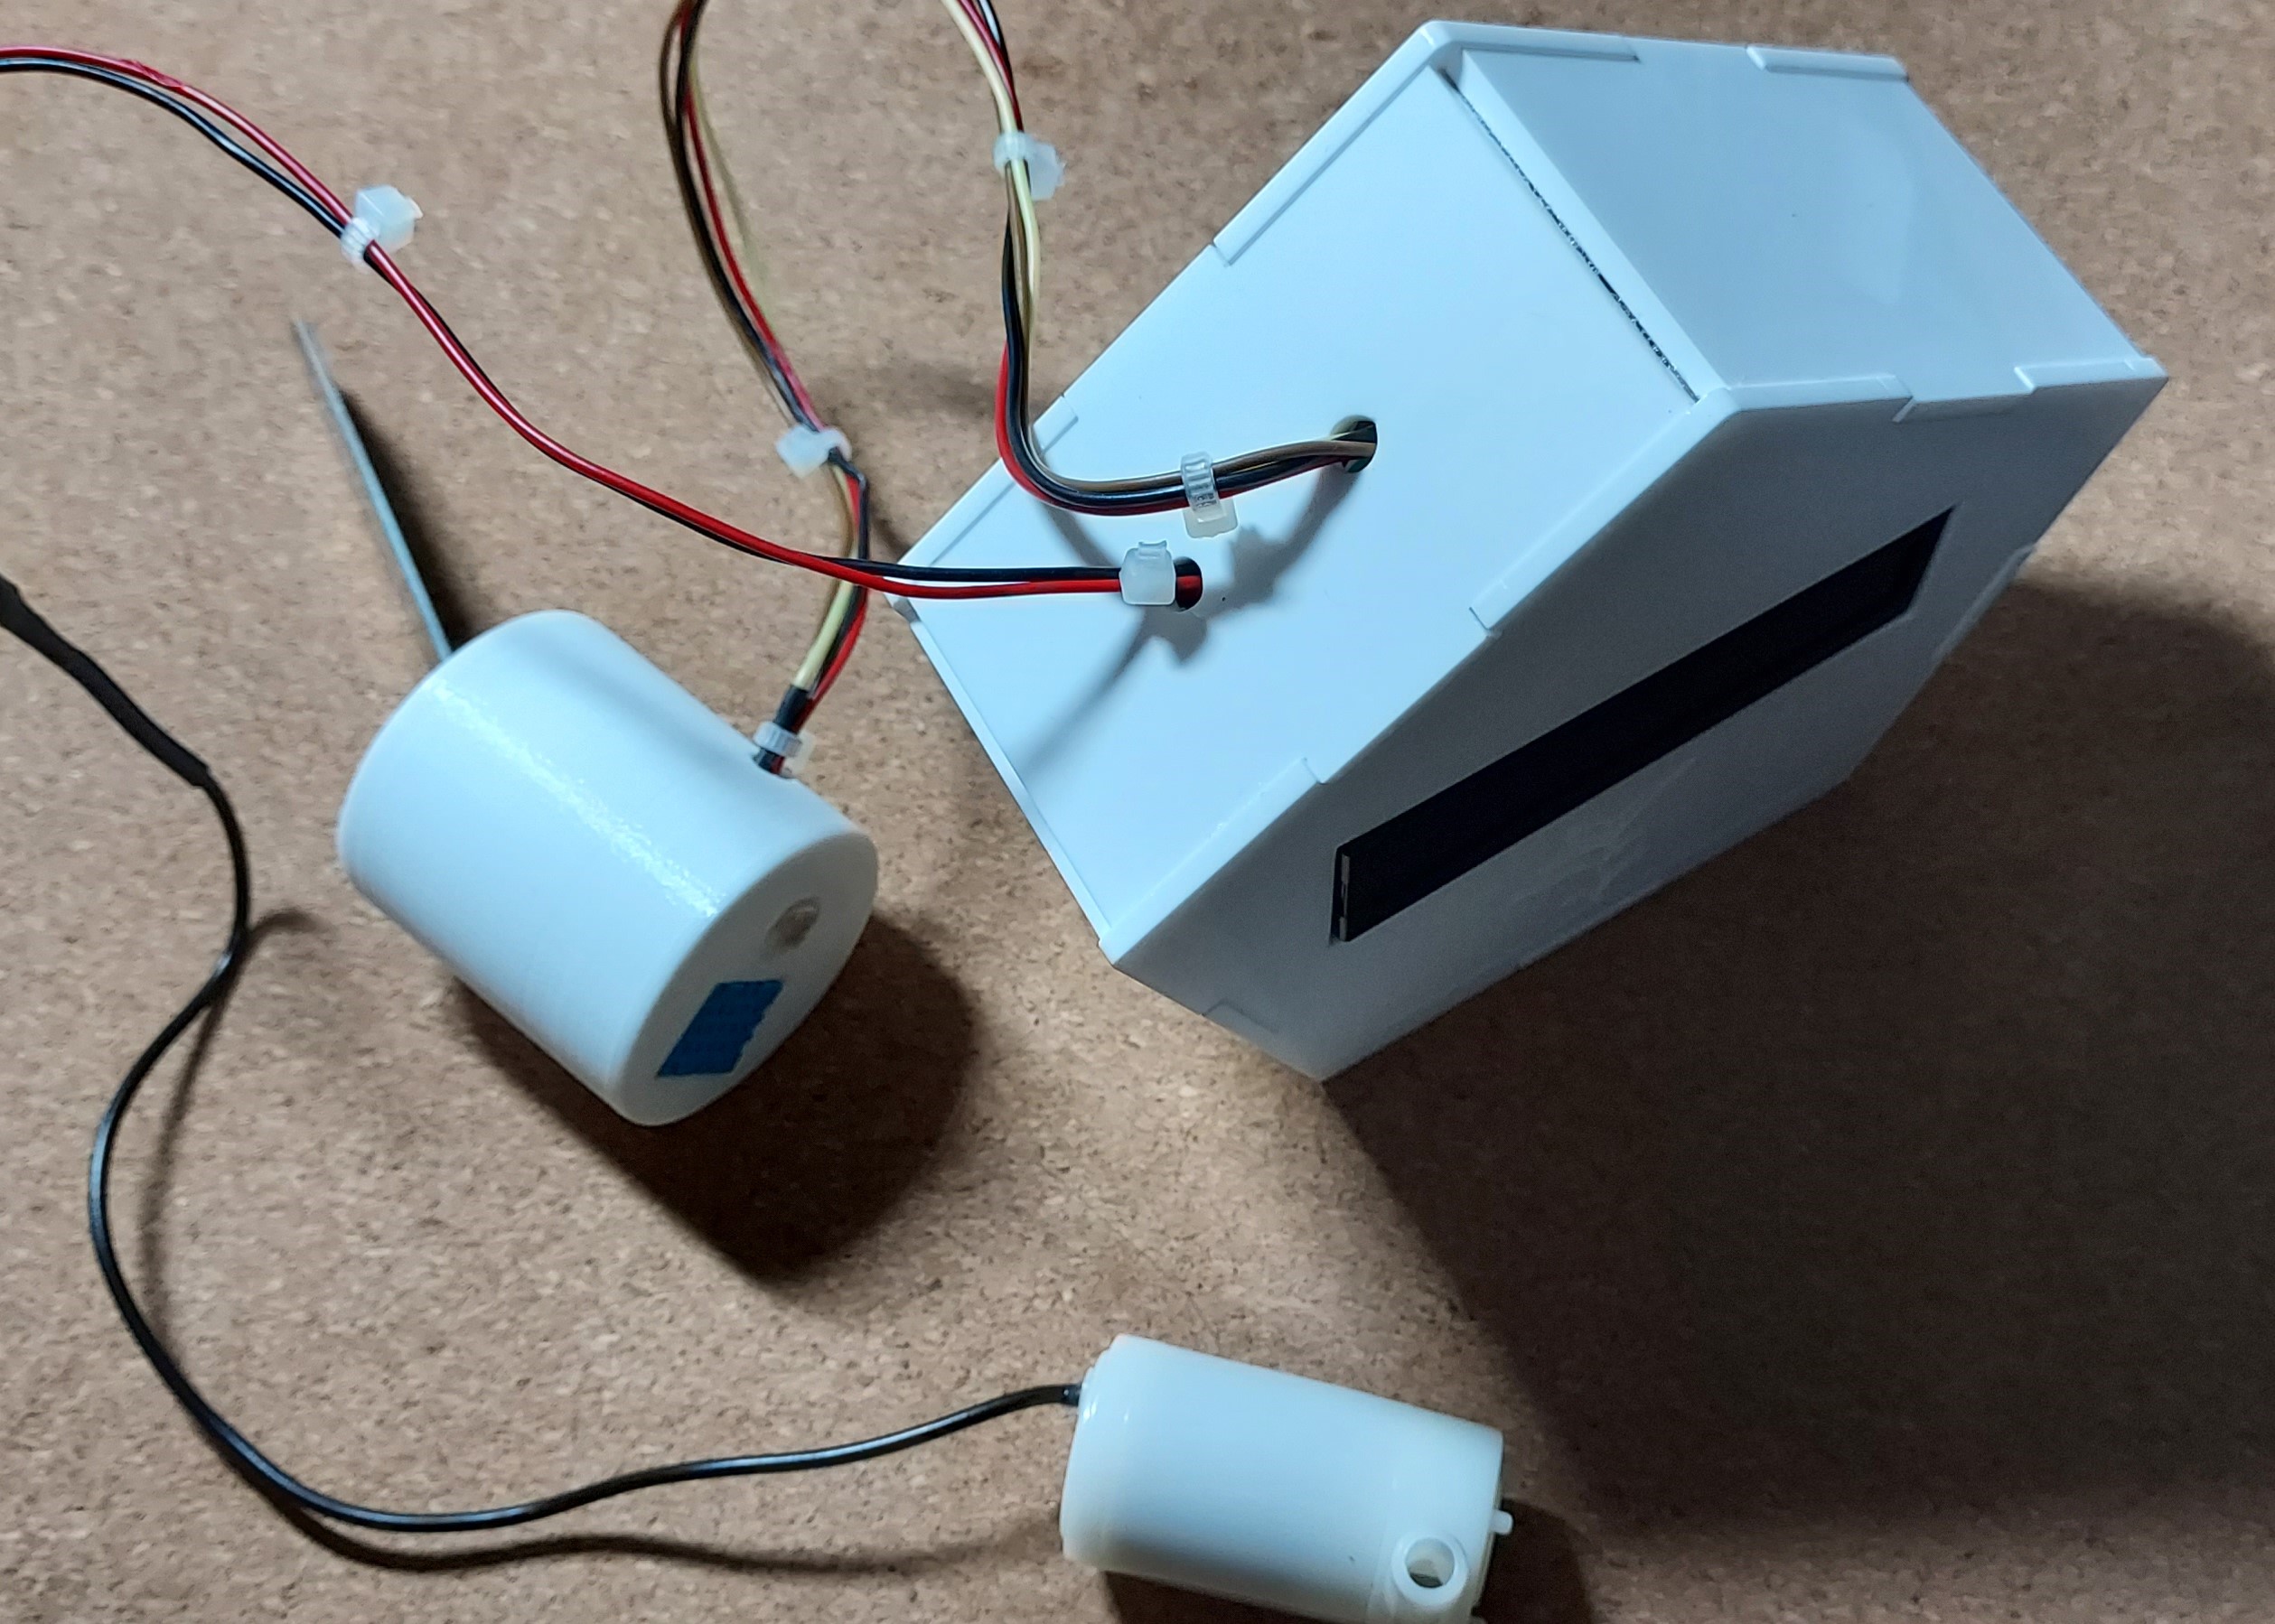
Next, I hot glued the top sensors into the sensor housing. This was a bit hard as the sensor housing was pretty small.
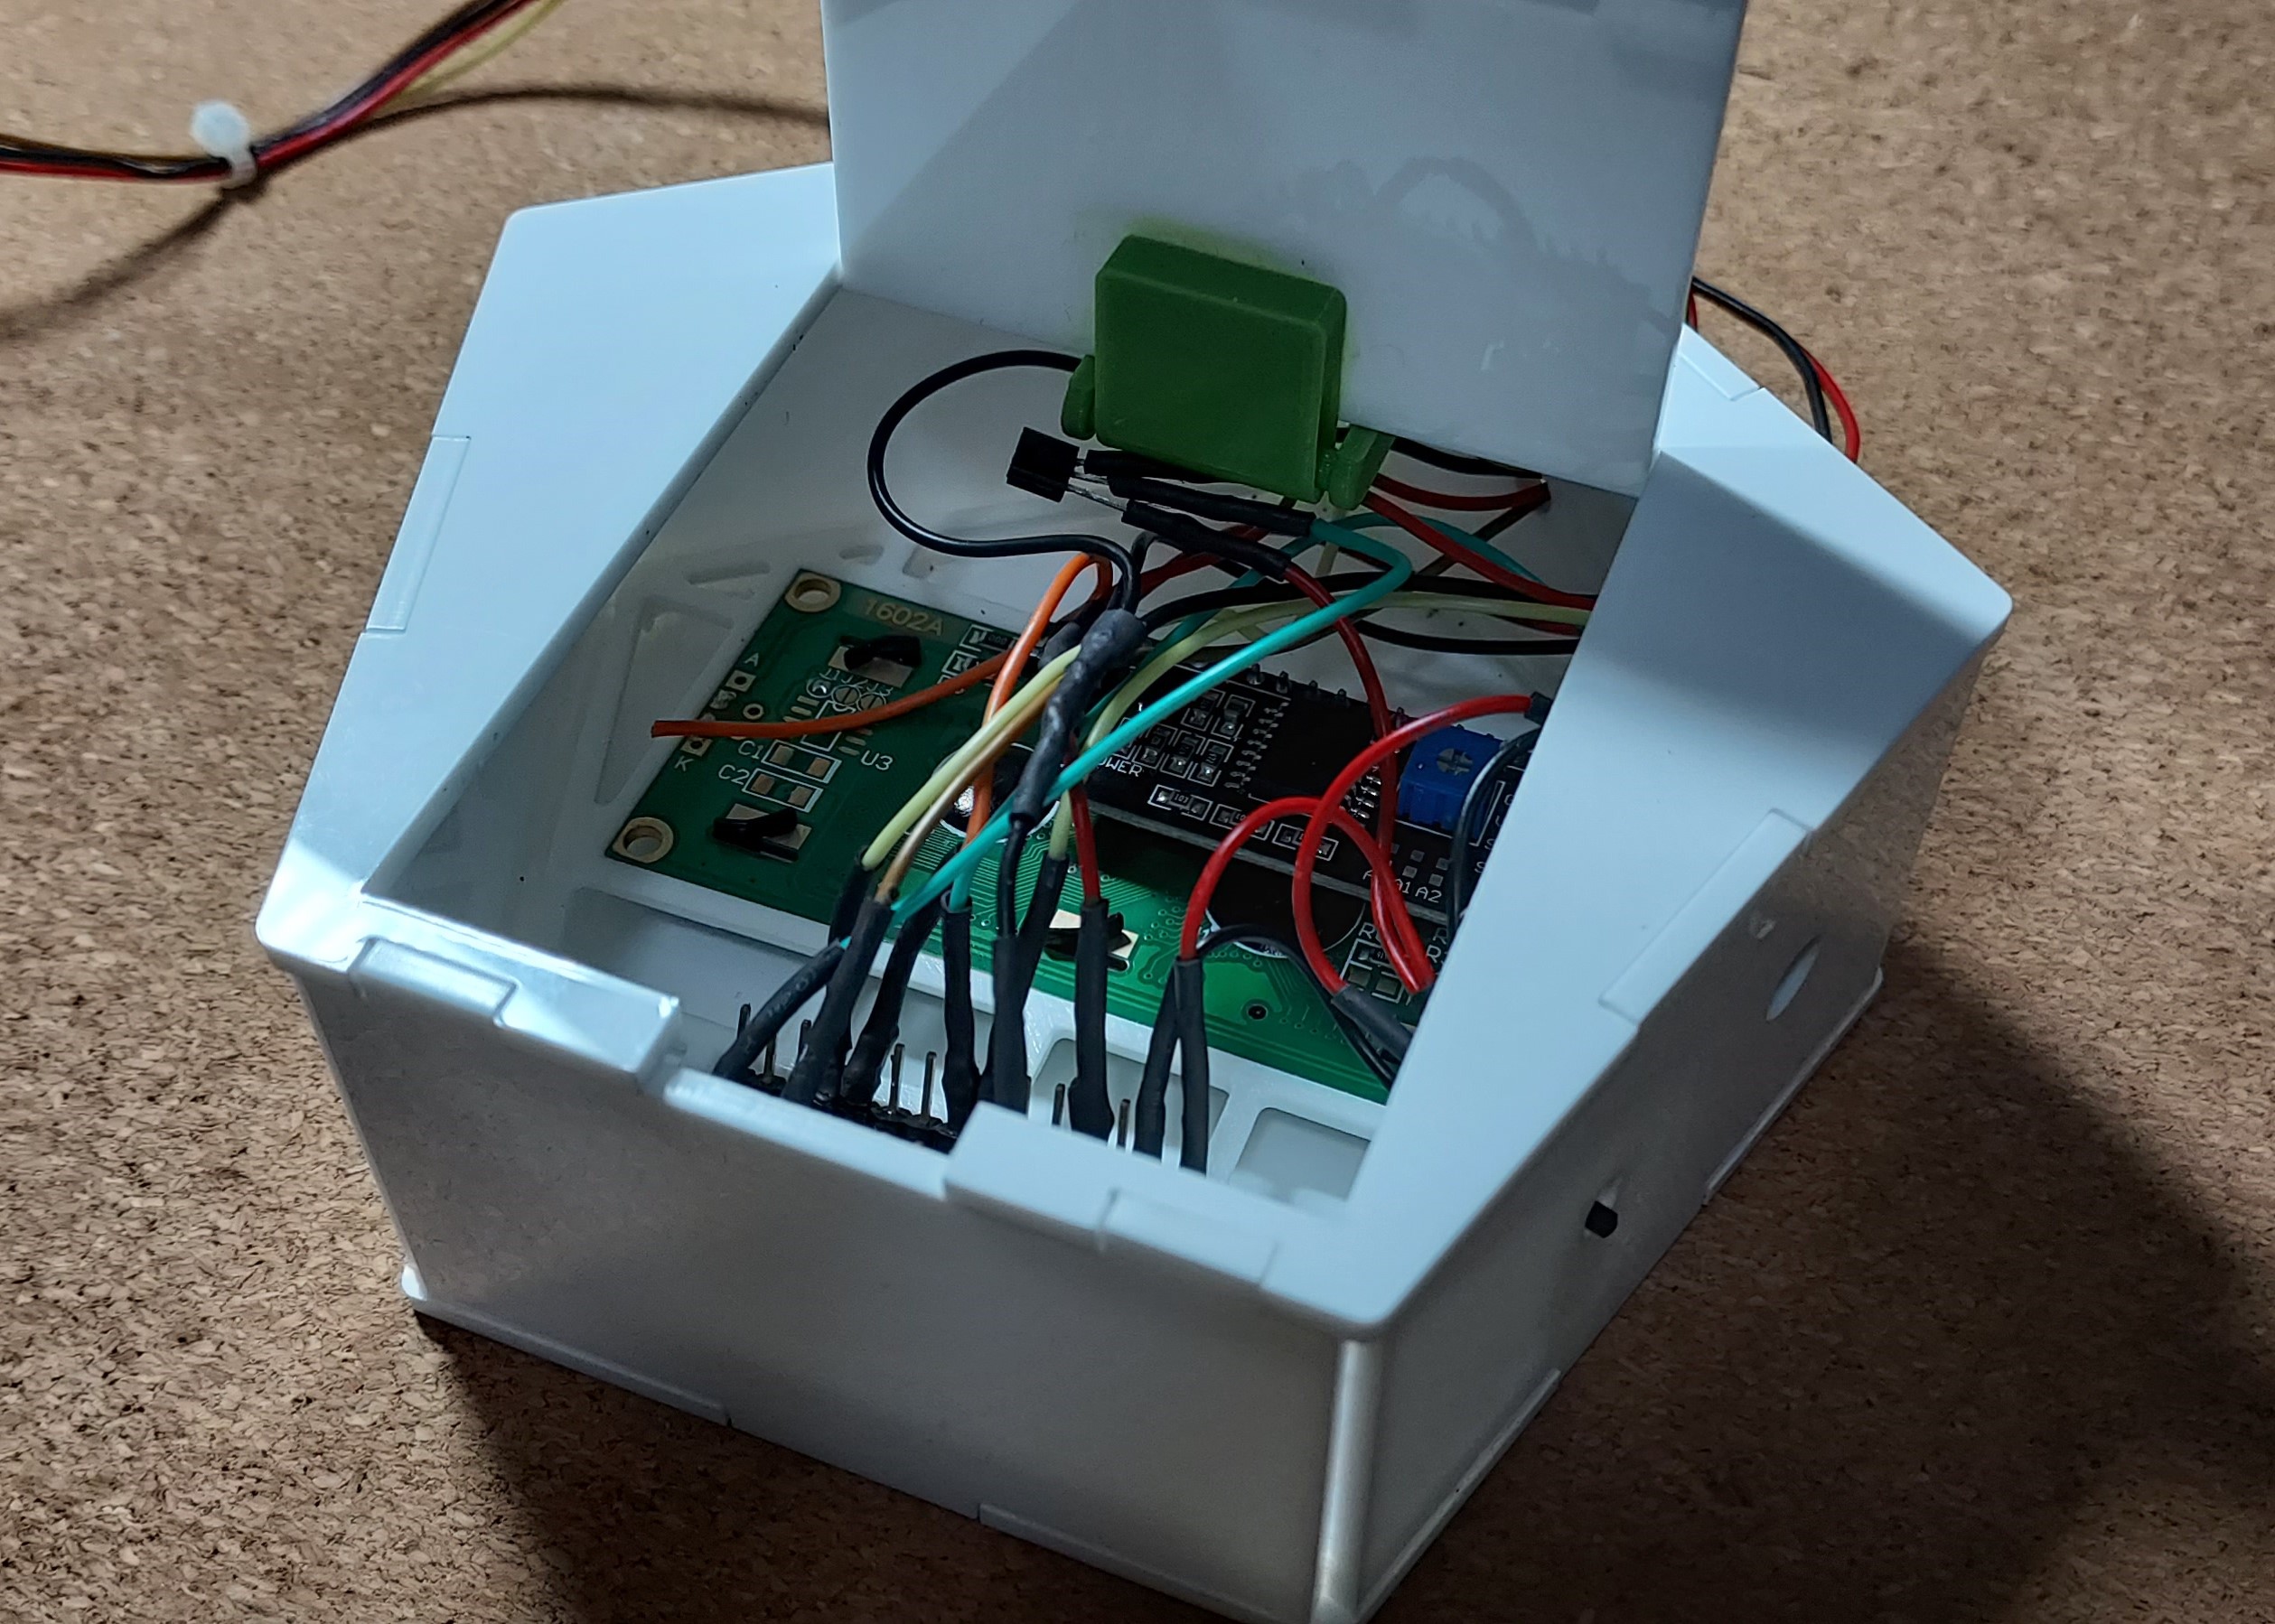
Afterwards, I started gluing the main housing pieces. For this I also used UHU Glue to glue everything together. The drying time was relatively long as acrylic is not a porous material. After gluing in the side walls of the housing, I glued in the pcb mount as it would be easier done this way. The finished piece is shown below.
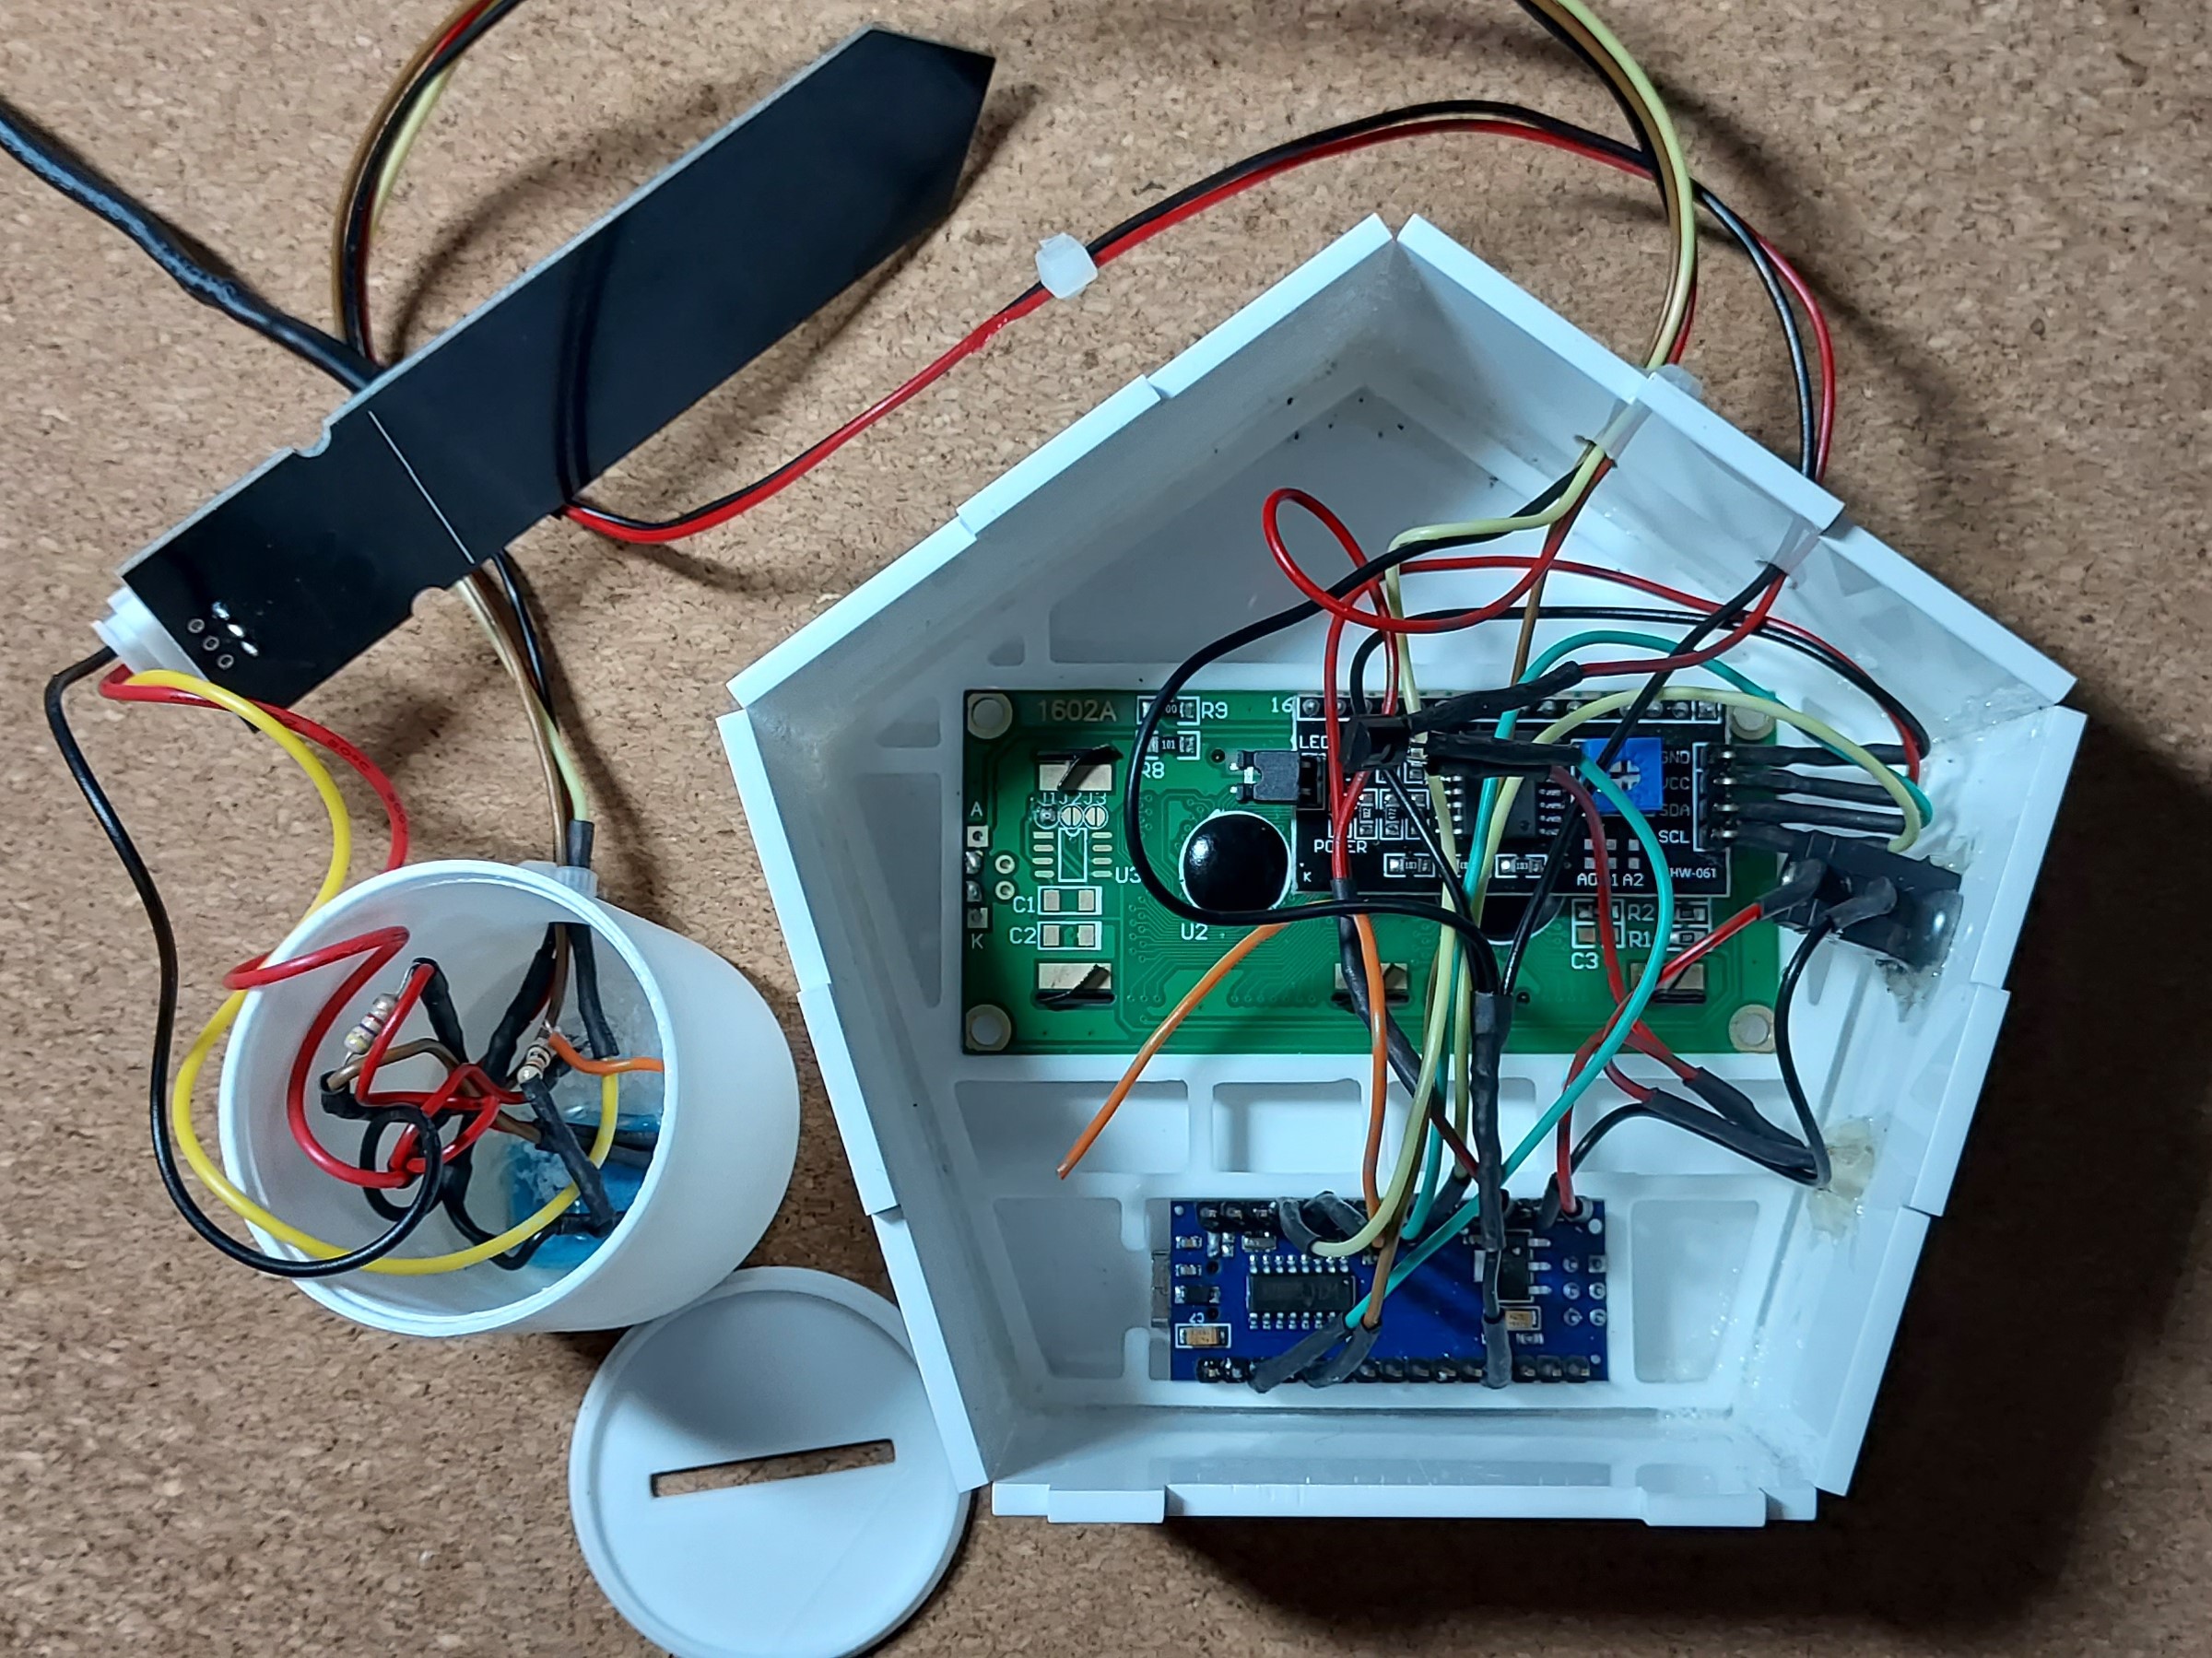
Now that I have completed the gluing process, this is how my internal circuitry looks like. After noticing I had quite a few wires exposed I decided to make them neater by cable tying the cables together.
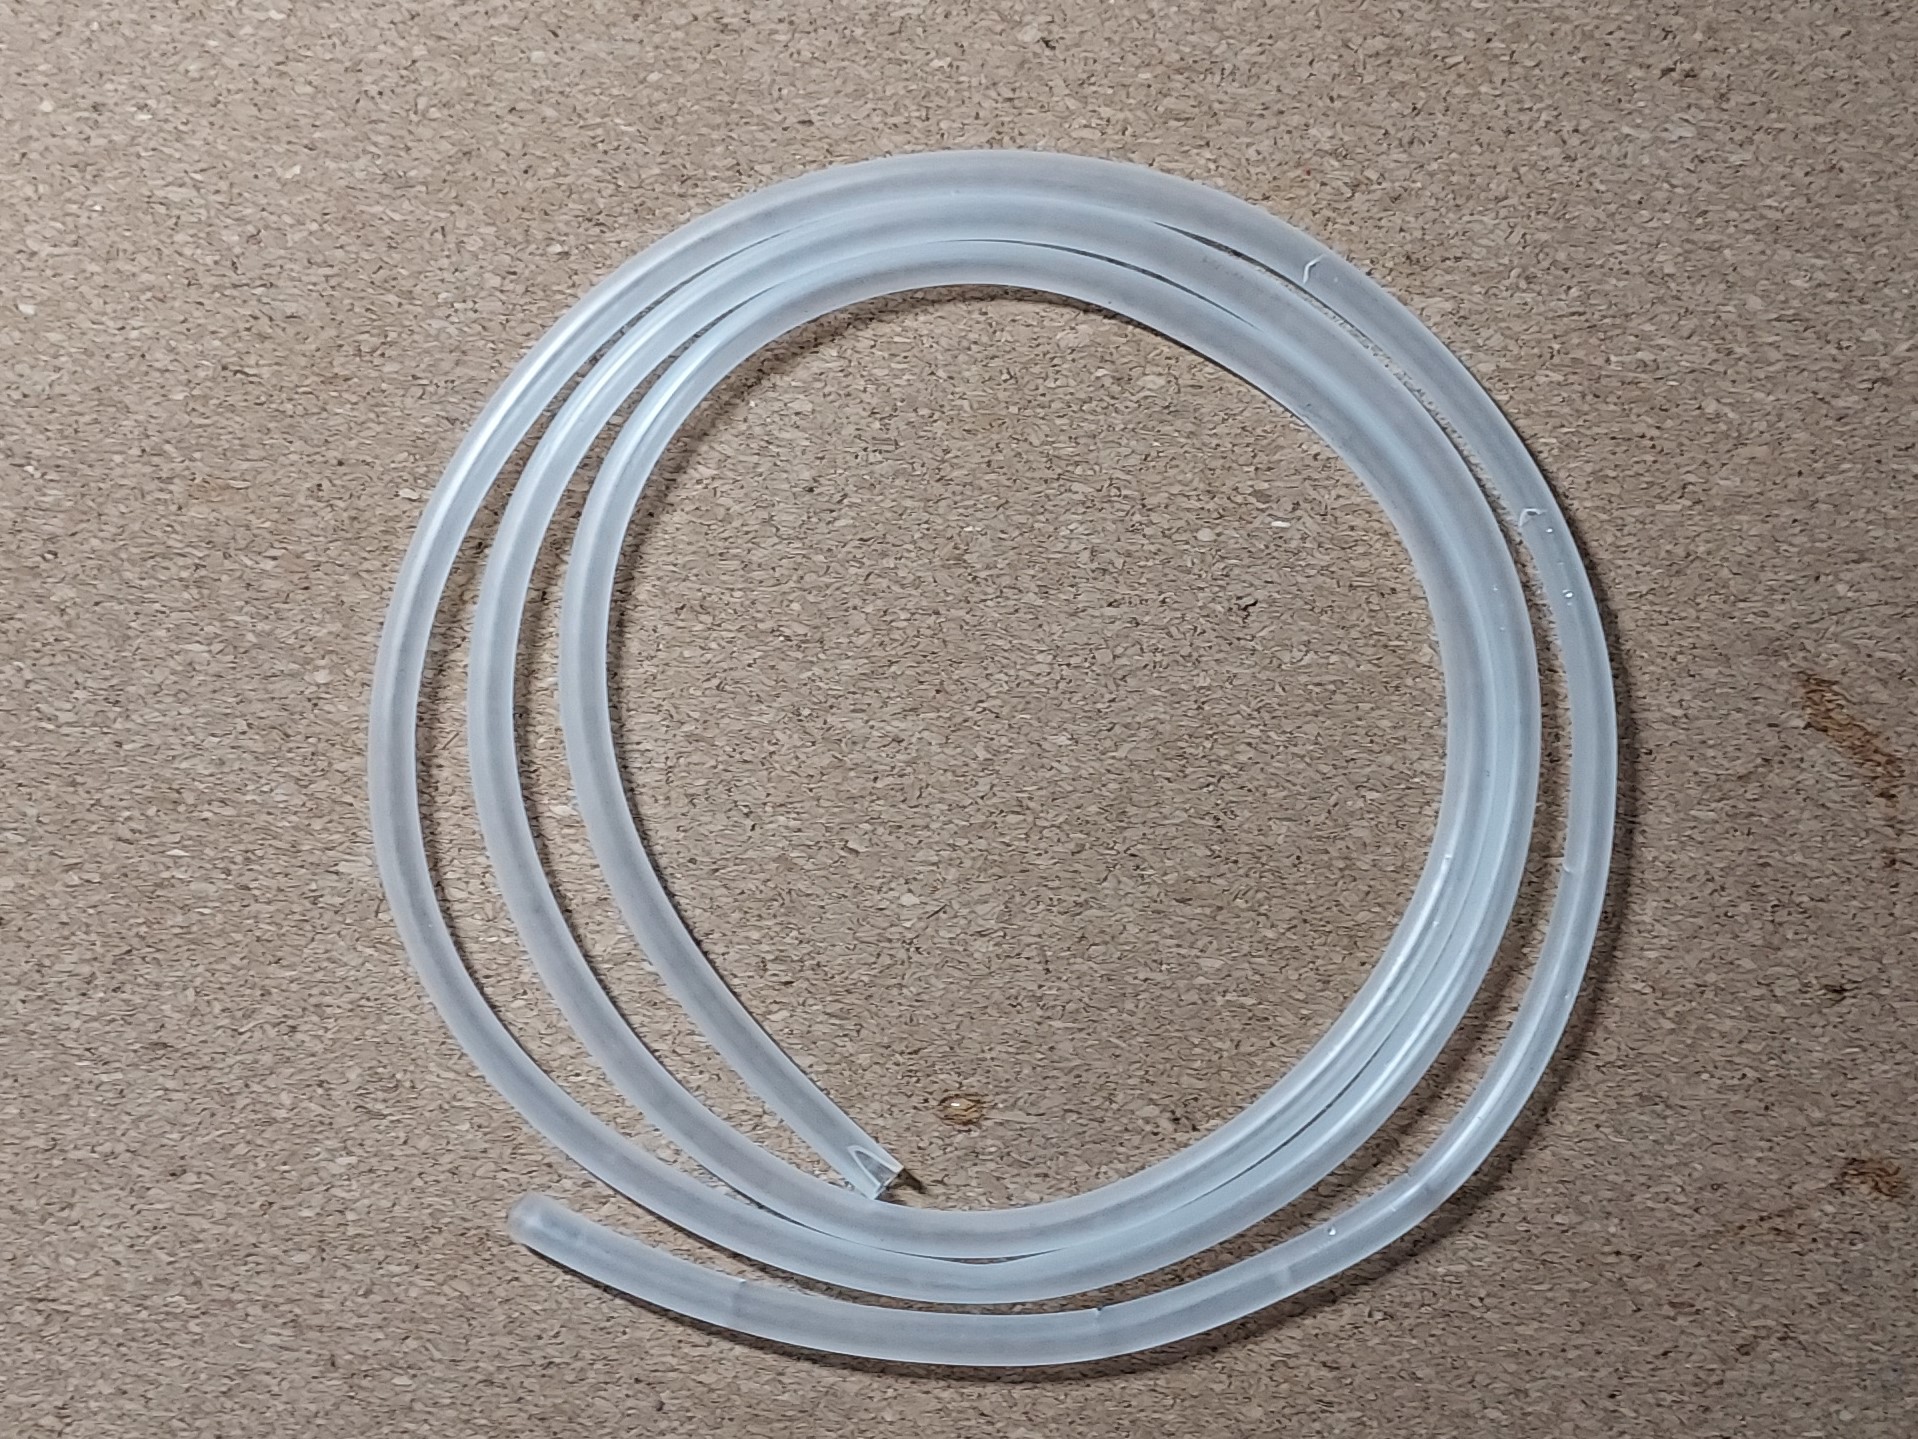
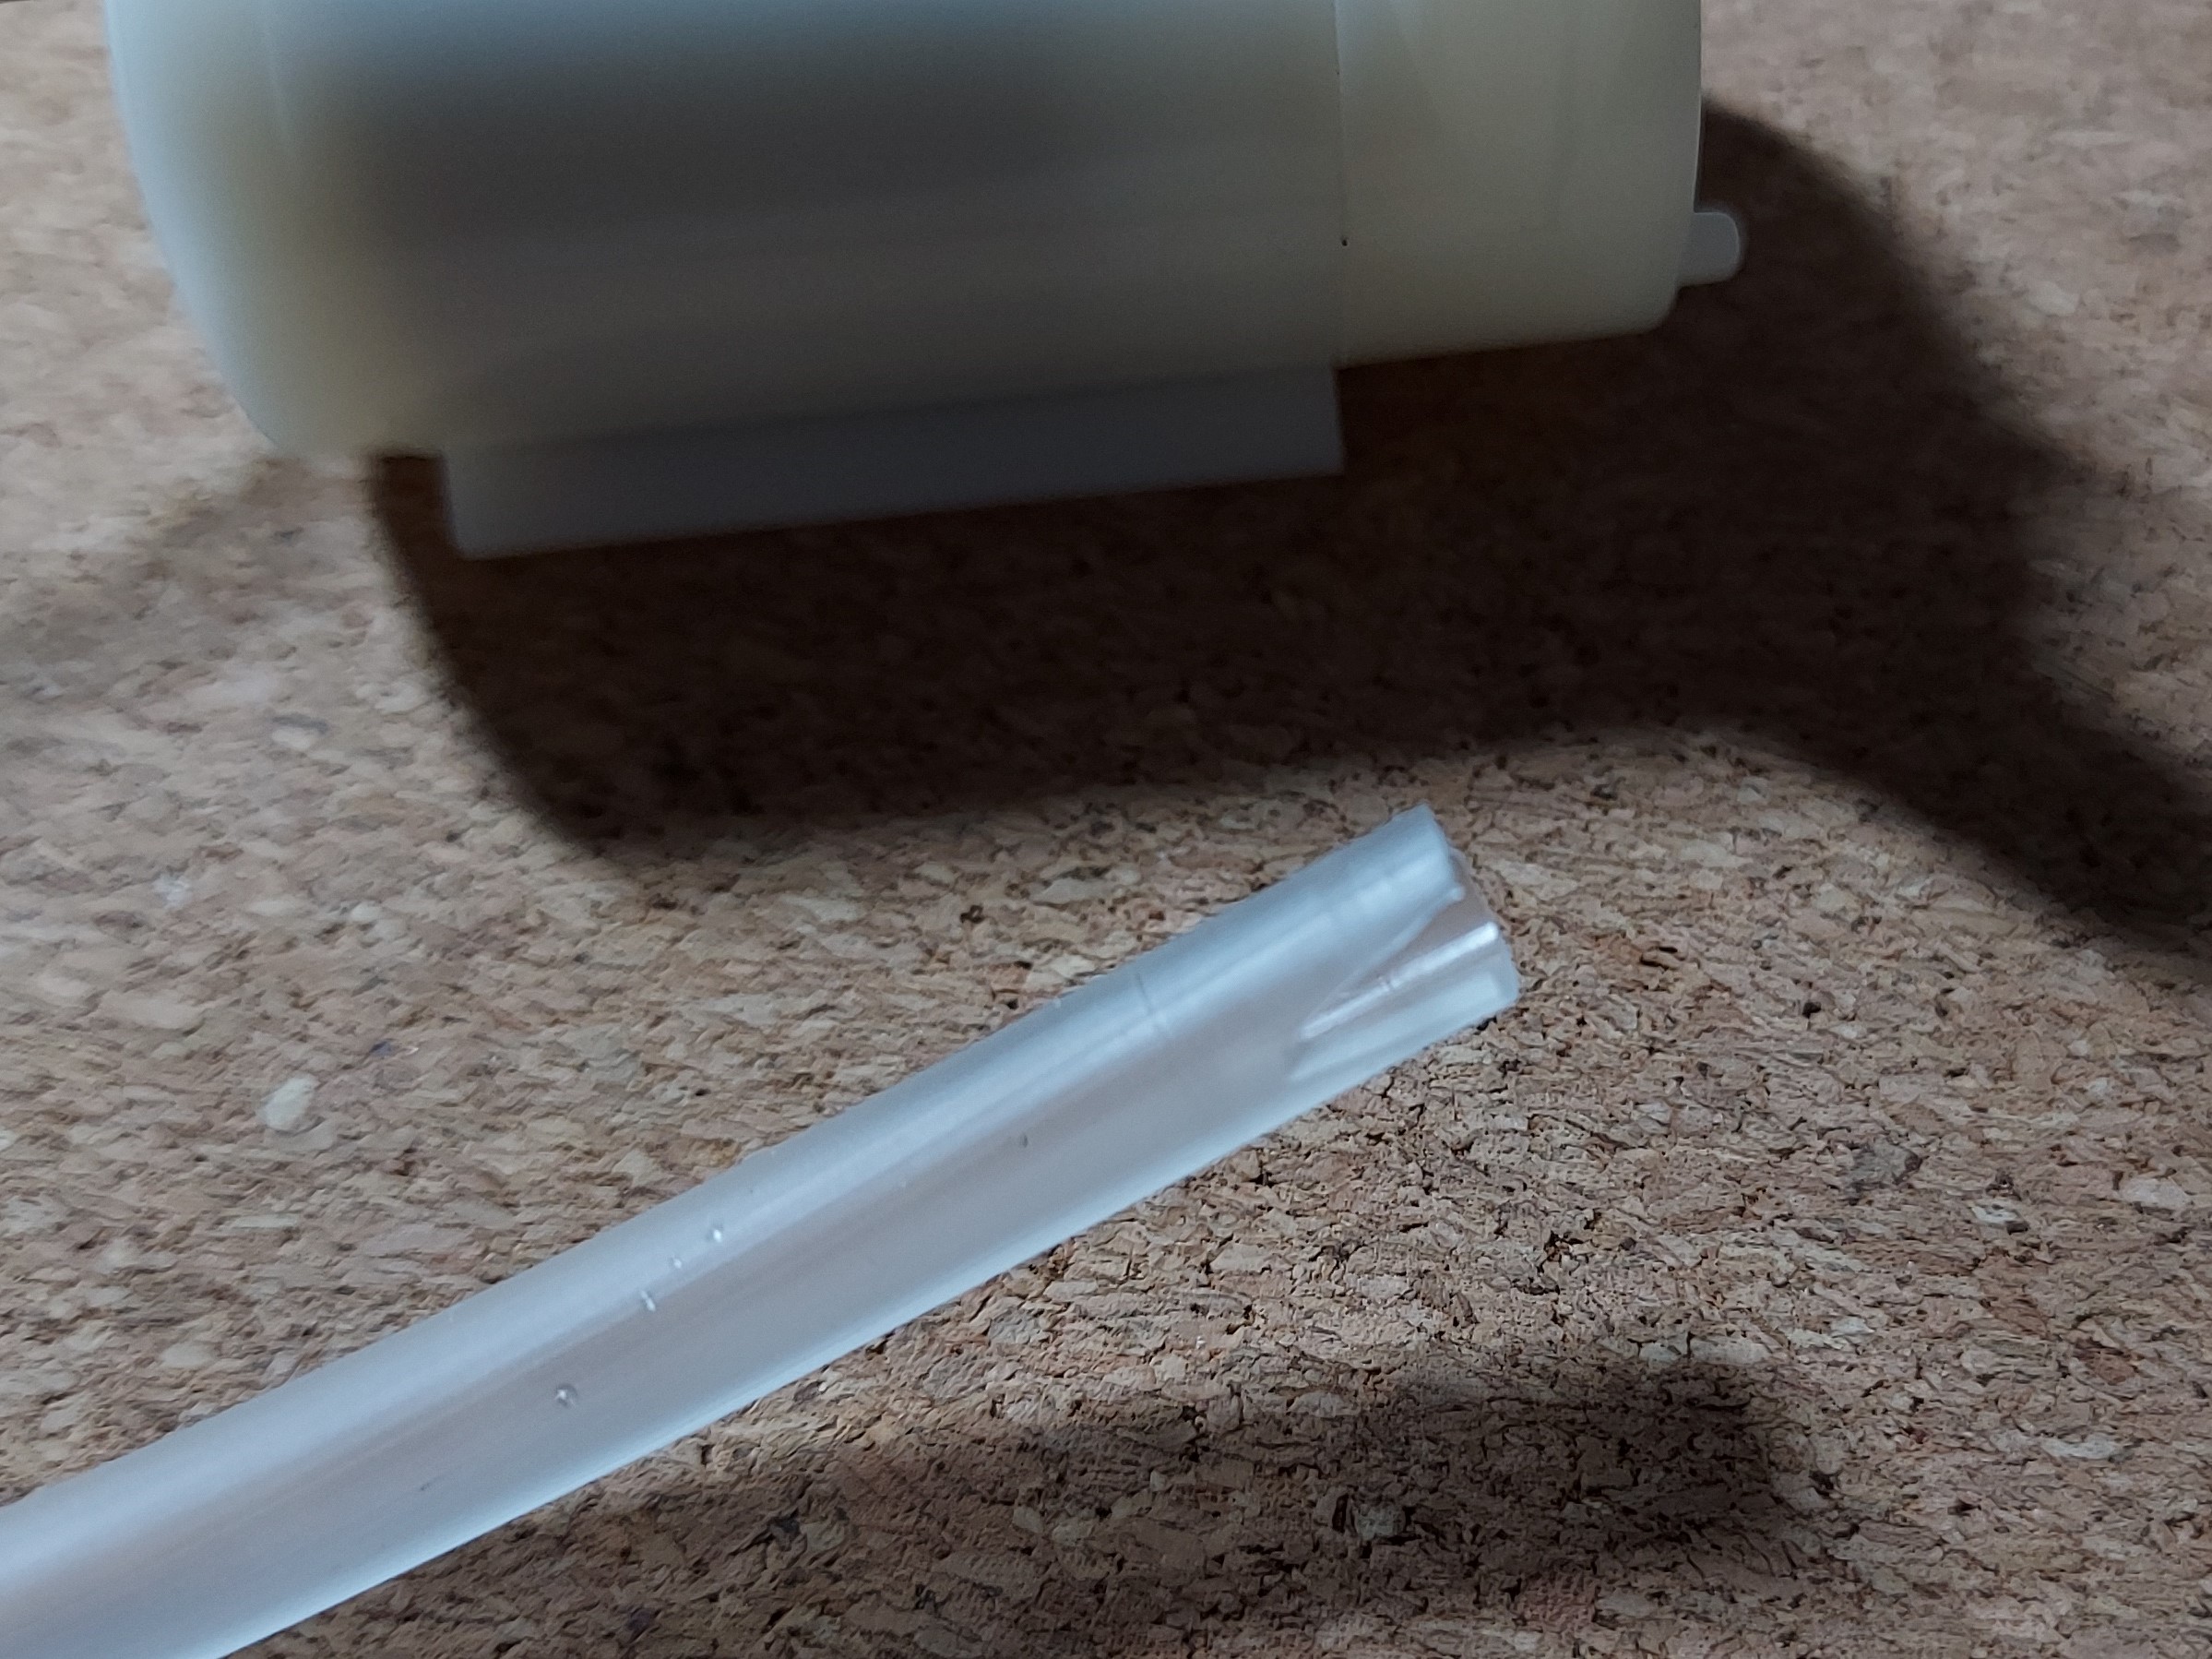
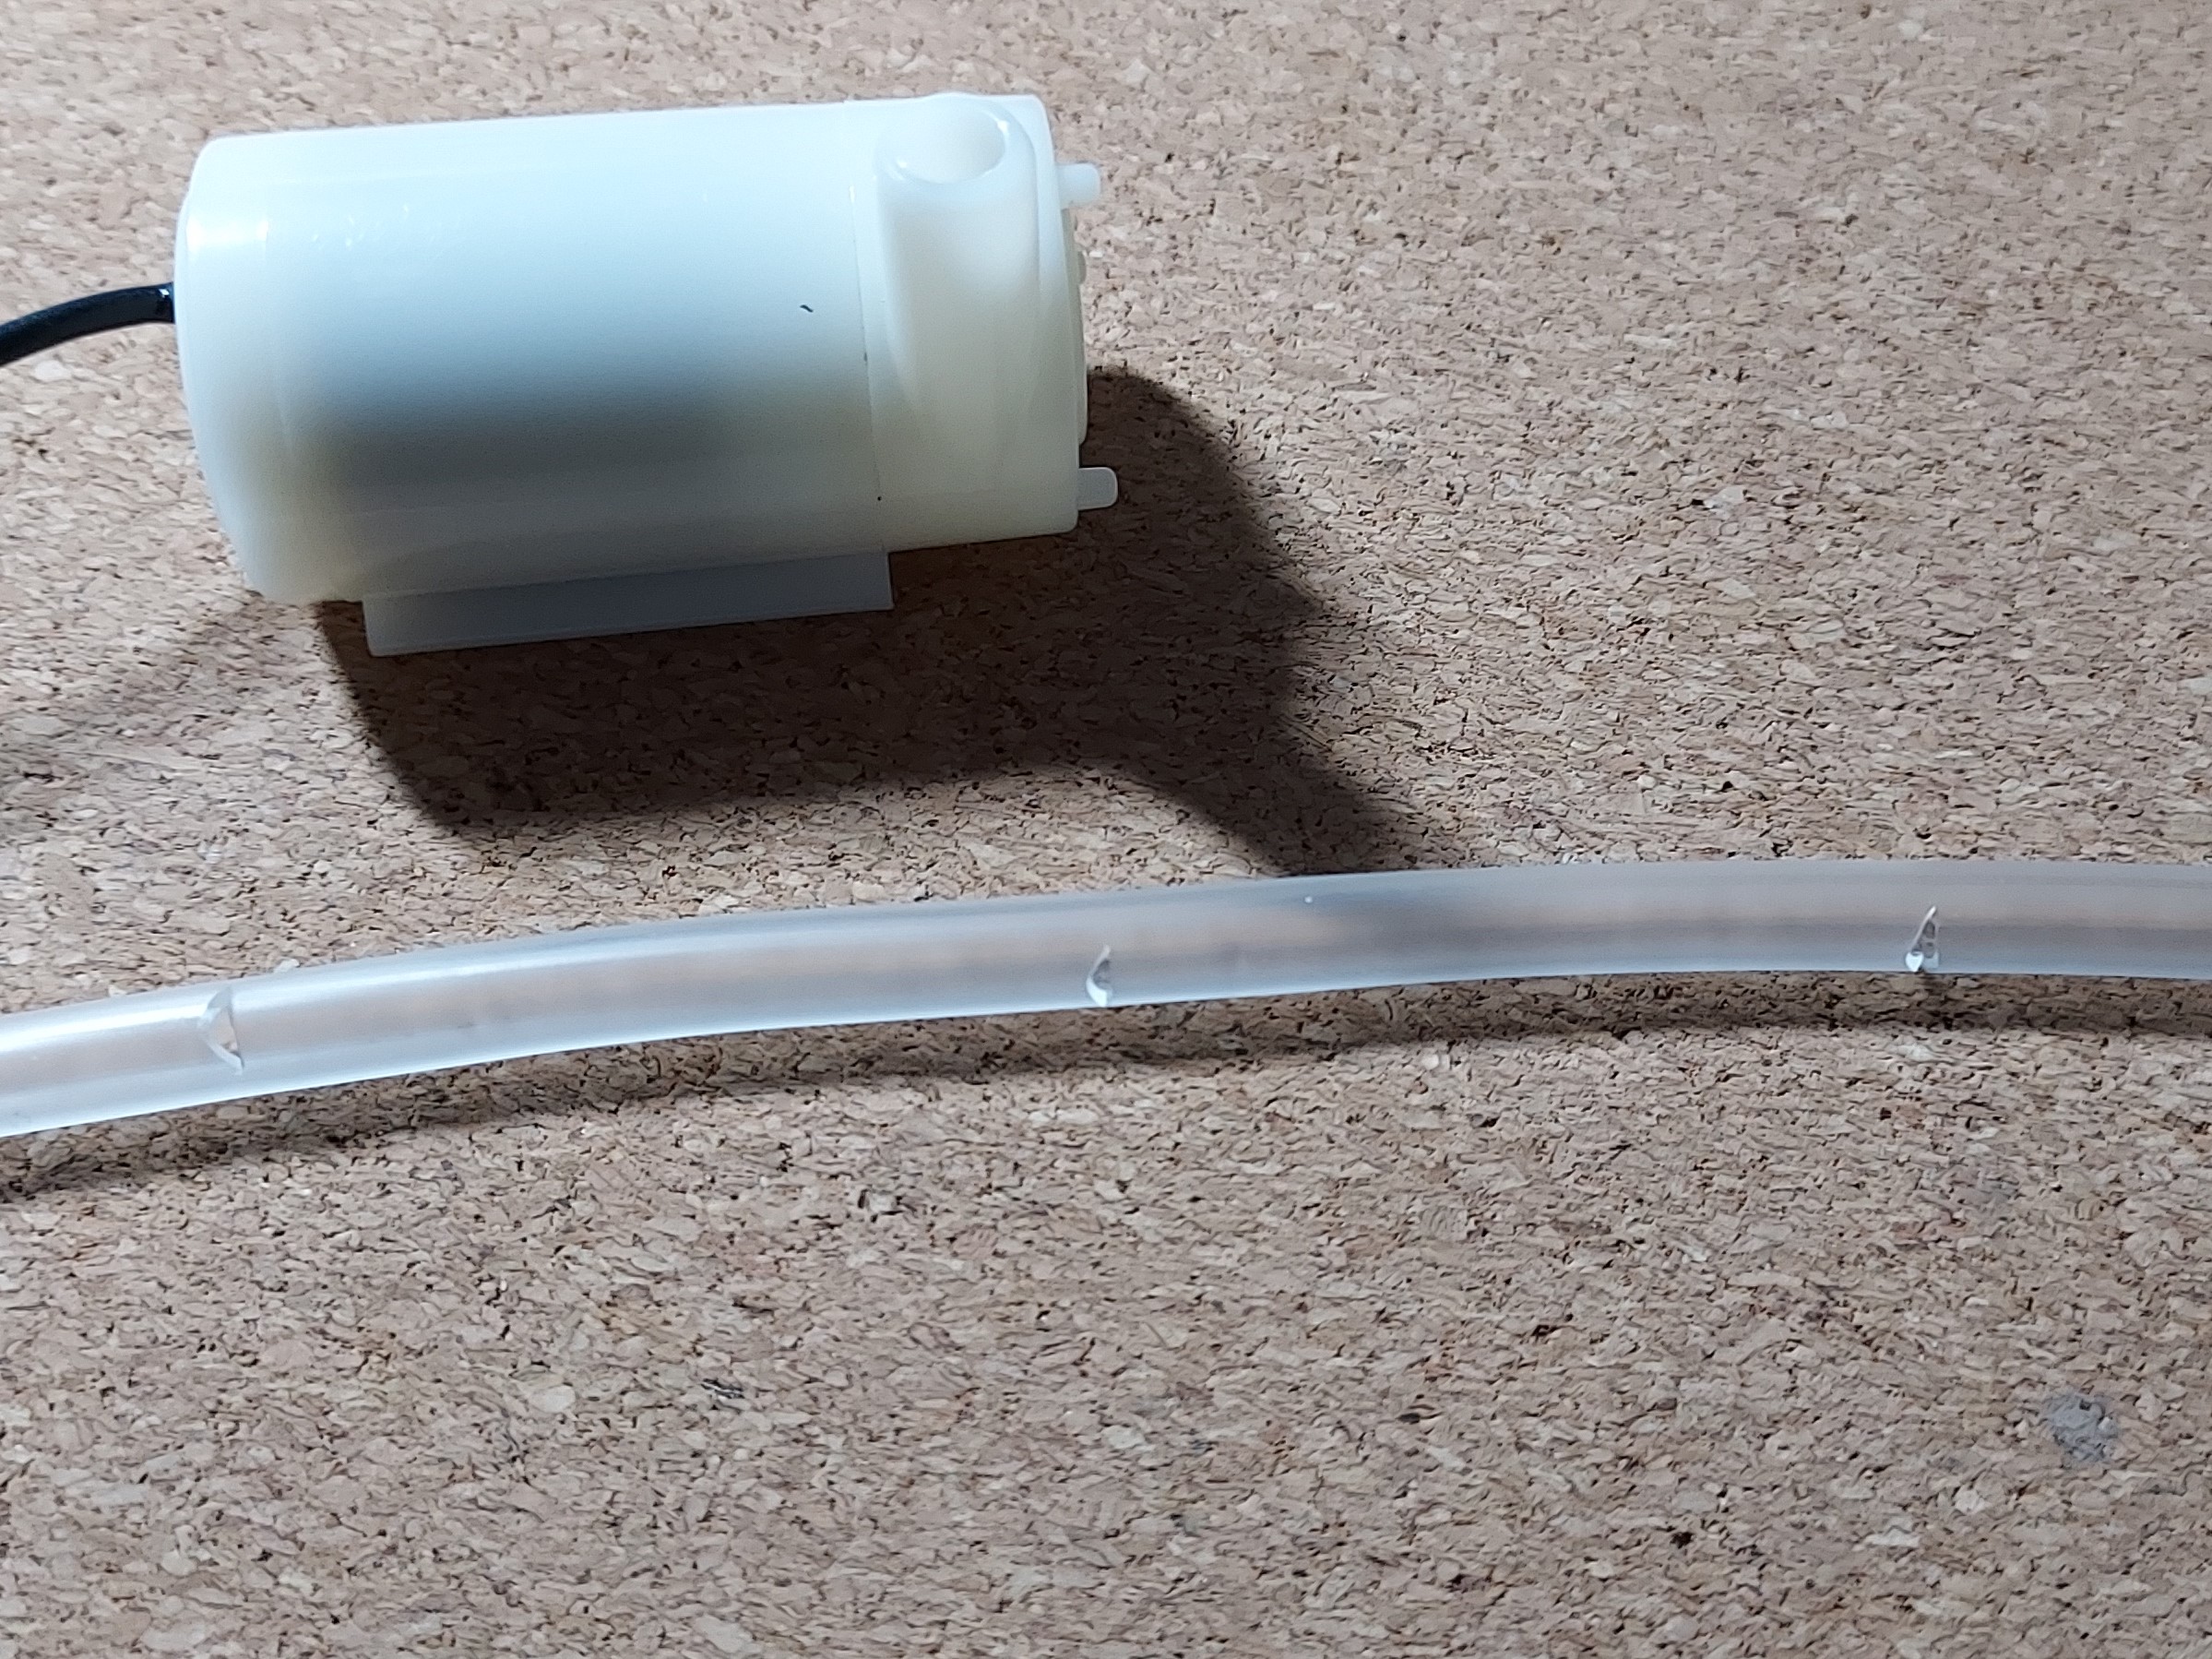
Moving on to the water tubing I would be using a 6mm external 4mm internal wide tubing.
I found this too big to fit into the water pump so I decided to cut a slit at the start of the tubing so it can slide into the water pump hole much easier. Also to water the plants more efficiently, I decided to cut small snips along the sides of the tubing.
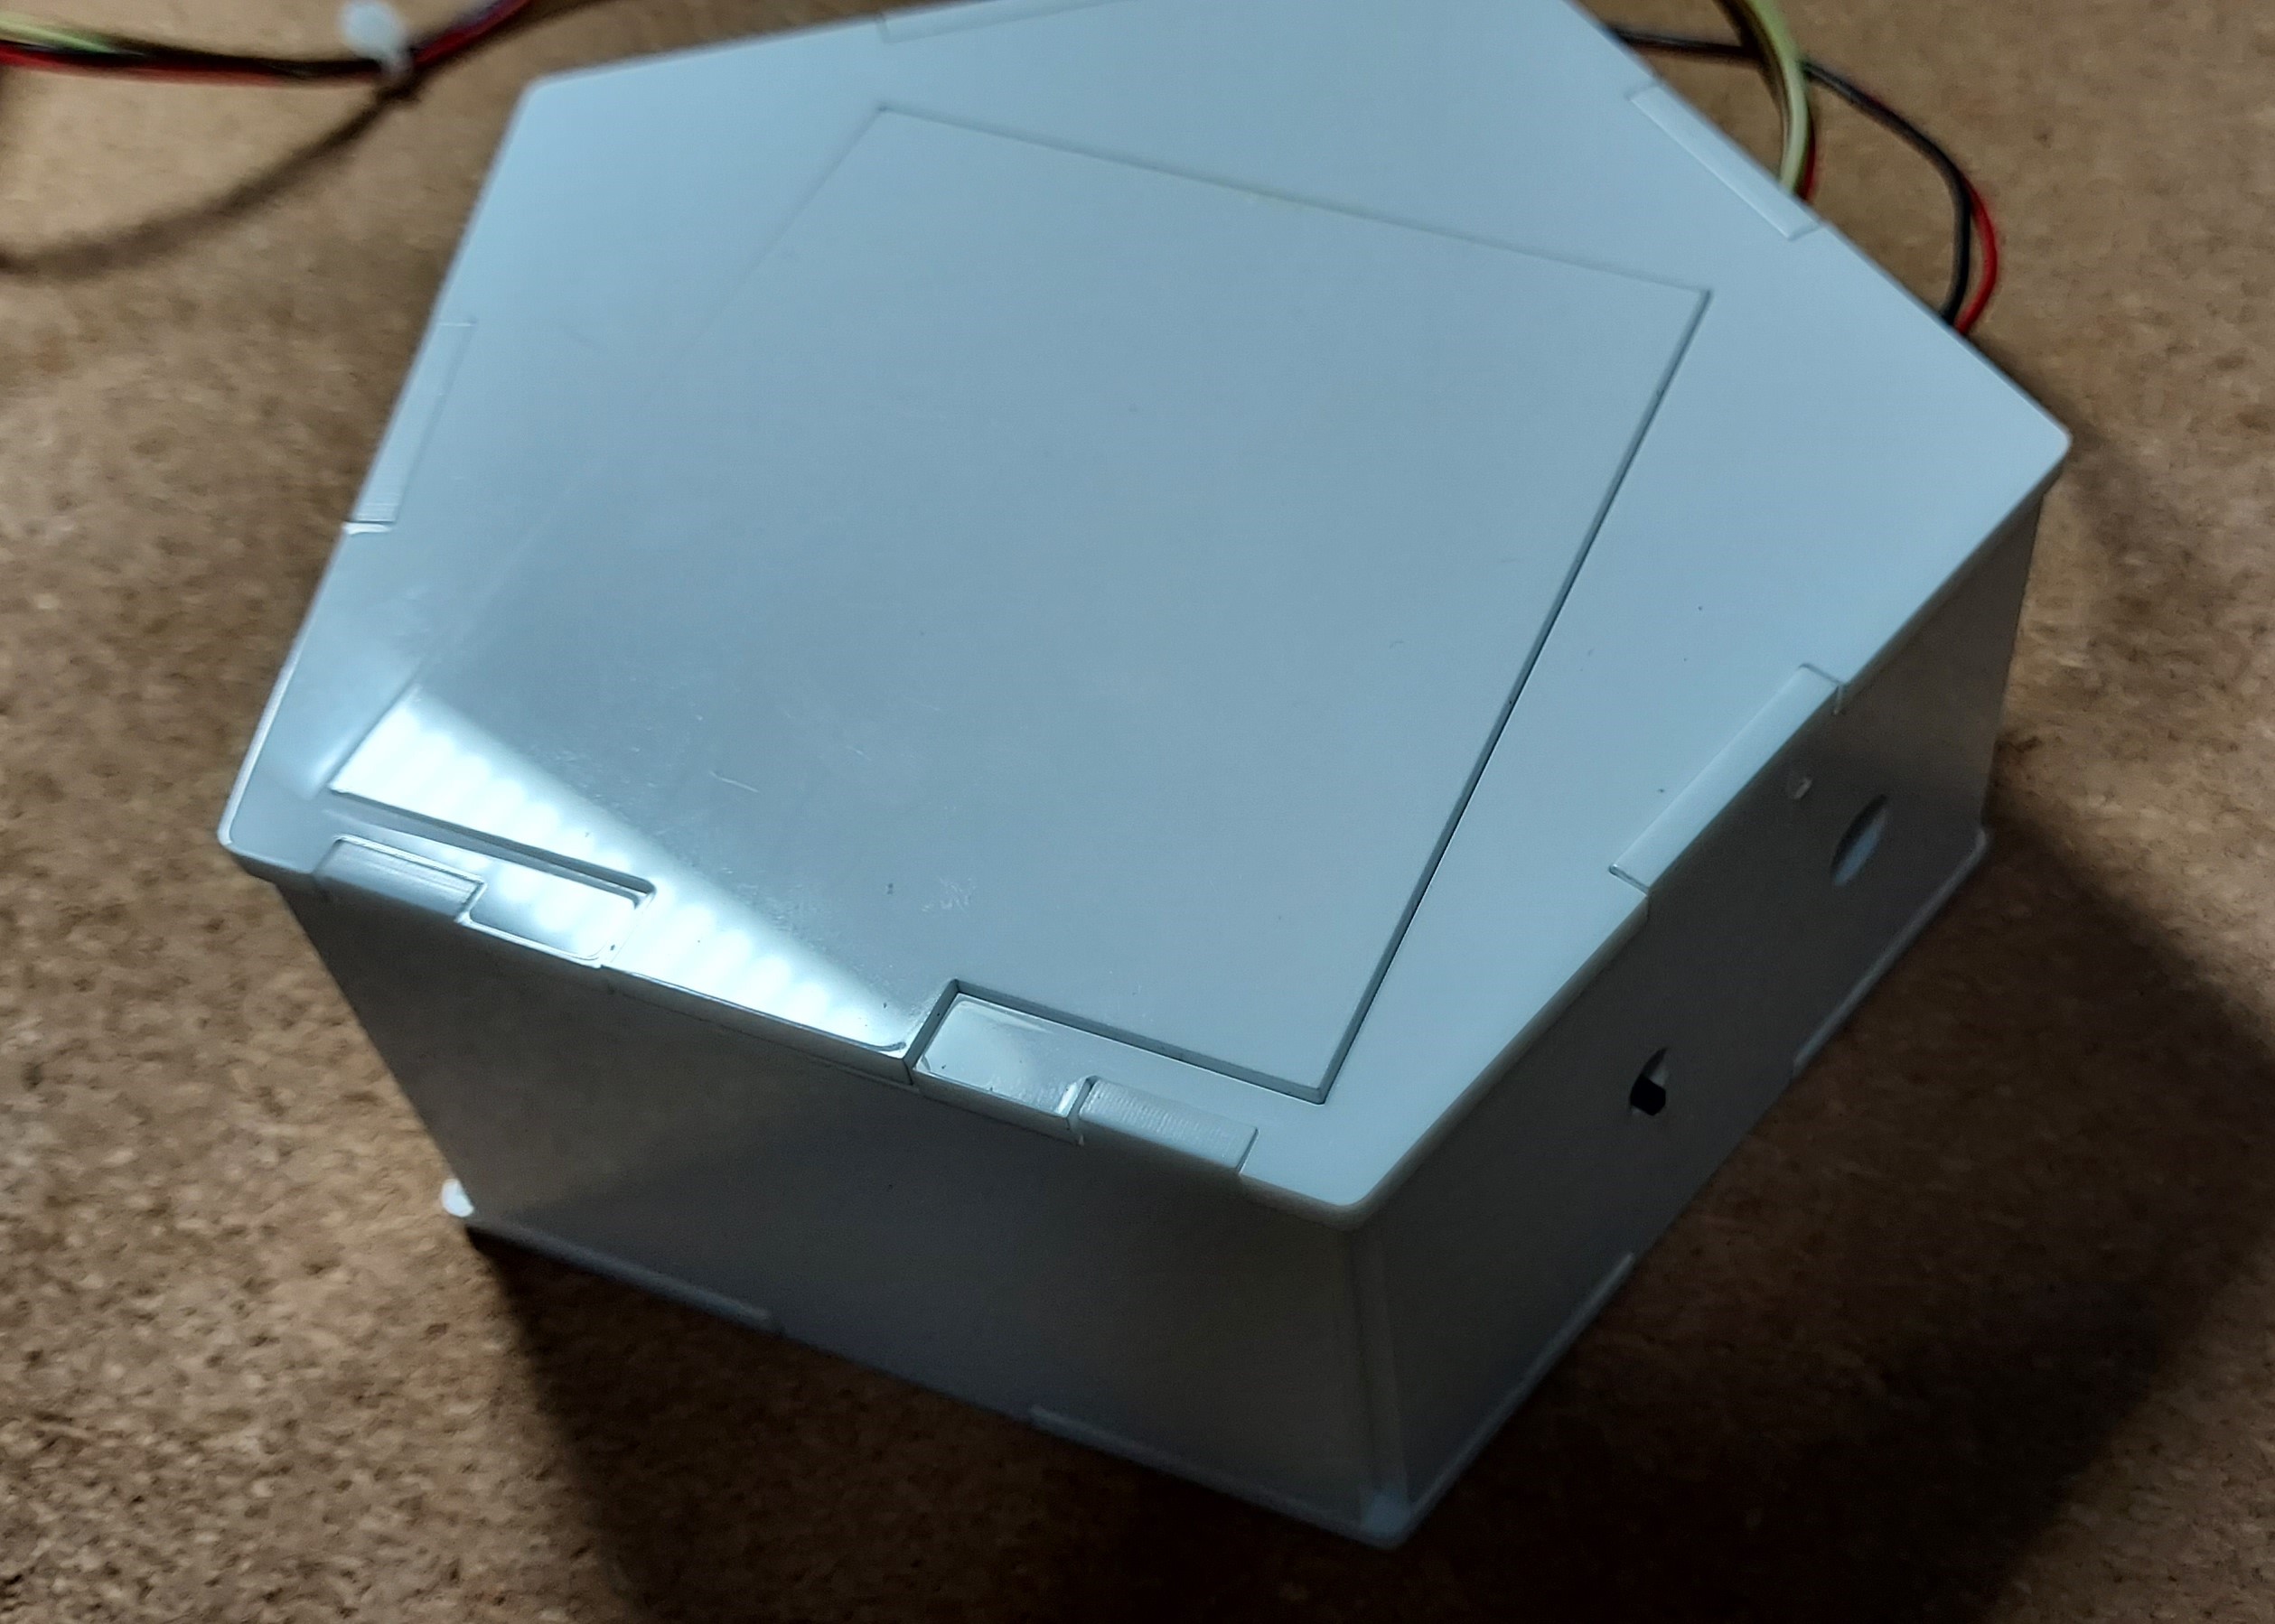
Finished Project
These are some pictures of my project.
How does my project work? Powering on: There is a slide switch at the side which turns the system off and on. The sensors: Capacitive Soil Moisture Sensor and DHT11 takes in the readings of the soil moisture, humidity and temperature. This reading is then sent to the nano which displays this code onto the LCD screen. Watering: When the moisture reading of the soil drops below 35% (this can be adjusted by re-coding) the water pump activates, pumping water into the tubing and onto the surface of the soil. The watering is repeated until soil moisture is above 35%. Any water source can be used for this system.
My setup is shown below. I used a milk carton for the water source and cut out a section such that the pump could fit in nicely.
List of Material Used
Material used
Estimated price
Arduino Nano
$8.05
DHT11
$1.55
Slide Switch
$0.80
Submersible Water Pump
$3.50
Capacitive Soil Moisture Sensor
$2.00
Clear Water Tube (6mm)
$2.00
I2C LCD
$3.00
2N2222
$0.50
3mm Acrylic Sheet
-
Review
What was successful? Generally the whole laser cutting and 3d printing process went relatively well. The laser cut and 3d printed parts had some parts which were smaller than electronics that were supposed to fit in so I just filed it down and it worked fine afterwards.
What needs more work? My initial plan was to have one more sensor which was the LDR which can be seen in some of my photos. I had even glued it onto my sensor housing. However when I was testing it, the LDR changed the voltage too much such that it affected my soil moisture sensor. In the end I had to remove it. This could have been fixed by using a variable resistor to control the voltage better.
Showcase
Here is a 1 minute video of how my self-watering plant system works.